Sütiket használunk, hogy segítsenek javítani weboldalunkat. Kérjük, olvassa el a Cookie szabályzat .

2025-03-27
Upon completion of this course you should be able to:
Course Prerequisites:
None
Students are expected to have a working knowledge of:
Microsoft Windows
1. Introduction to Windows Active Directory
2. Adding NAS to a Windows AD domain
2.1 Getting Information from the AD server
2.2 Connecting the NAS to the AD domain
2.3 Managing AD domain users and groups
Windows Active Directory (hereafter referred to as “AD”) is a directory service created by Microsoft for Windows domain networks. After successfully adding your NAS to your AD domain, you can then configure access rights using the Domain Users, Domain Groups and Shared Folders settings found in the Access Control system App. AD users can then use their own AD accounts to log in to and access the NAS. ASUSTOR NAS can support up to 500,000 AD domain records.
In order to connect your ASUSTOR NAS to your Windows AD domain you will need the following pieces of information from your AD server:
In the following example we will show you how to obtain these pieces of information from a Windows AD server and then use them to connect a NAS to a Windows AD domain.
Note: Your Domain DNS Server is the DNS sever that is used for your Active Directory. If you are unsure about what the IP address for your Domain DNS Server is, please contact your system administrator.
2.1 Getting Information from the AD server
STEP 1
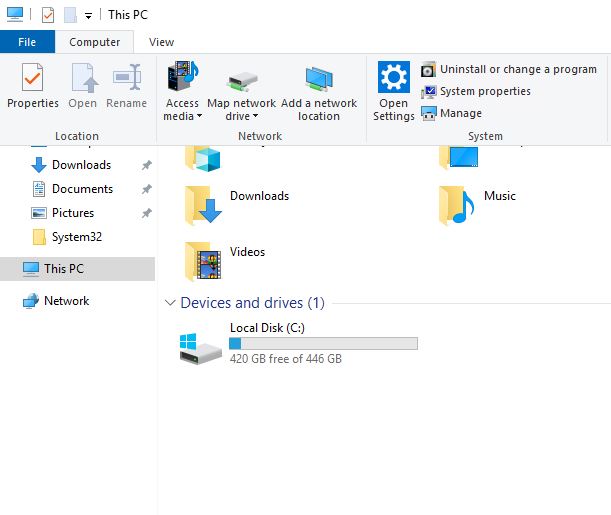
STEP 2
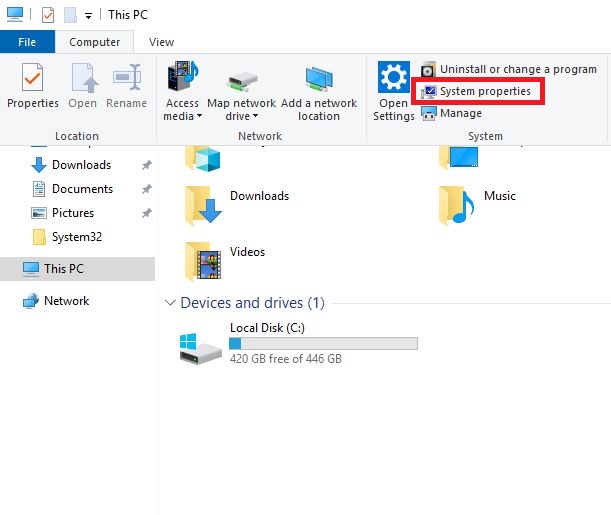
STEP 3
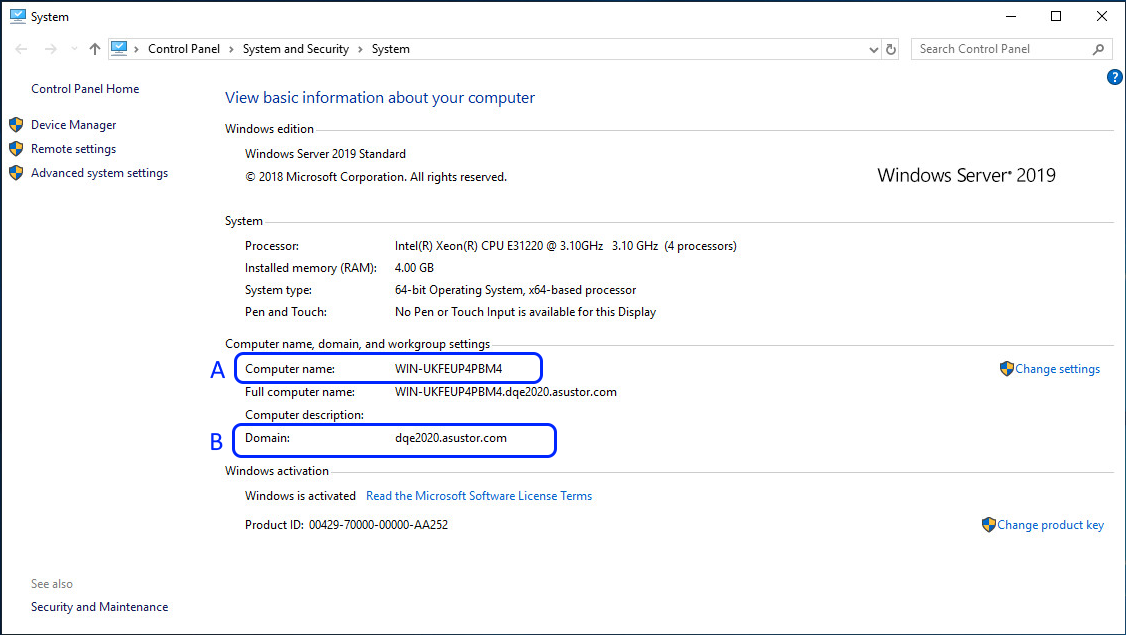
The system screen should now appear. You should be able to find your AD Server Name and Domain Name on this screen. Please see the graphic below:
STEP 4
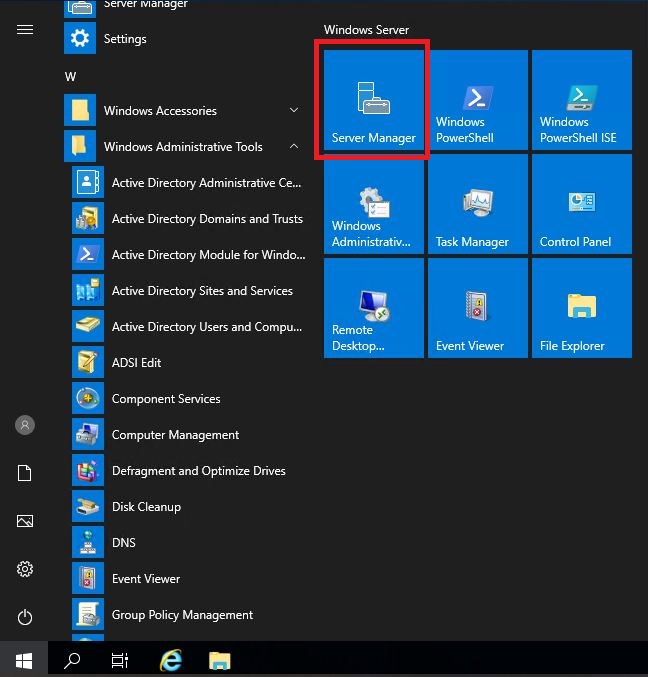
STEP 5
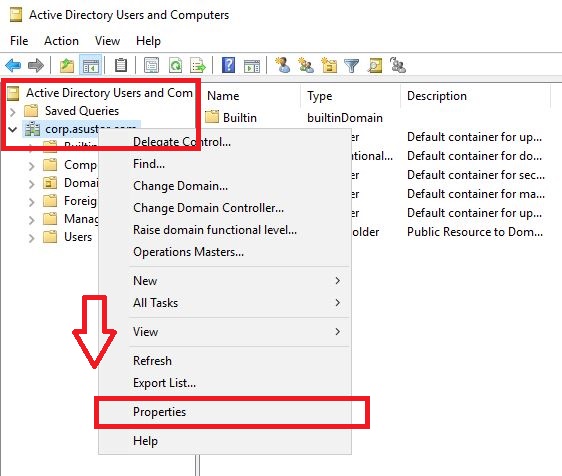
STEP 6
In the Properties dialog box you should be able to find your Domain NetBIOS Name. Please see the graphic below:
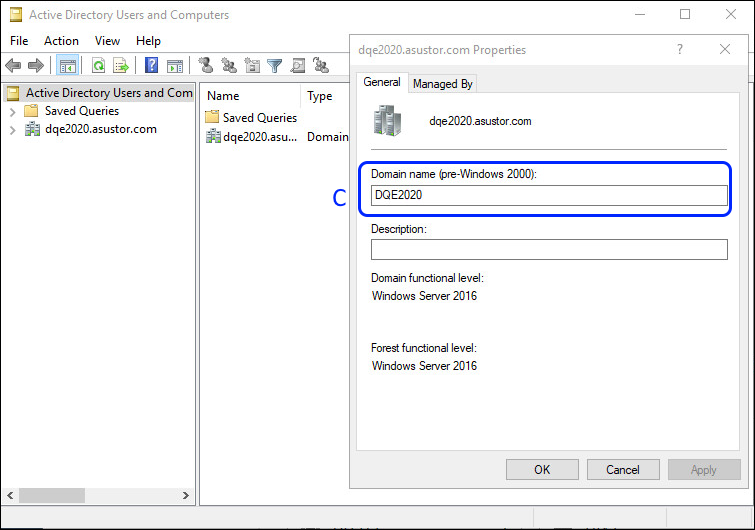
2.2 Connecting the NAS to the AD domain
STEP 1
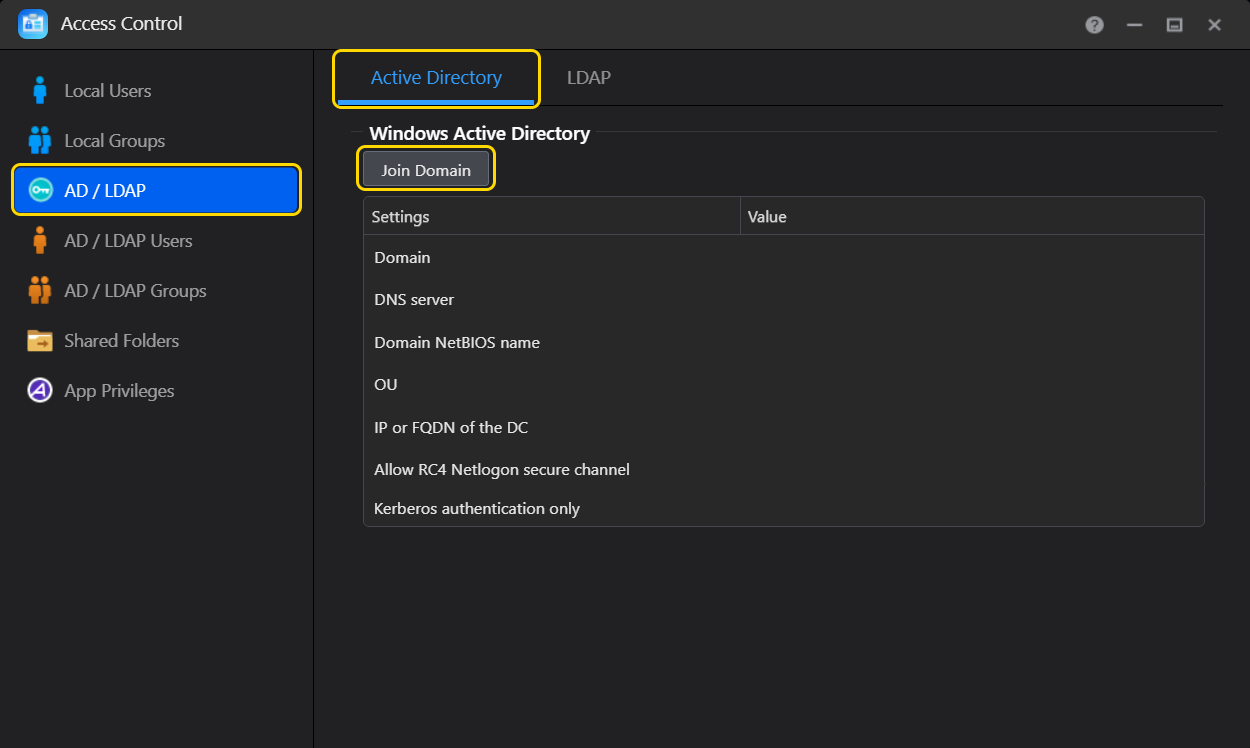
STEP 2
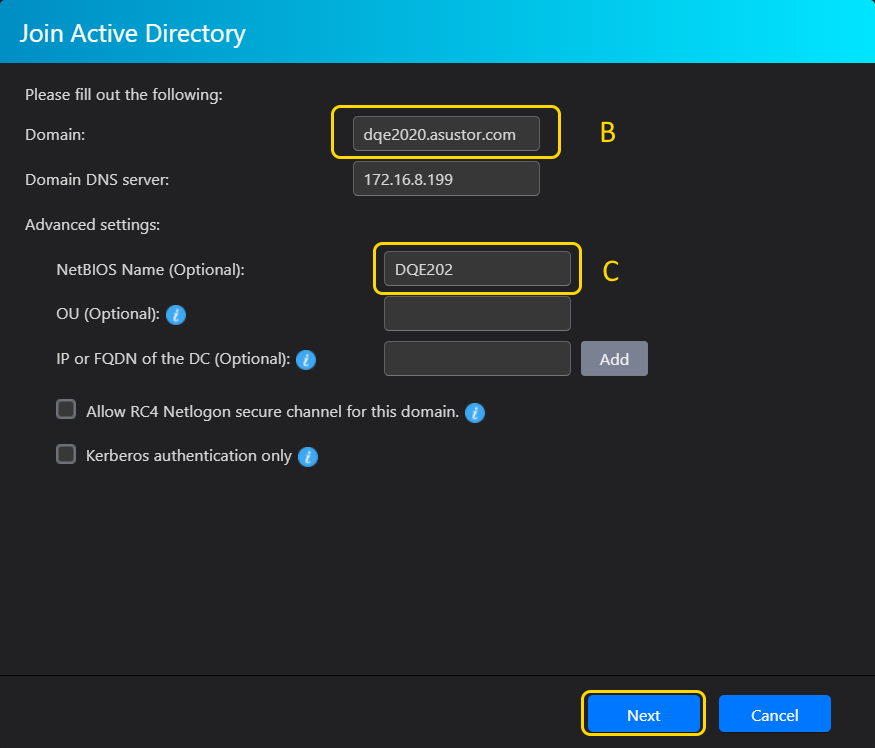
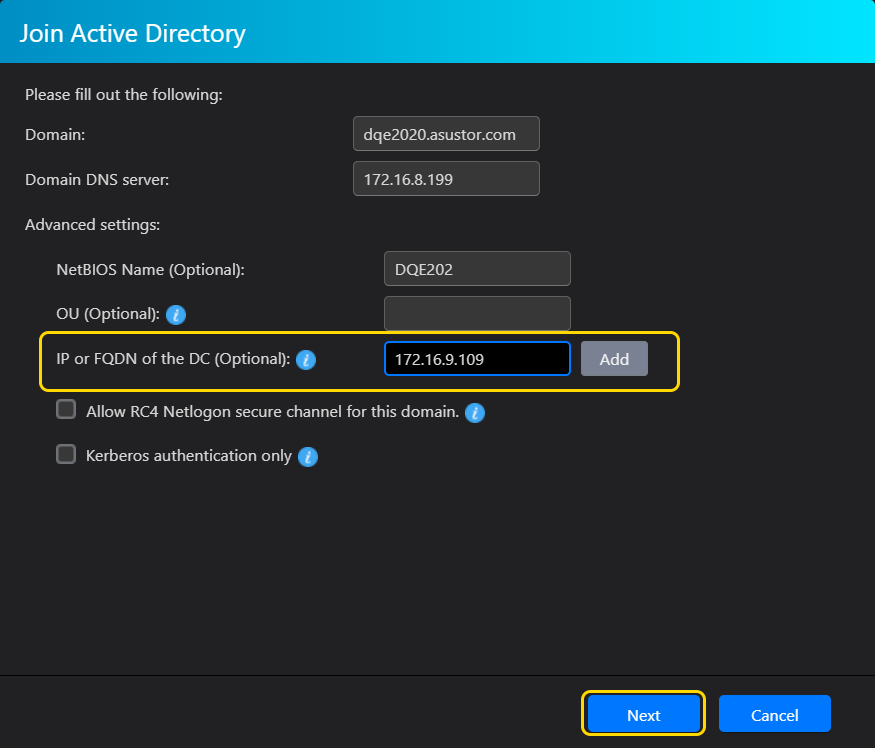
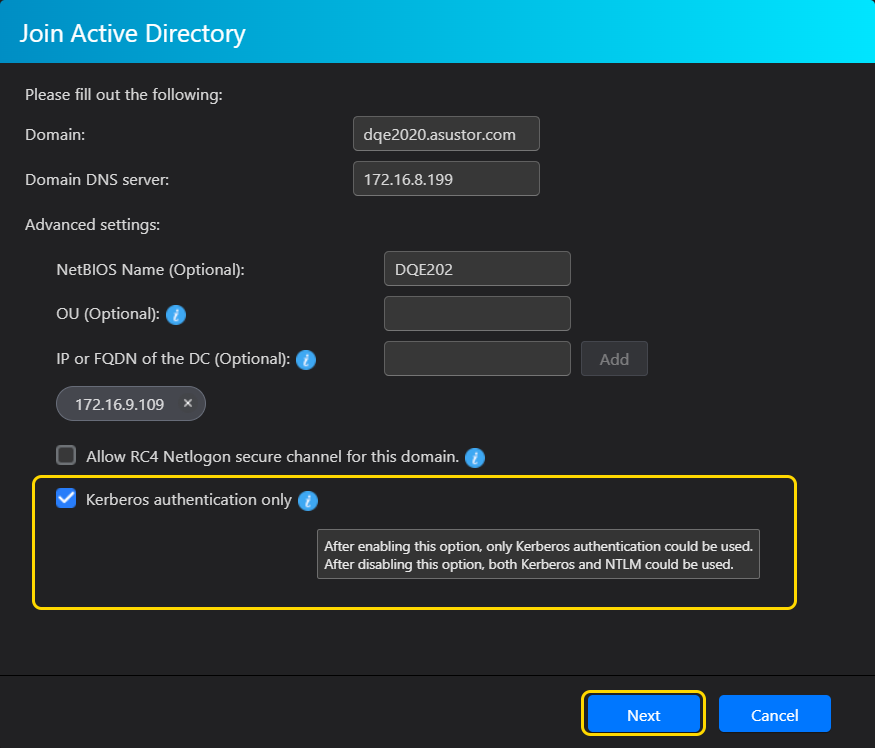
STEP 3
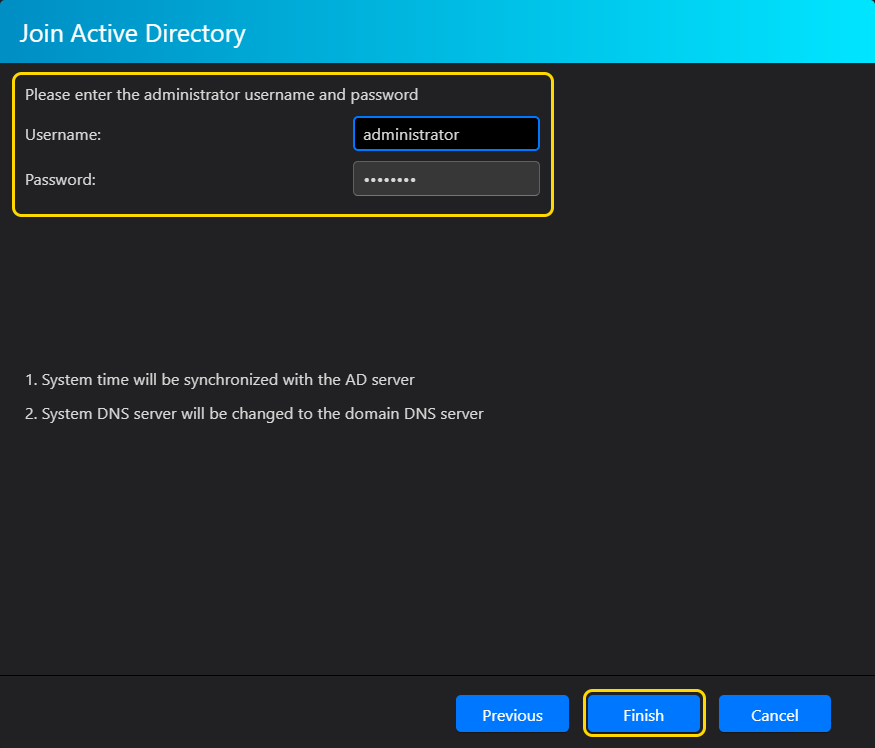
STEP 4
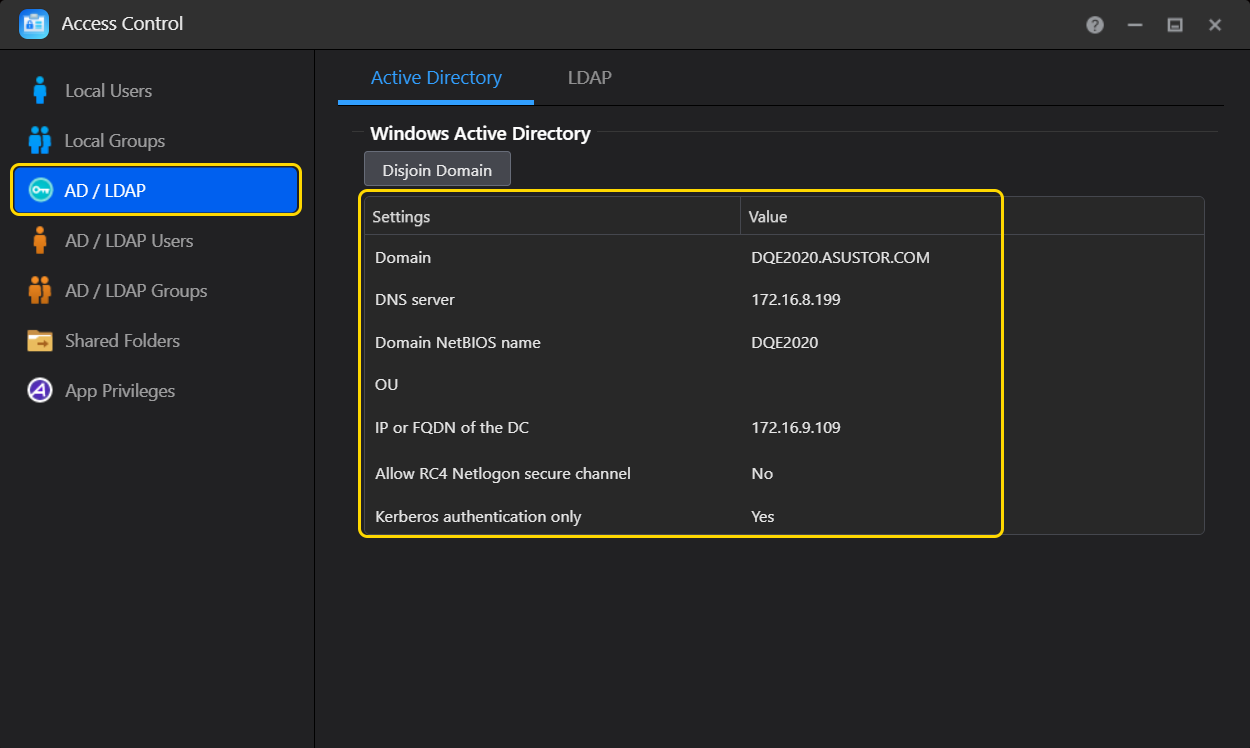
2.3 Managing AD domain users and groups
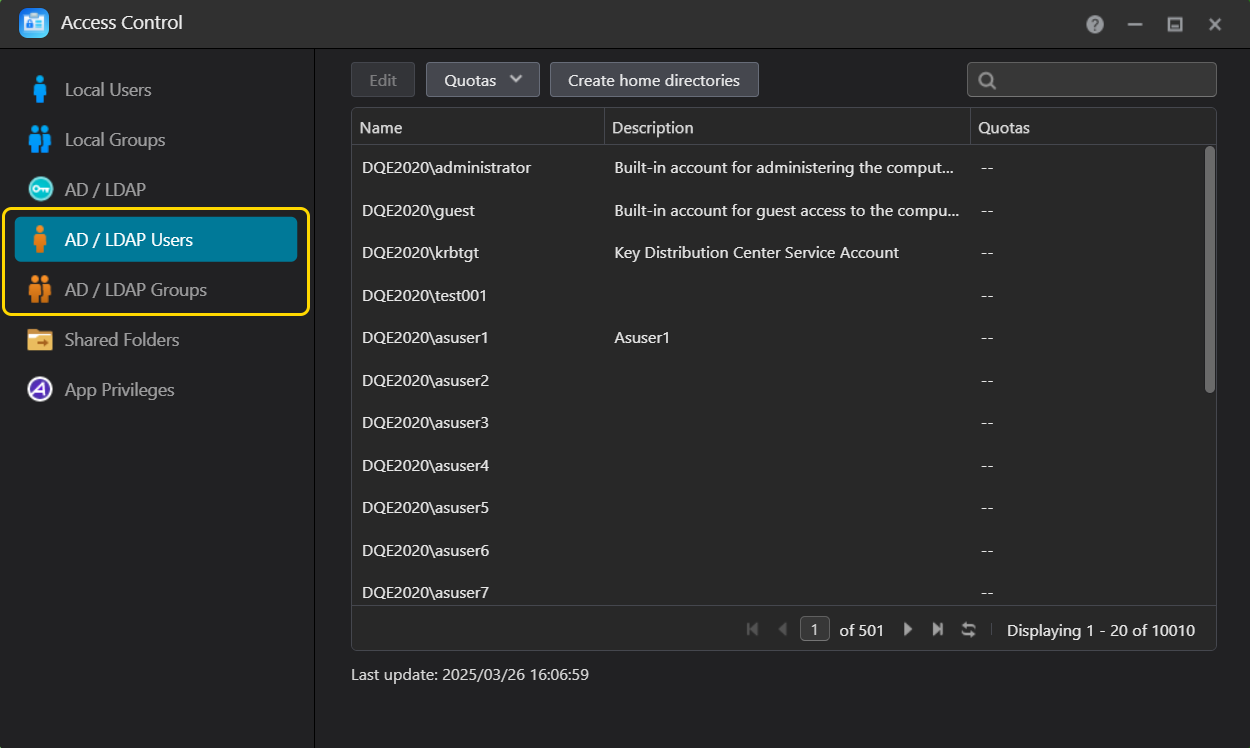
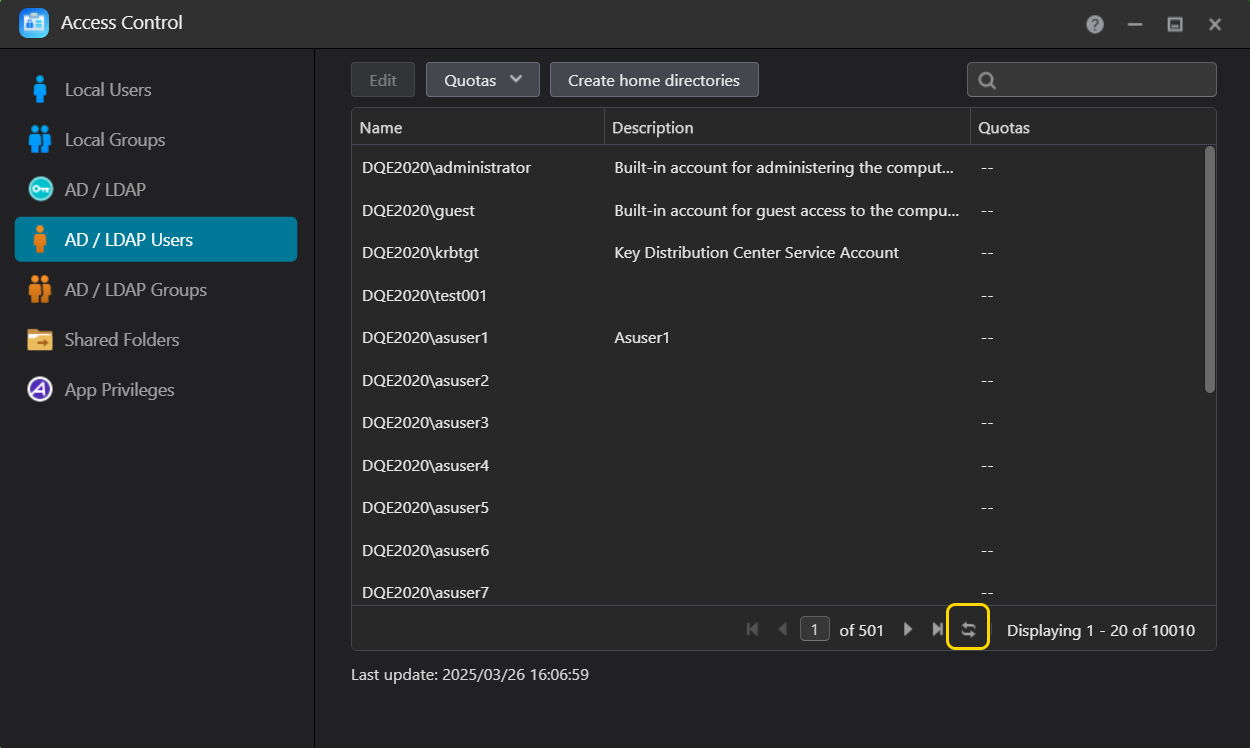
Once you have successfully added your NAS to the AD domain you will be able to manage the access rights for AD domain users and groups. You can do this by selecting [Access Control] [ Domain Users] or [Domain Groups].
Copyright © 2025 ASUSTOR Inc.