Surveillance Center is a powerful add-on App on ASUSTOR NAS devices. After installing the Surveillance Center from App Central, an ASUSTOR NAS can be instantly turned into a 24/7 non-stop high resolution security surveillance system. Furthermore, Surveillance Center is compatible with popular web browsers on Windows and mobile devices, allowing you to monitor and protect your most valued assets from anywhere and at any time. Surveillance Center provide 4 free IP Camera channels by default.
1.1 Install Surveillance Center
STEP 1
Using your Web browser on Windows, log in to ADM using an administrator account.
Select [App Central] [ASUSTOR Apps].
Click on [Surveillance Center] and press [Install].
STEP 2
Locate the [Surveillance Center] icon in the ADM desktop and click on it to open Surveillance Center.
STEP 3
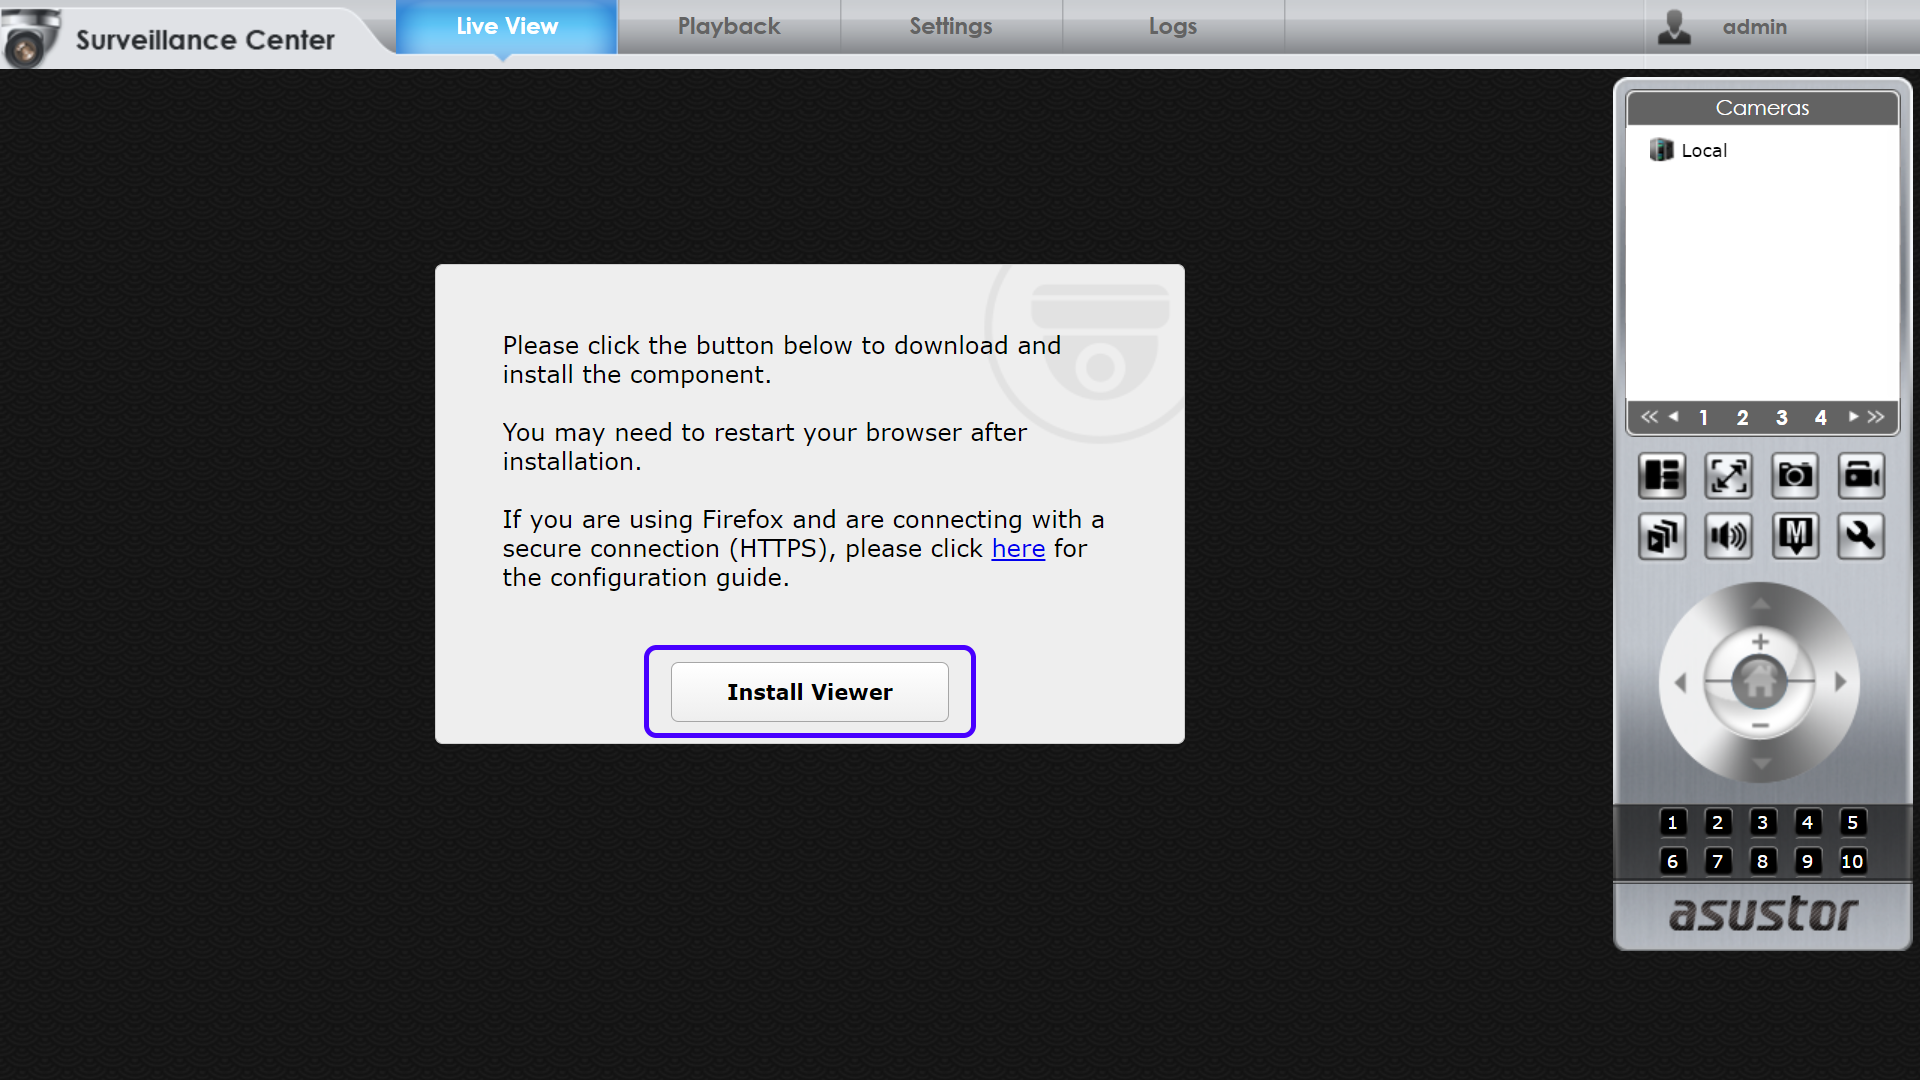
Please click the button below to download and install the component. (ASUSTOR Surveillance Center Viewer)
ASUSTOR Surveillance Center Viewer only supports Windows and TLS 1.1. If you need to connect to the NAS via HTTPS, please be sure that the minimum security protocol allowed on the ADM is set to TLS 1.1.
STEP 4
After the component is installed, locate the [Surveillance Center] icon in the ADM desktop and click on it to open Surveillance Center.
1.2 Surveillance Center Quick Start Wizard
STEP 1
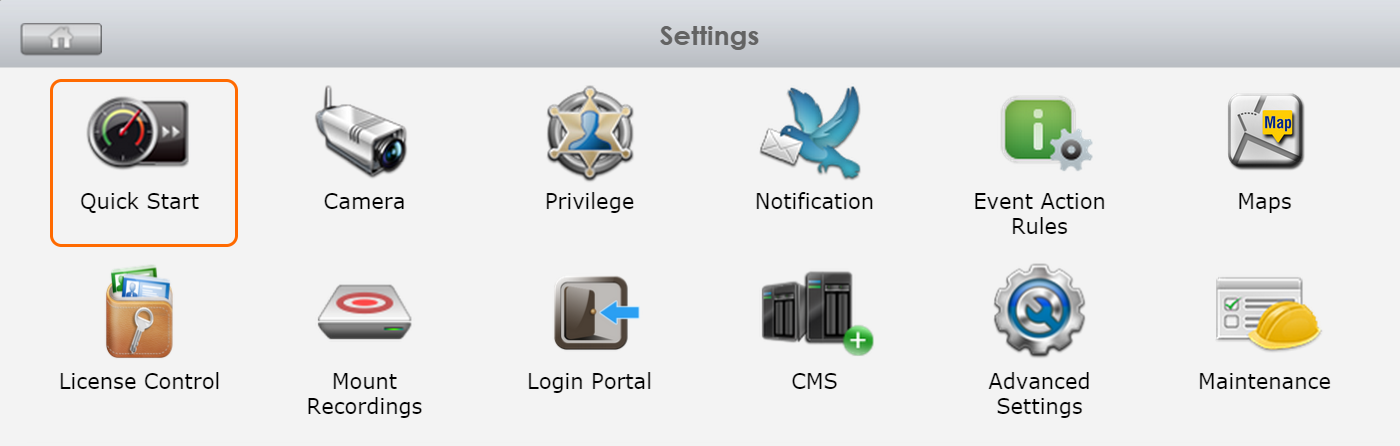
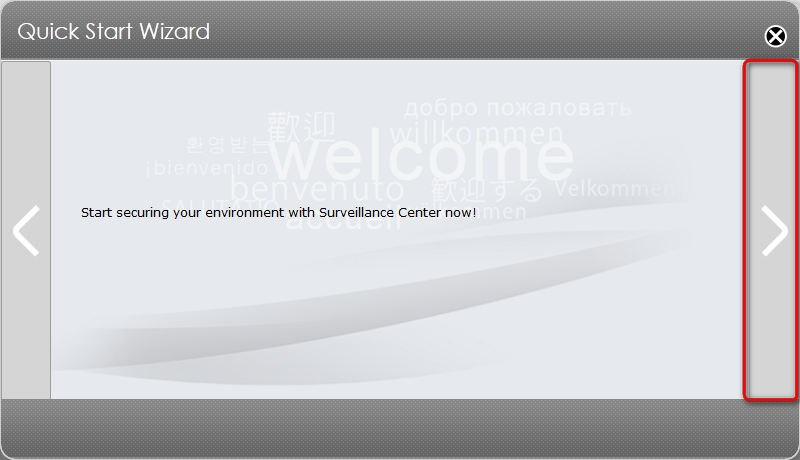
Select [Settings] [Quick Start]. The Quick Start Wizard should now appear.
STEP 2
Click the arrow on the right hand side of the window to continue. The Quick Start Wizard will then scan your local area network for cameras.
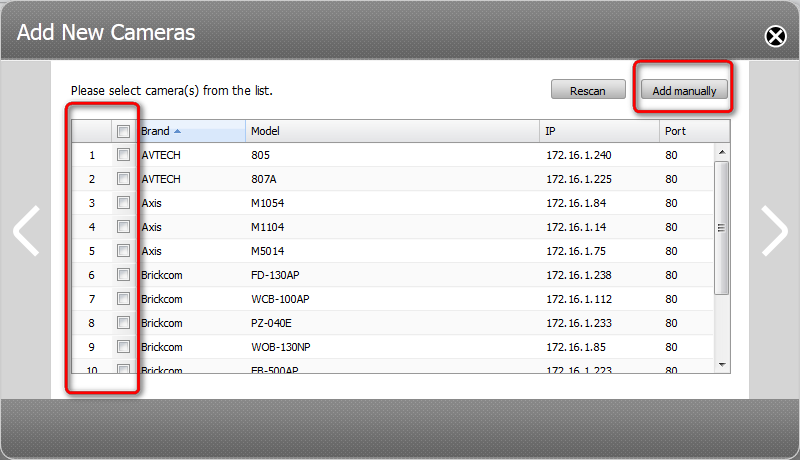
STEP 3
Select the cameras from the list that you want to manage with Surveillance Center.
STEP 4
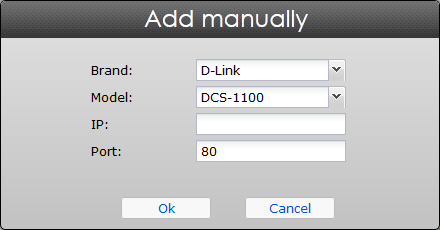
If you find that your camera has not been listed, please click on the [Add manually] button to add your camera.
If your camera is not in the compatibility list of cameras supported by Surveillance Center, you can refer to the following links and try to connect to an IP camera with ONVIF or RTSP.
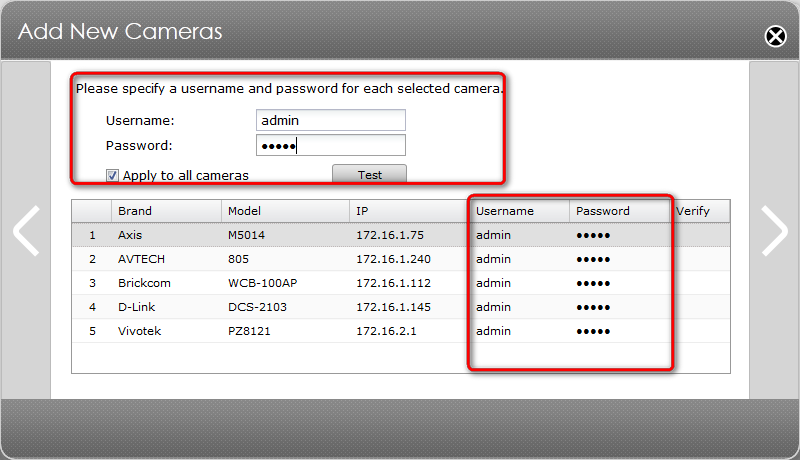
Next, specify a username and password for each selected camera. You can also use one username and password for all cameras if you wish.
STEP 6
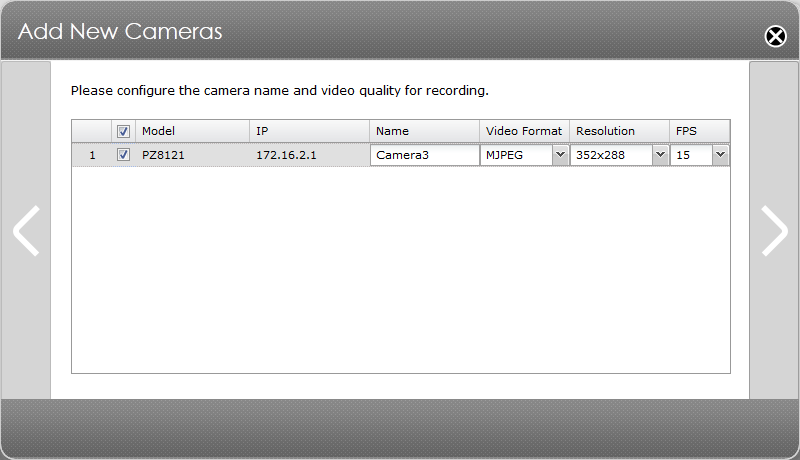
At the next screen you will be able to configure the name, video format, resolution and frame rate for all your cameras.
STEP 7
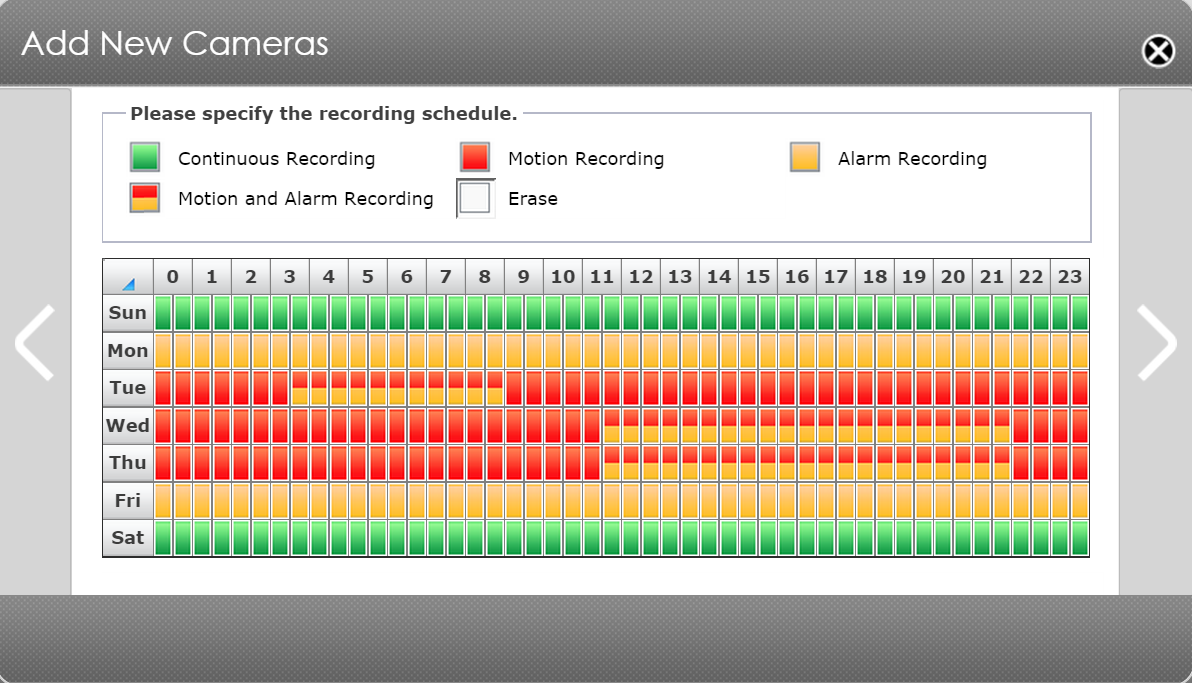
Configure the recording mode and schedule.
Note: Cameras that do not support motion detection or alarm trigger functions will not be able to activate Motion or Alarm recording. Please consider setting to continuous recording mode.
STEP 8
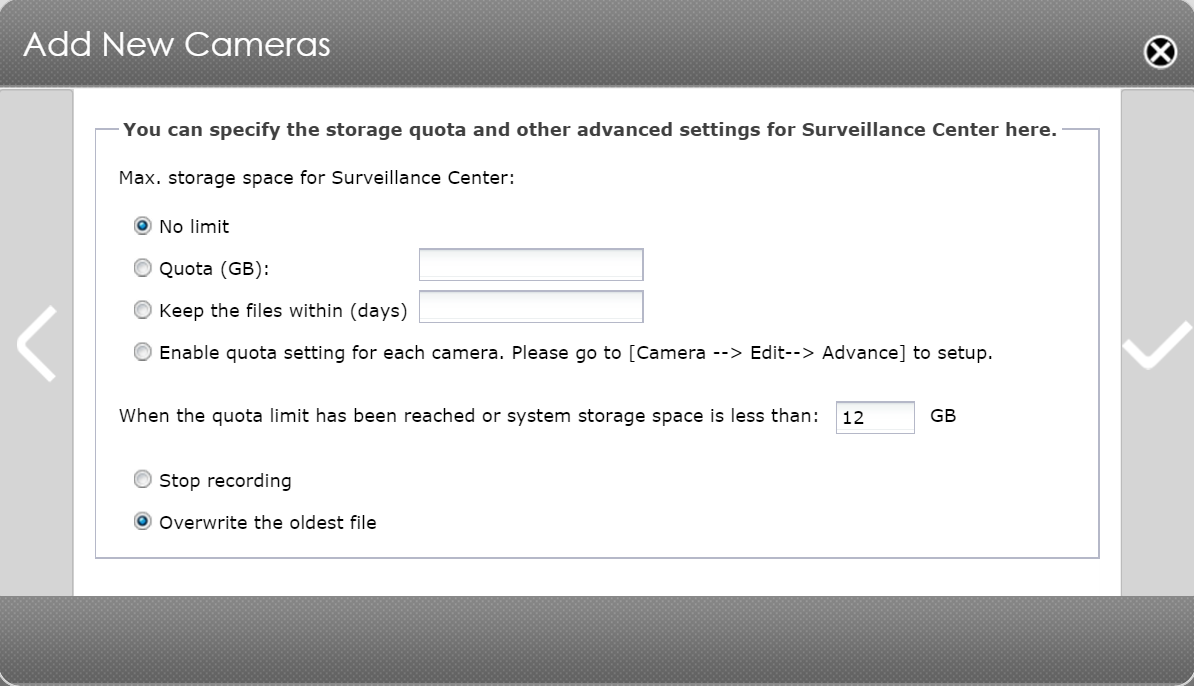
Configure Surveillance Center's storage space settings for recordings. Configuration should now be complete. You are now ready to start using Surveillance Center.
2. Using Surveillance Center
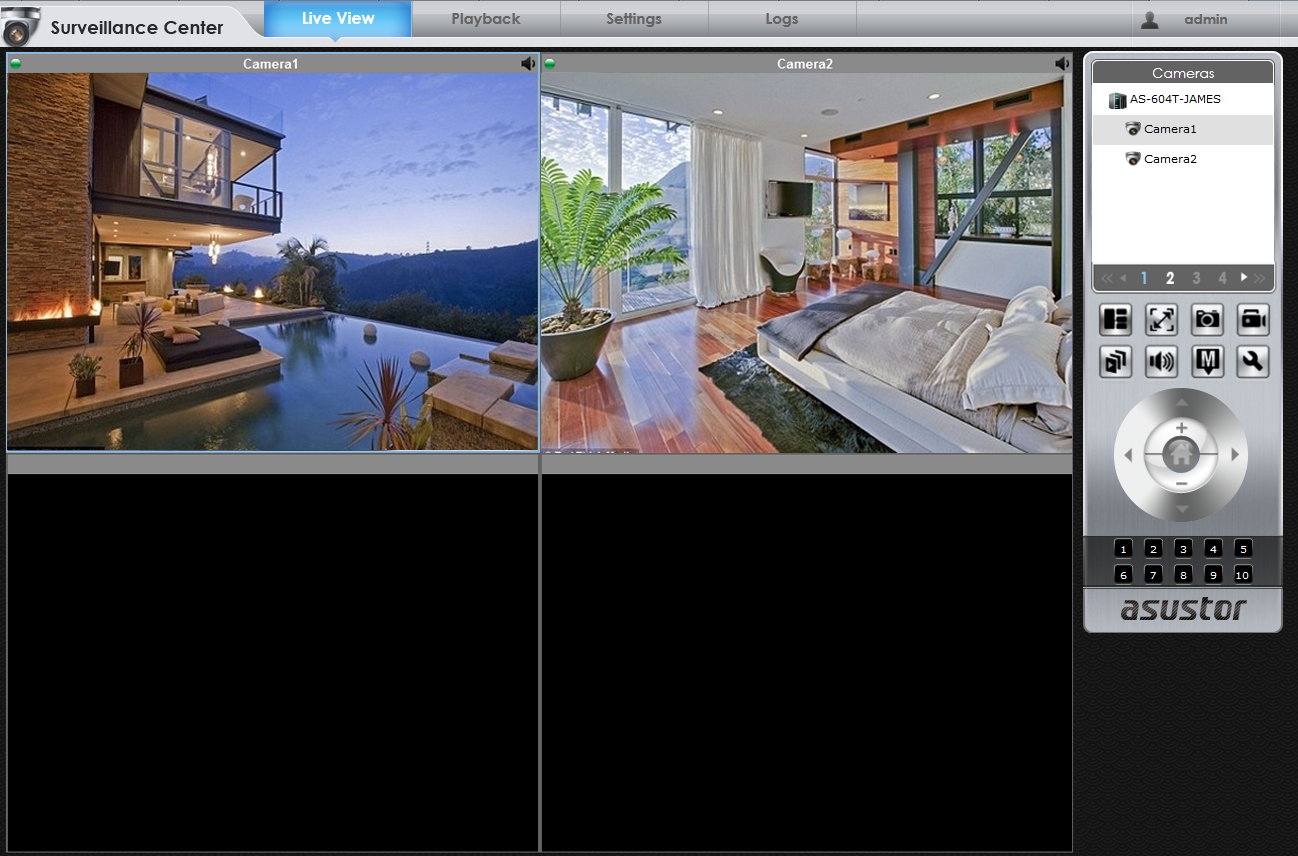
2.1 Live View
Log in to ADM using an administrator account.
Double-click on the Surveillance Center icon and then click on the [Live View].
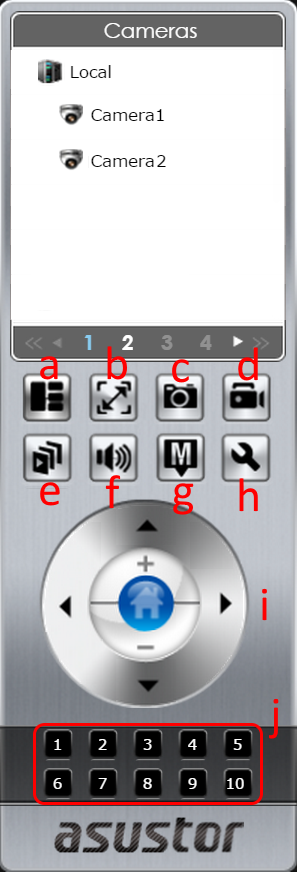
Introduction to Functions:
a. Change screen layout
b. Full screen
c. Take a snapshot of focus channel
d. Enable/disable manual record
e. Sequenced view
f. Mute/Unmute
g. Maps
h. Settings
i. PTZ controls
j. PTZ preset point control
Note: Cameras that do not support PTZ cannot be controlled by PTZ. The PTZ preset point needs to be set in the settings page provided by the camera.
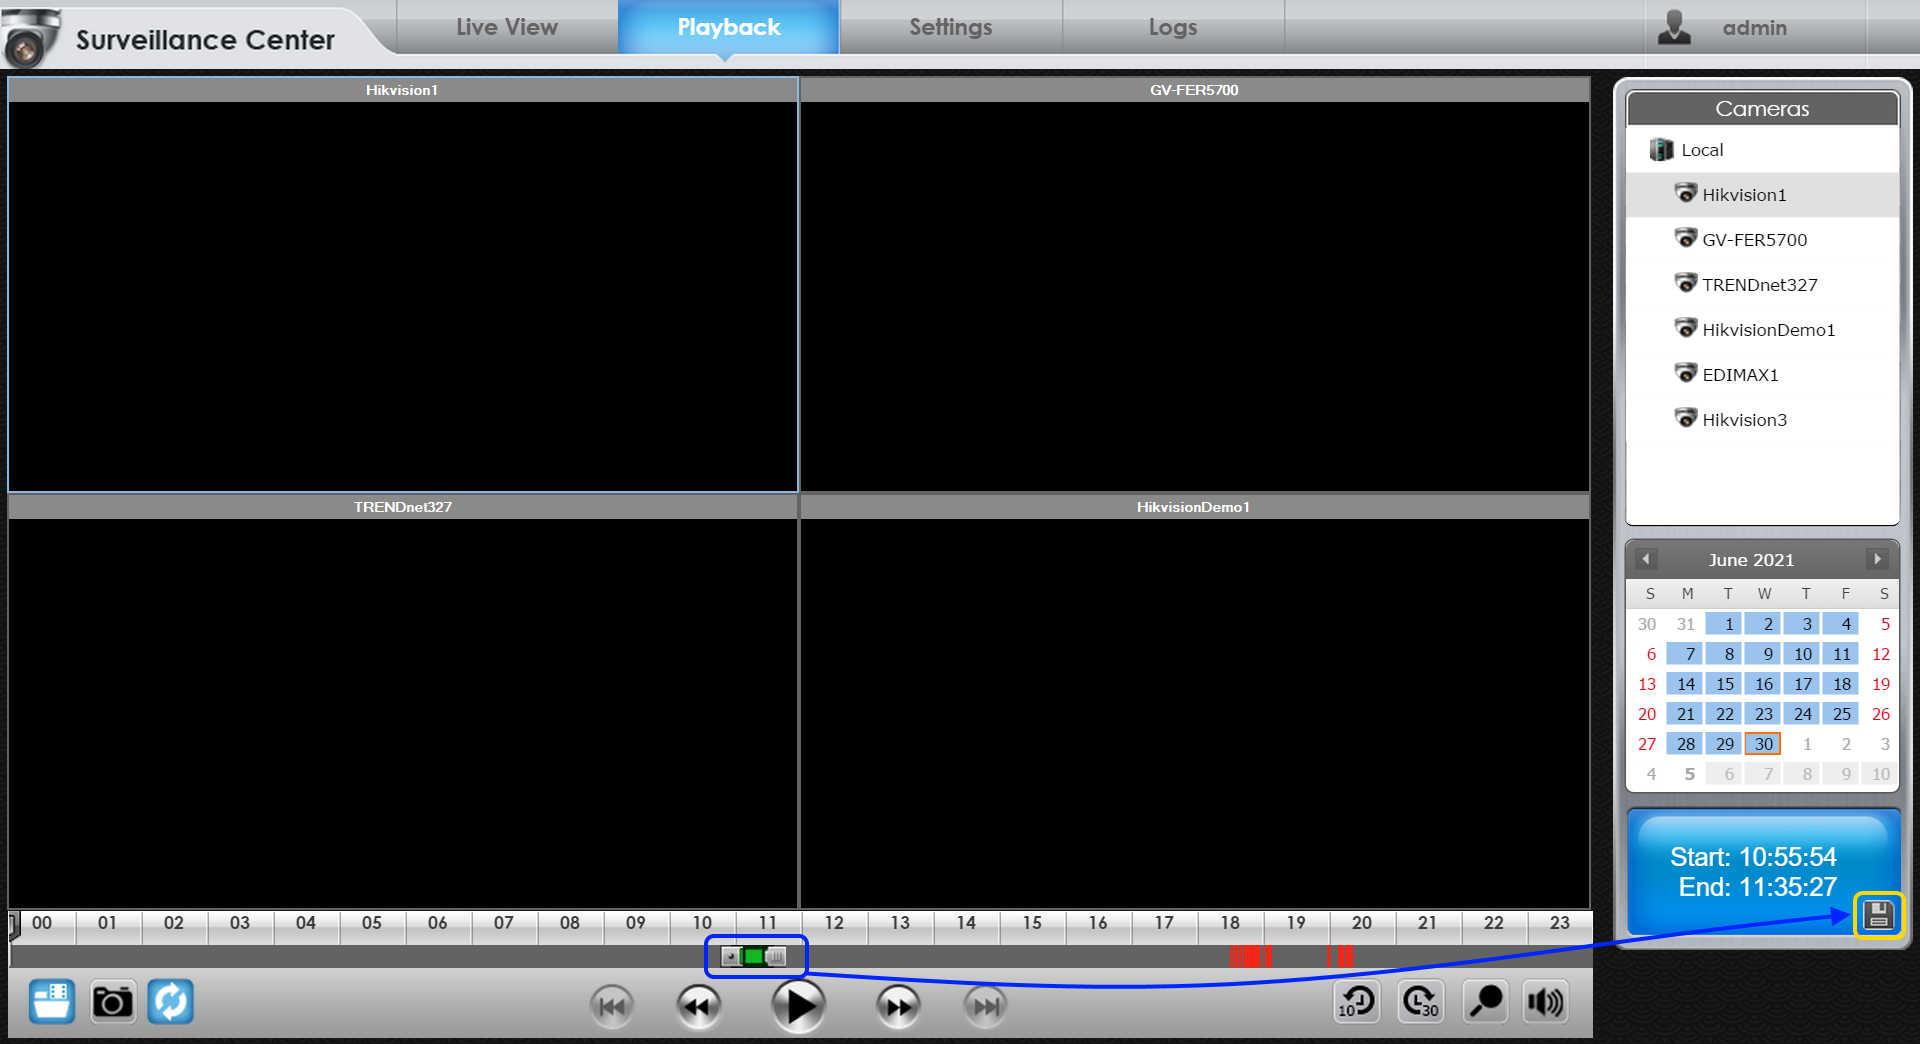
2.2 Playback
Click on the [Playback].
Select the date for the recordings that you wish to access.
You can drag the slider along the time axis to specify the time that you want recordings played from. If you require finer control you can also click on the time axis to get an enlarged view for the specific time period.
Introduction to Functions:
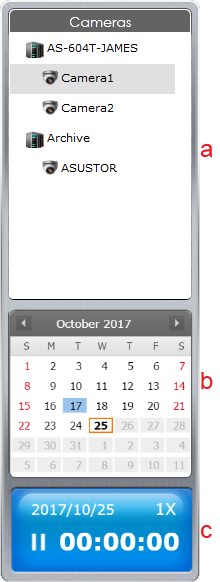
a. Archived recording files
b. Recording calendar: Dates with recordings will appear in black.
c. Status indicator: Will display the date, time and status of files being played.
d. Export video: Specify the channel and time for videos that you wish to export.
e. Take a snapshot of focus channel.
f. Allows all channels to playback simultaneously.
g. Skip 10 sec backward
h. Skip 30 sec forward
i. Smart Search
2.3 Export video
STEP 1
Click on the [Playback].
Select the date for the recordings that you wish to access.
Click on .
STEP 2
Drag to select the start and end time of the exporting video.
Click on .
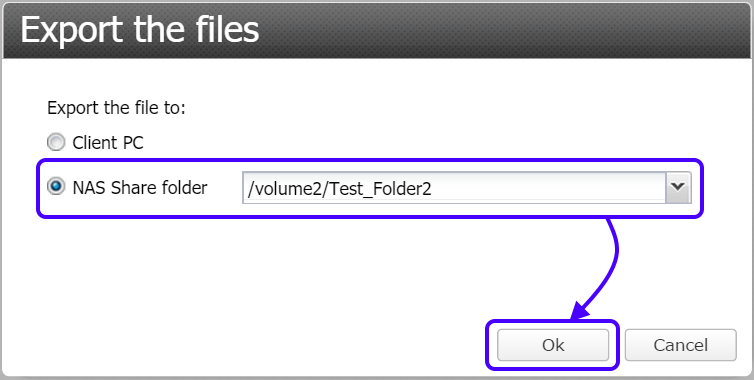
STEP 3
Select the destination to save the exported video, click on [OK].
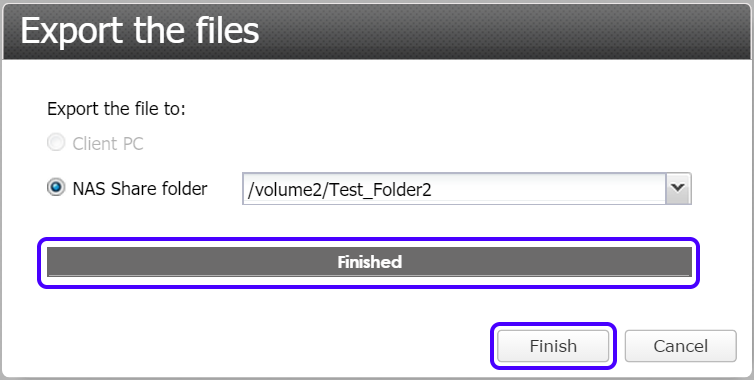
STEP 4
Click on [Finish] after the video exporting is completed.
The exported video will be saved as a zip file in the selected destination.