Käytämme evästeitä verkkosivustomme parantamiseksi. Lue Evästekäytäntömme.

2023-07-21
COURSE OBJECTIVES
Upon completion of this course you should be able to:
1. Use AiVideos to watch videos from an ASUSTOR NAS
2. Use AiVideos to stream and watch digital TV
3. Remotely control video conversions
PREREQUISITES
Course Prerequisites:
NAS 138 Introduction to LooksGood
Students are expected to have a working knowledge of:
Smartphones or tablets
OUTLINE
Please ensure the following before using AiVideo:
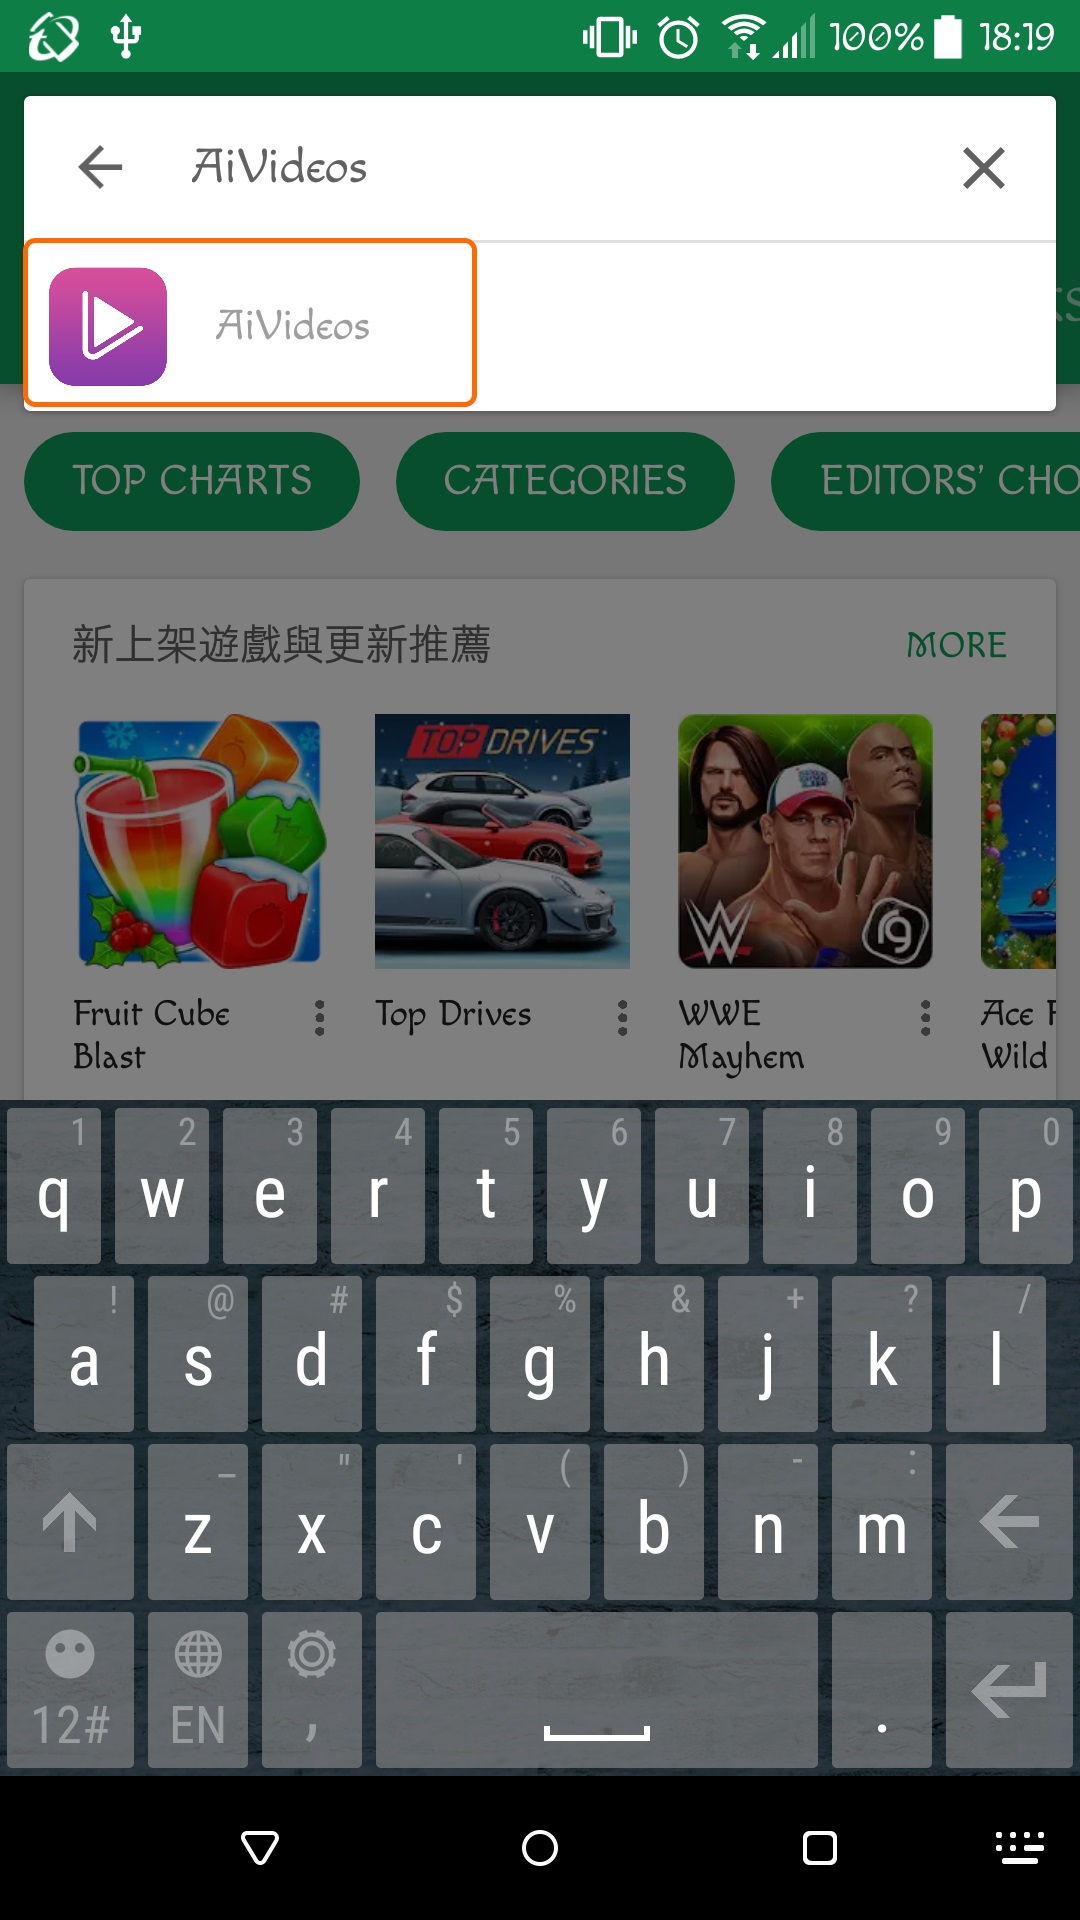
2.1 Install AiVideos from Google Play
STEP 1
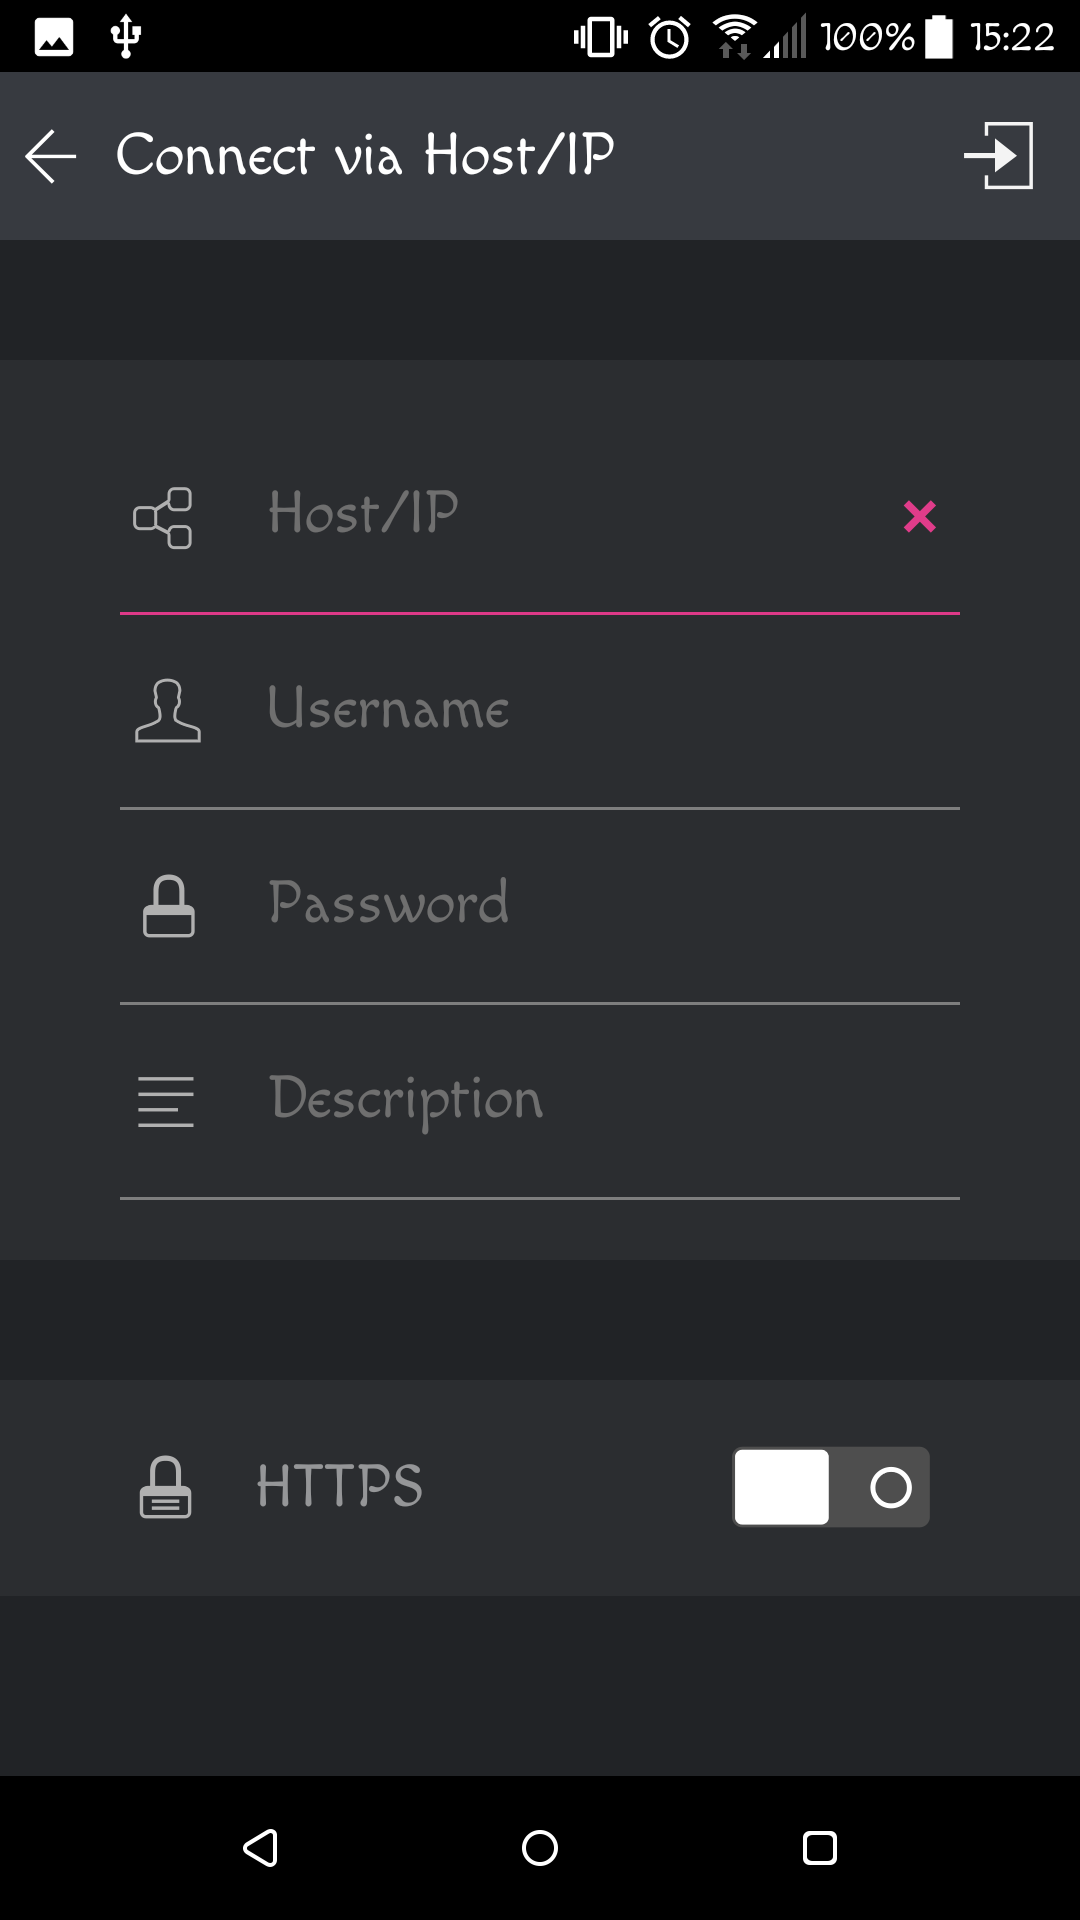
2.2 Connecting to your NAS with AiVideos
STEP 1

STEP 2
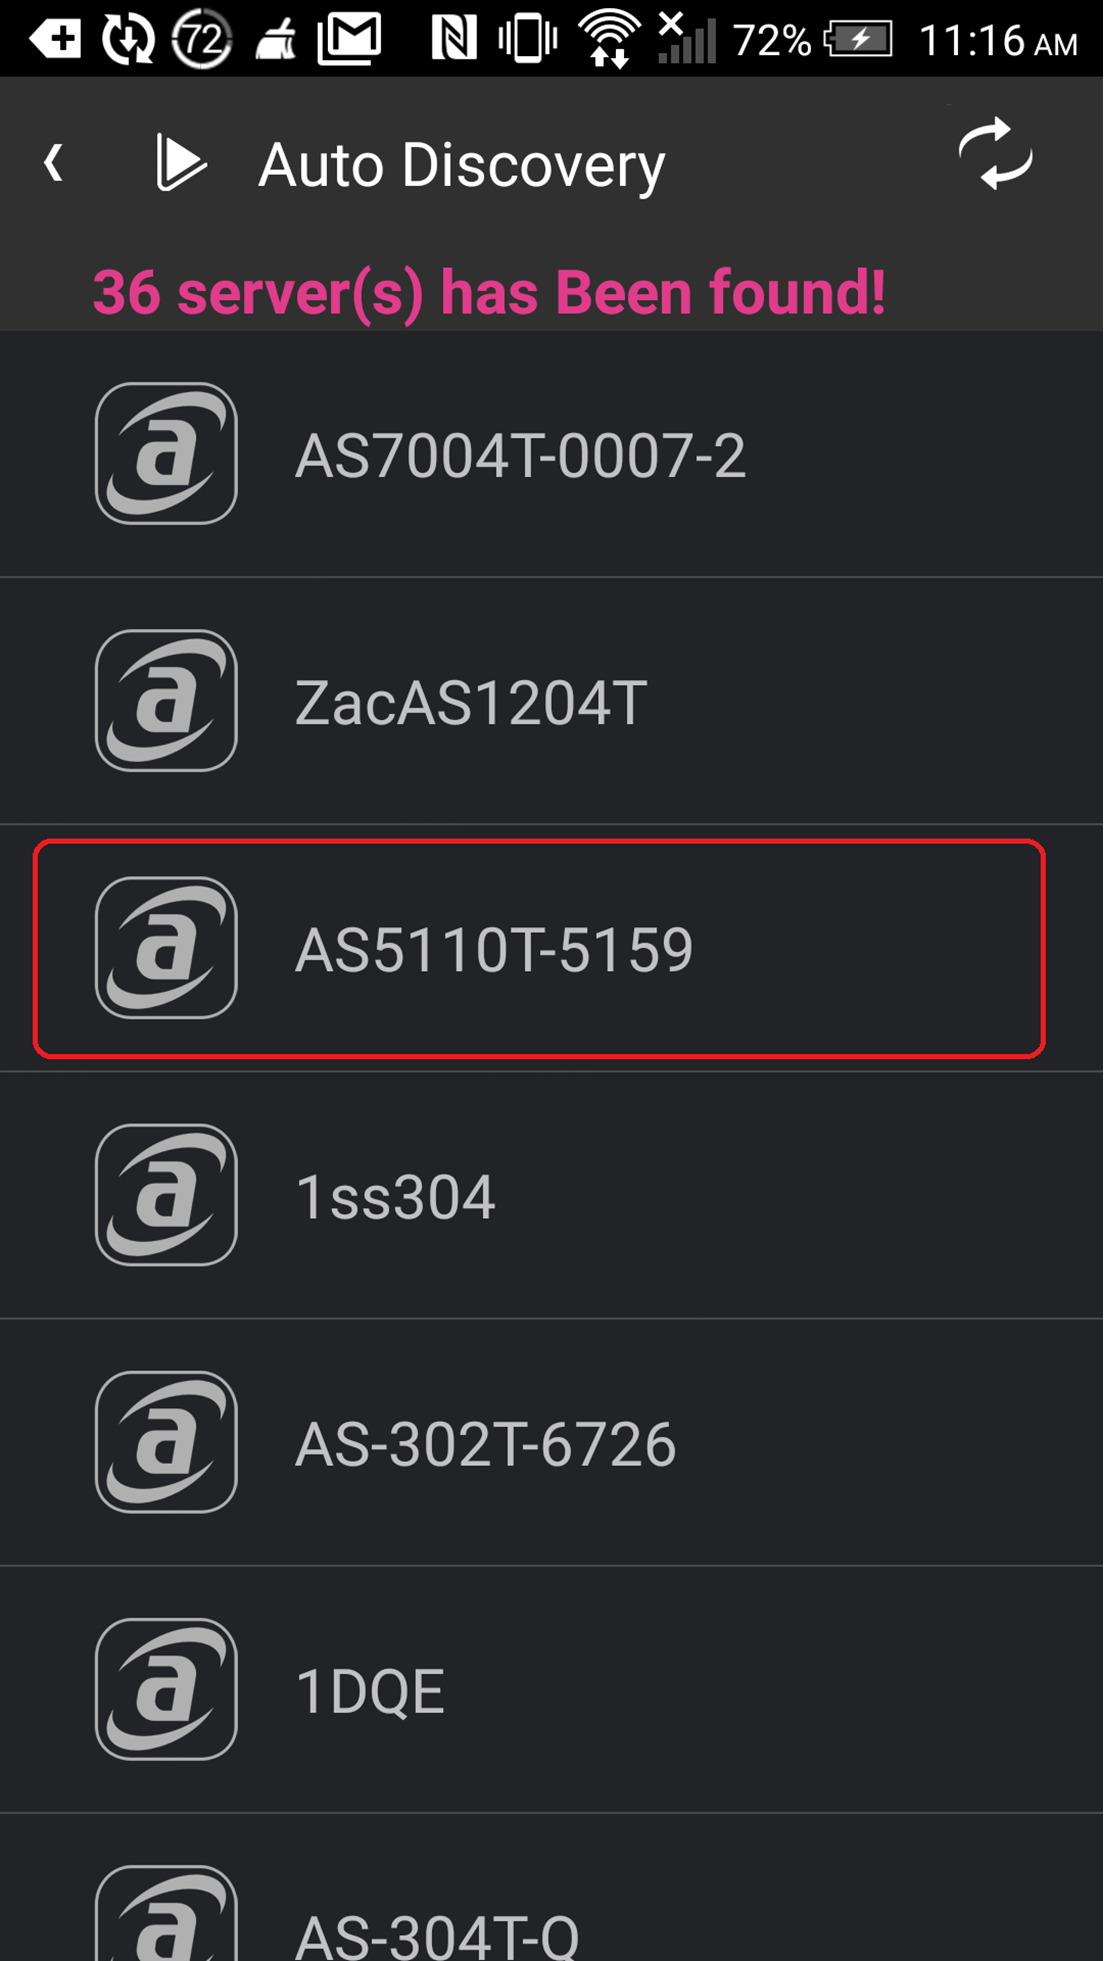
STEP 3
Features three main built-in video library categories: Movies, TV Shows and Home Videos. Smart Video Management also provides a large poster index mode, so you can easily manage and find videos quickly.
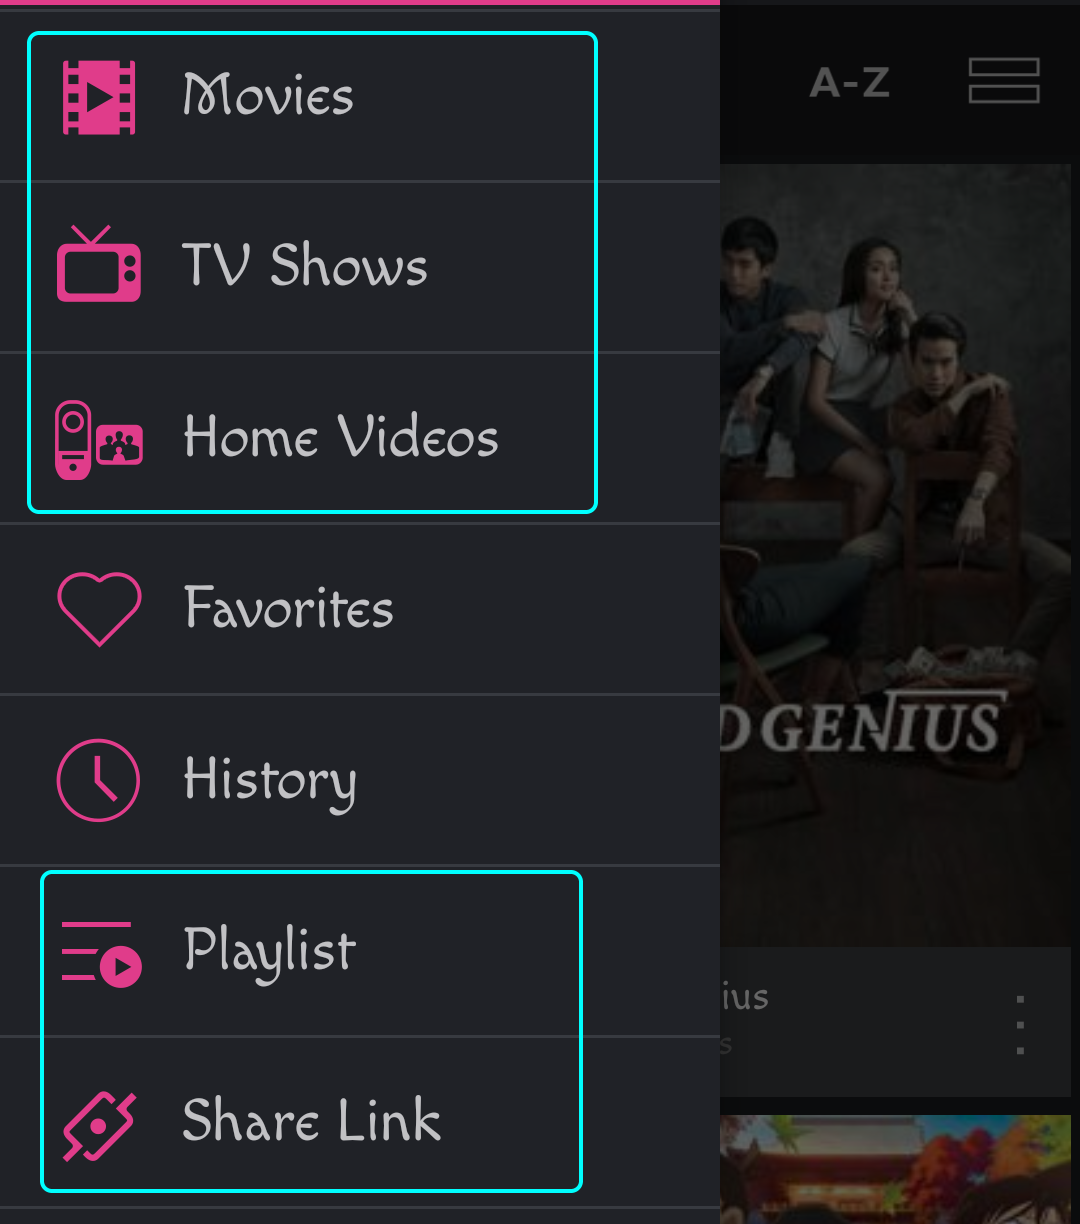
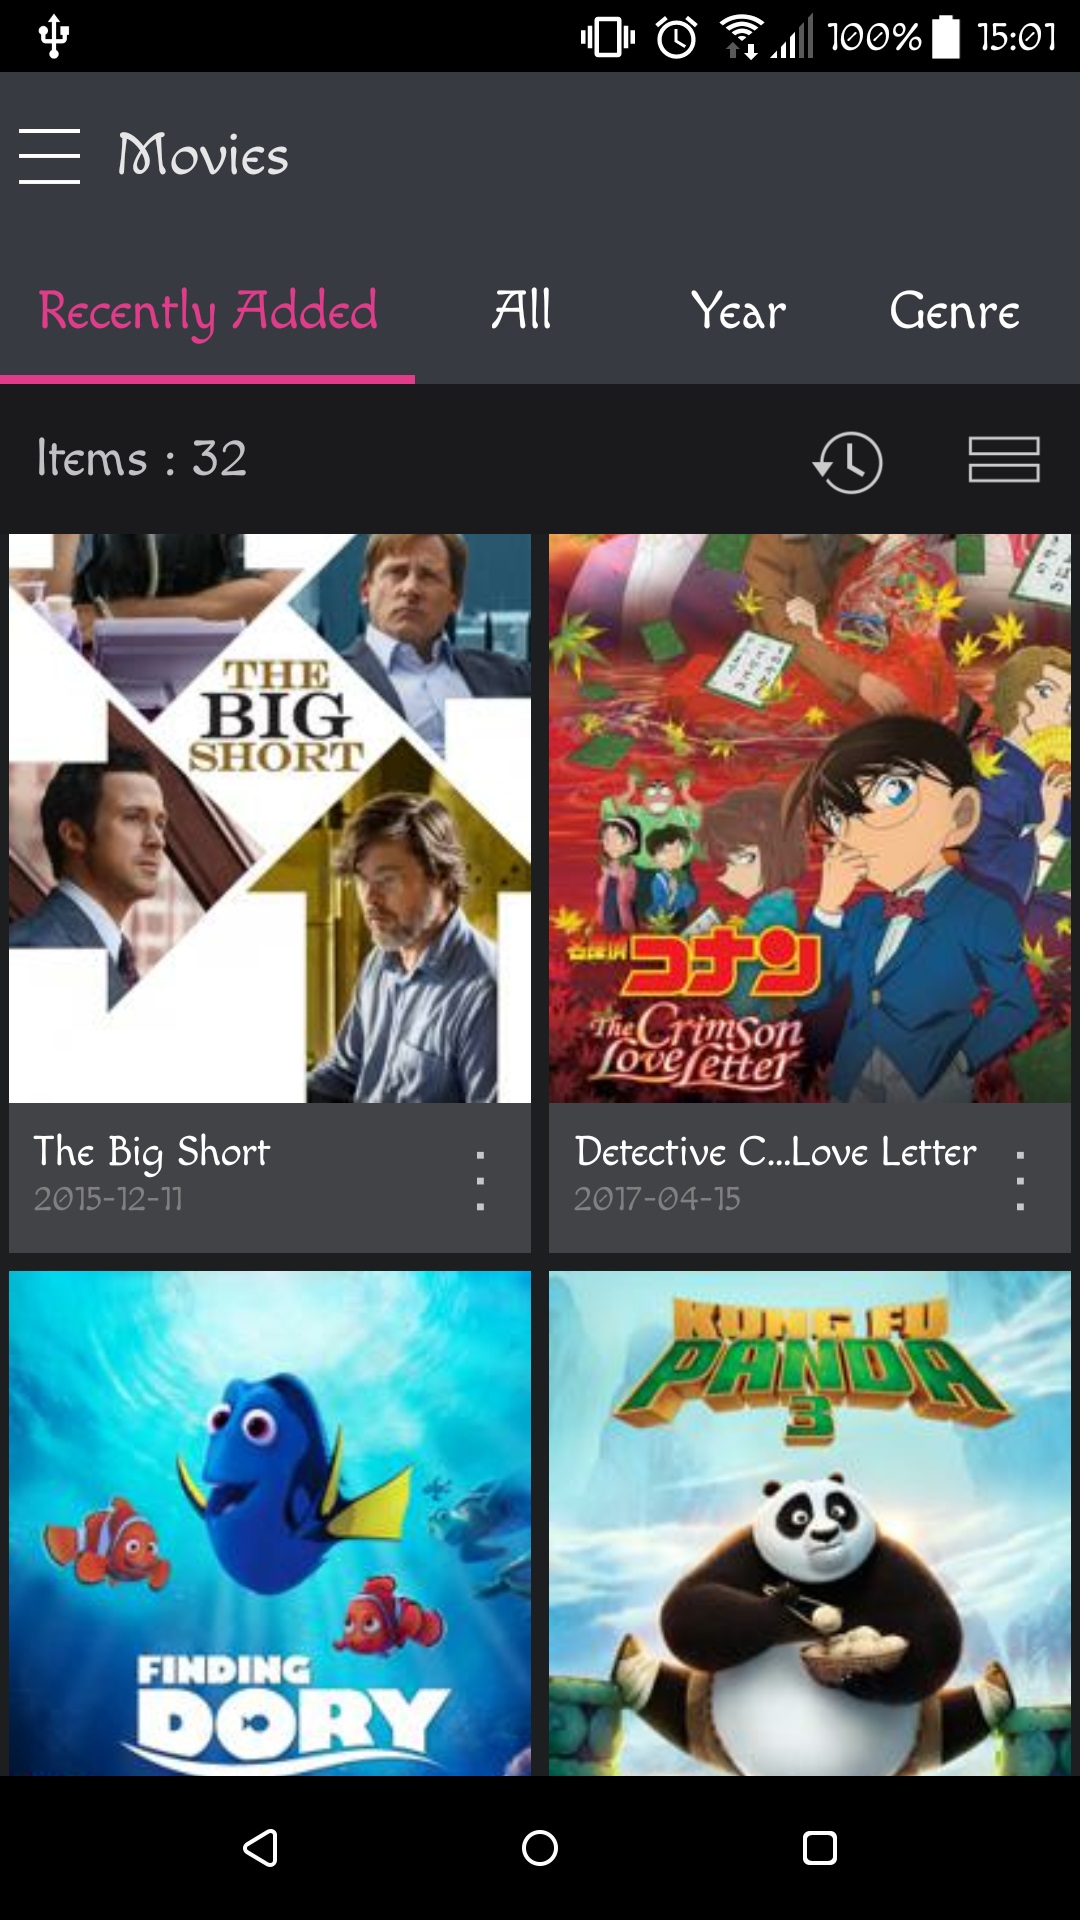
3.1 Movies
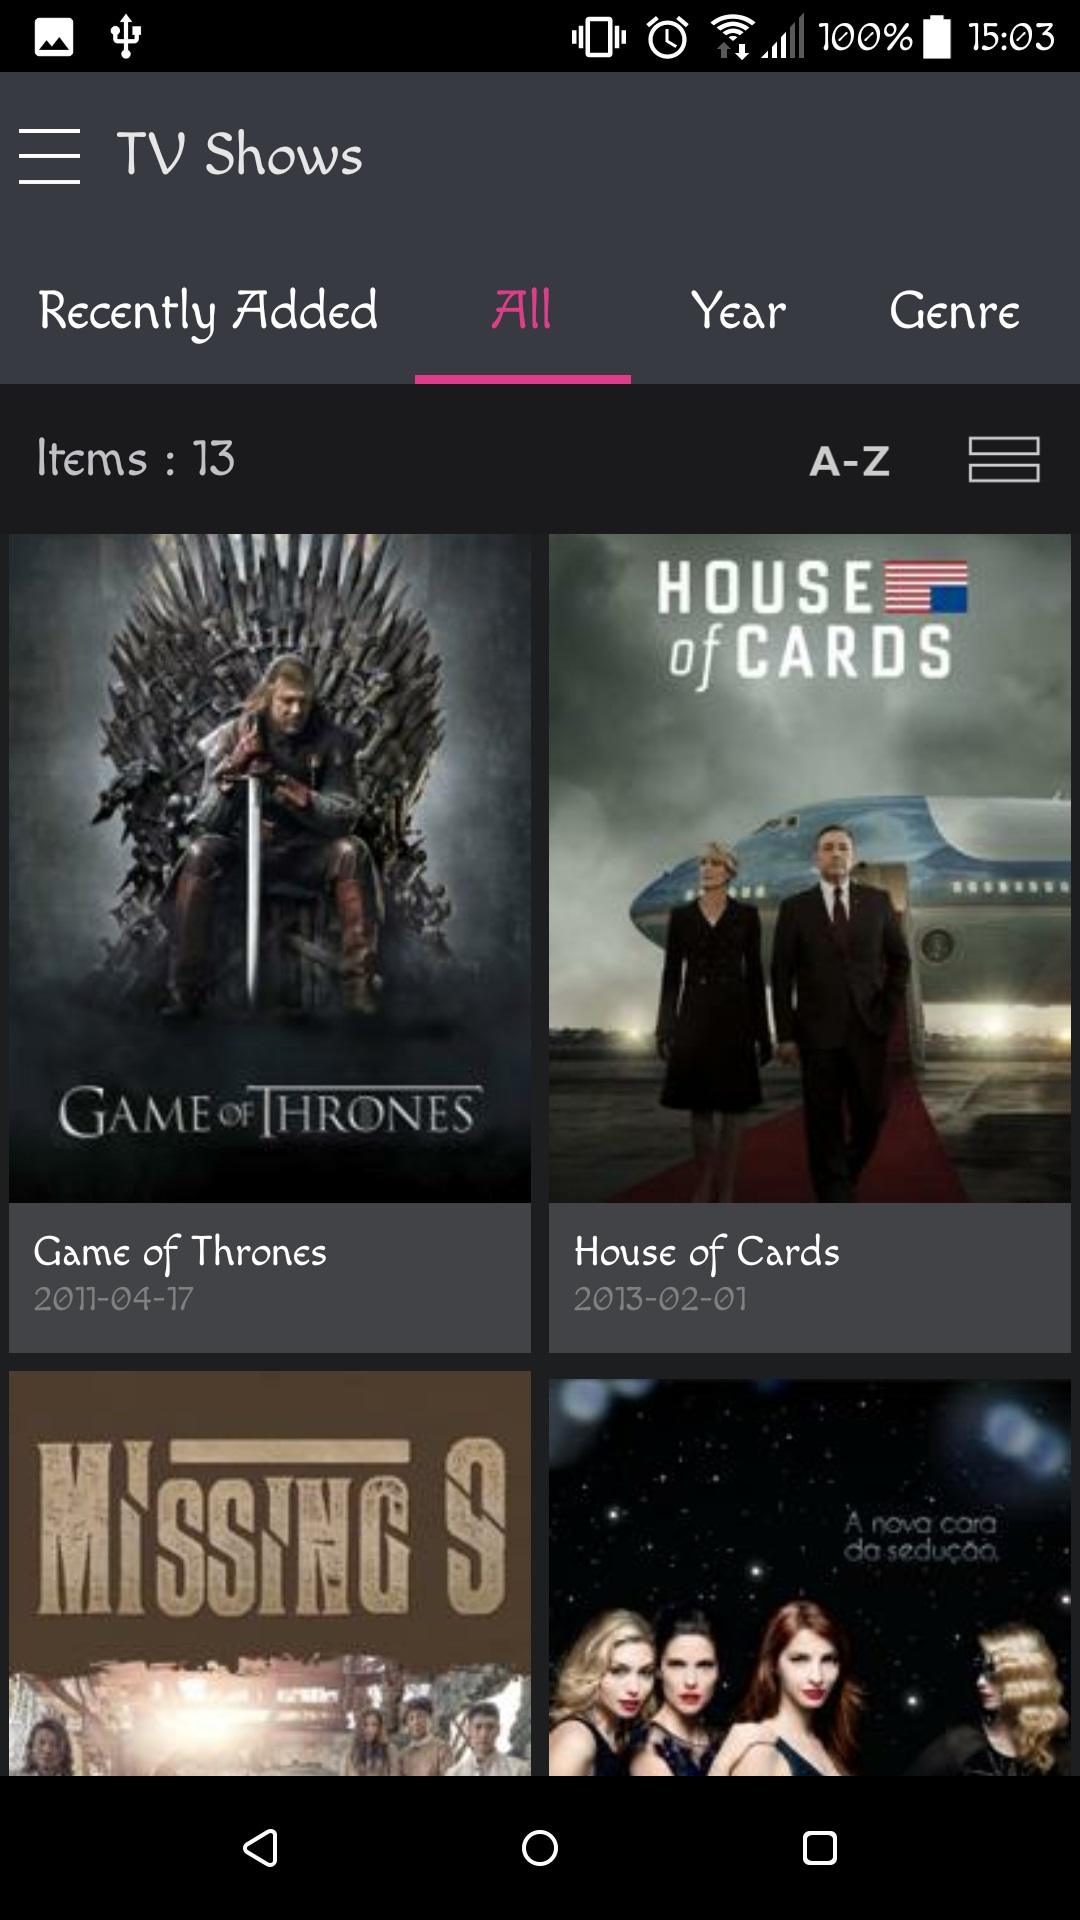
3.2 TV Shows
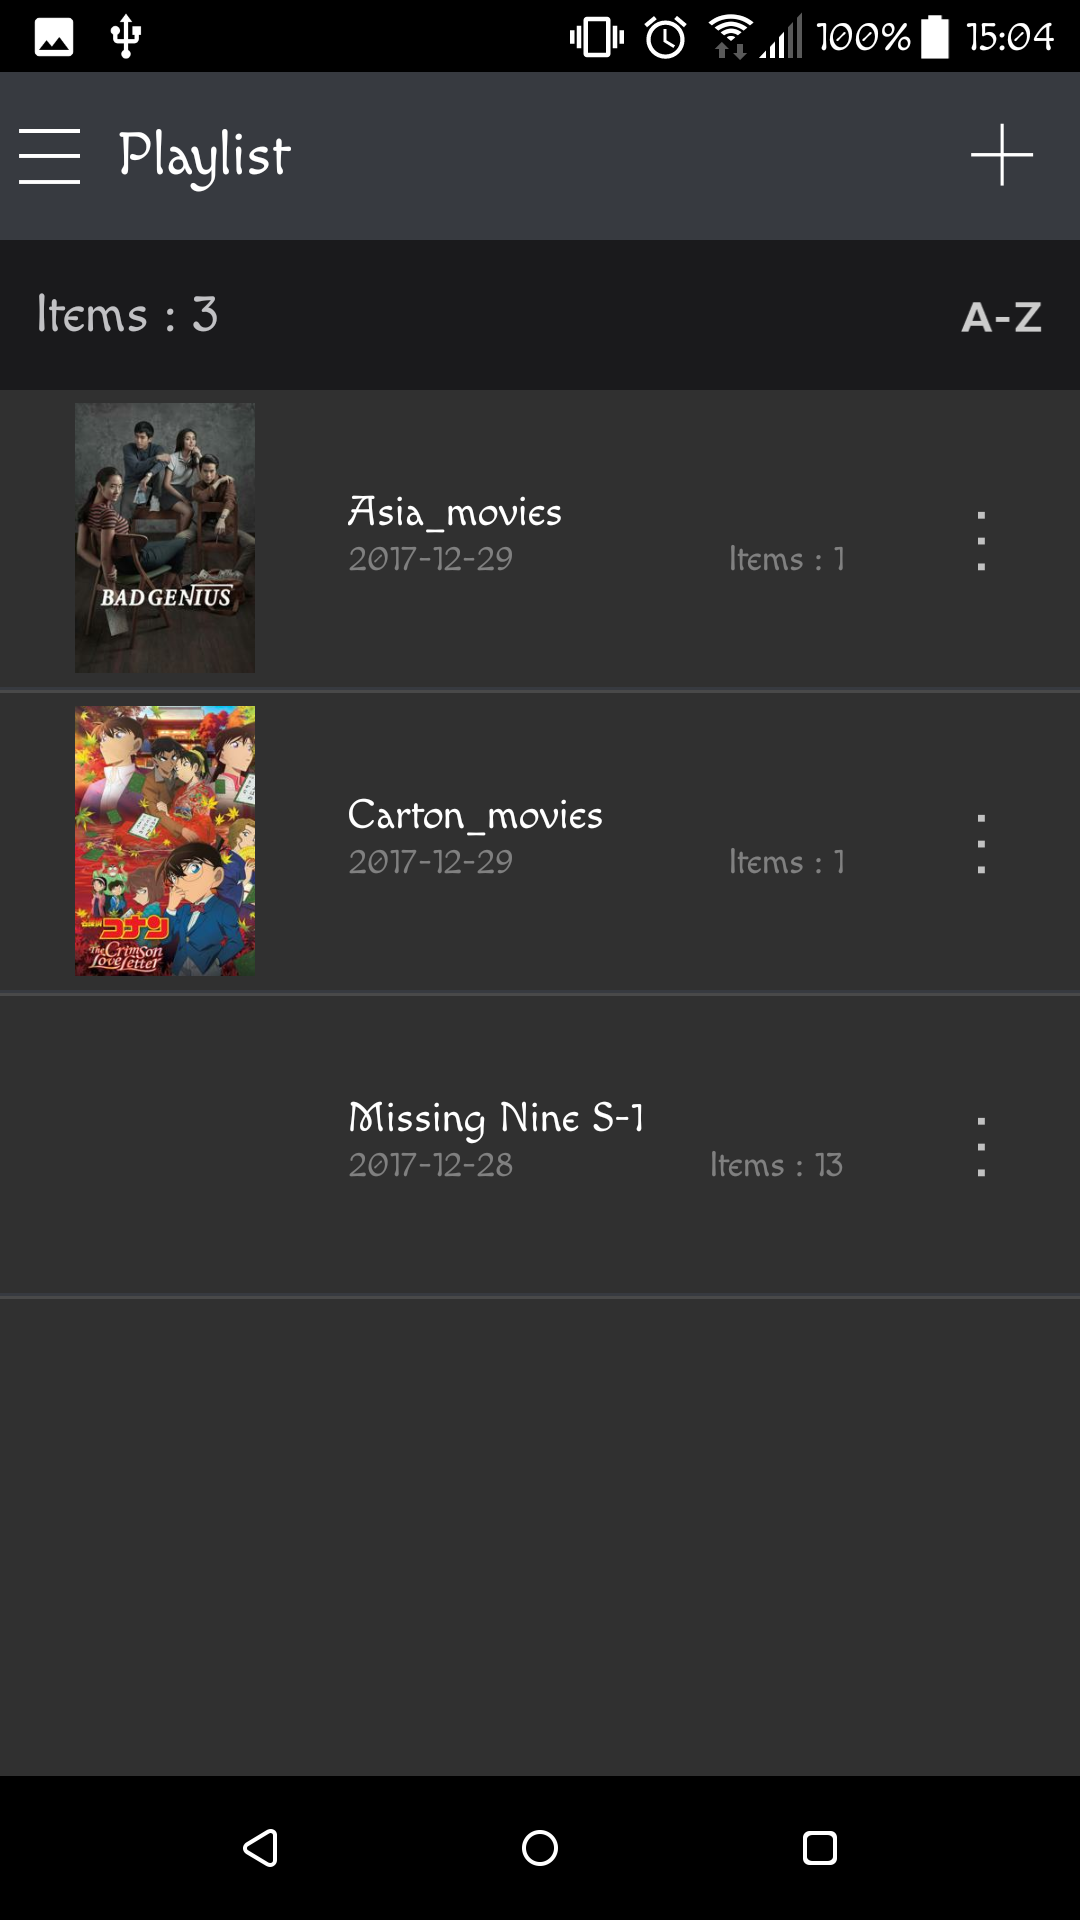
3.3 Video Playlists
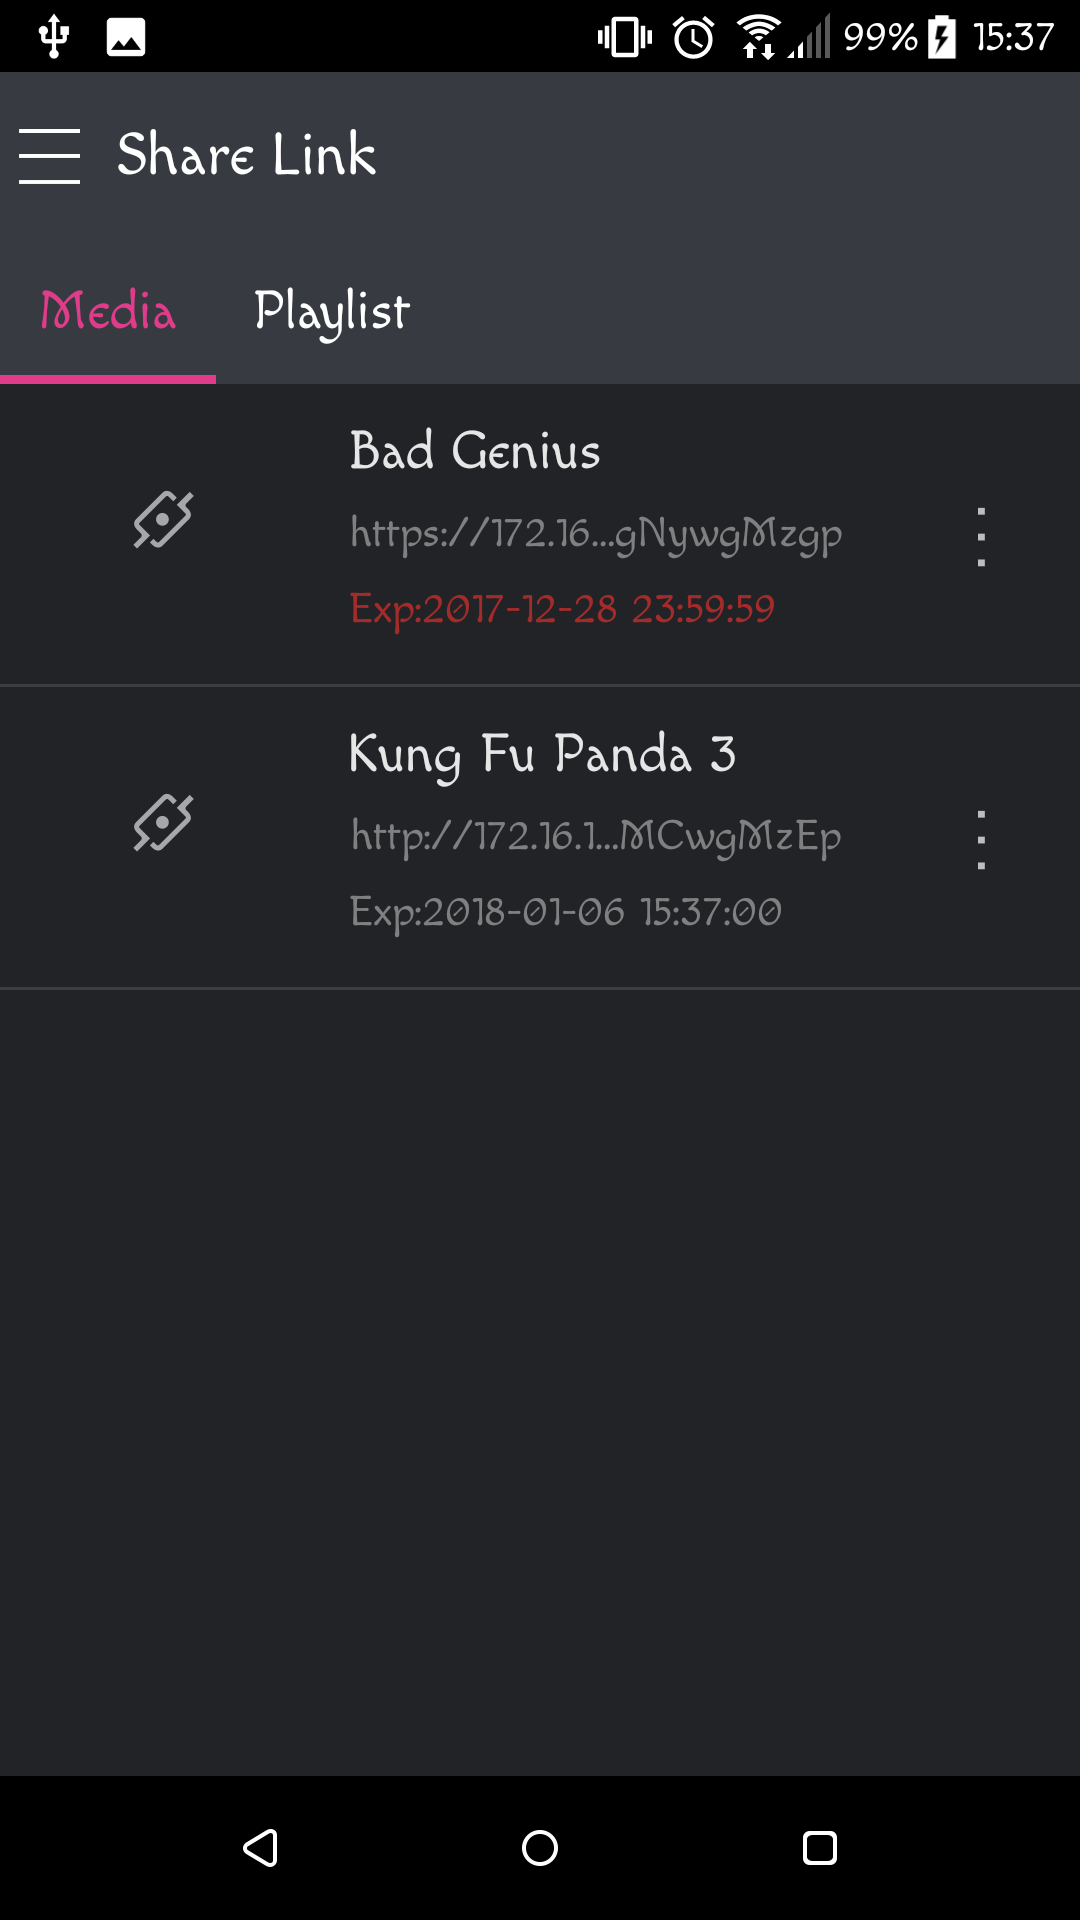
3.4 Share Link
4.1 Introduction to basic functions
4.1.1 Search function
Selecting the icon in the upper right-hand corner will cause the search field to be displayed. Enter the keywords that you want to search for and the results will automatically be displayed below.
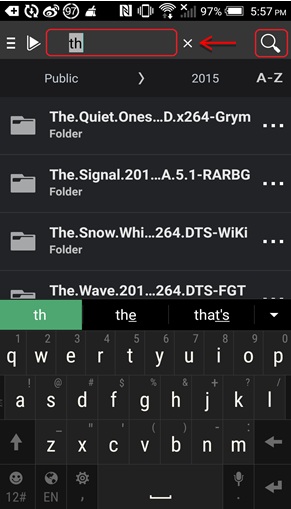
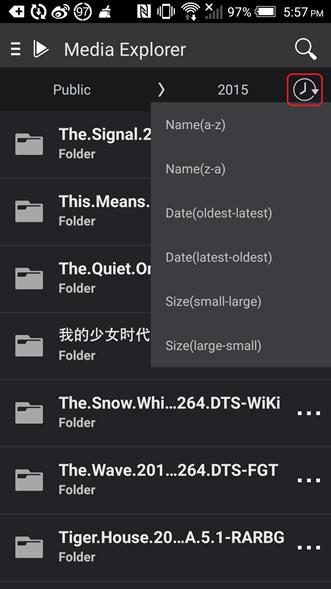
4.1.2 Sorting
Selecting the icon in the upper right-hand corner will cause a drop-down menu to be displayed, giving you options that you can use to organize the way in which files are listed in the interface. The icon will change according to the option you select.
4.2 Video folder operations
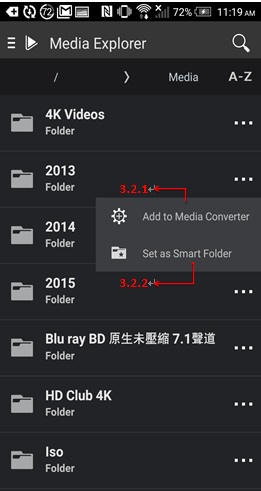
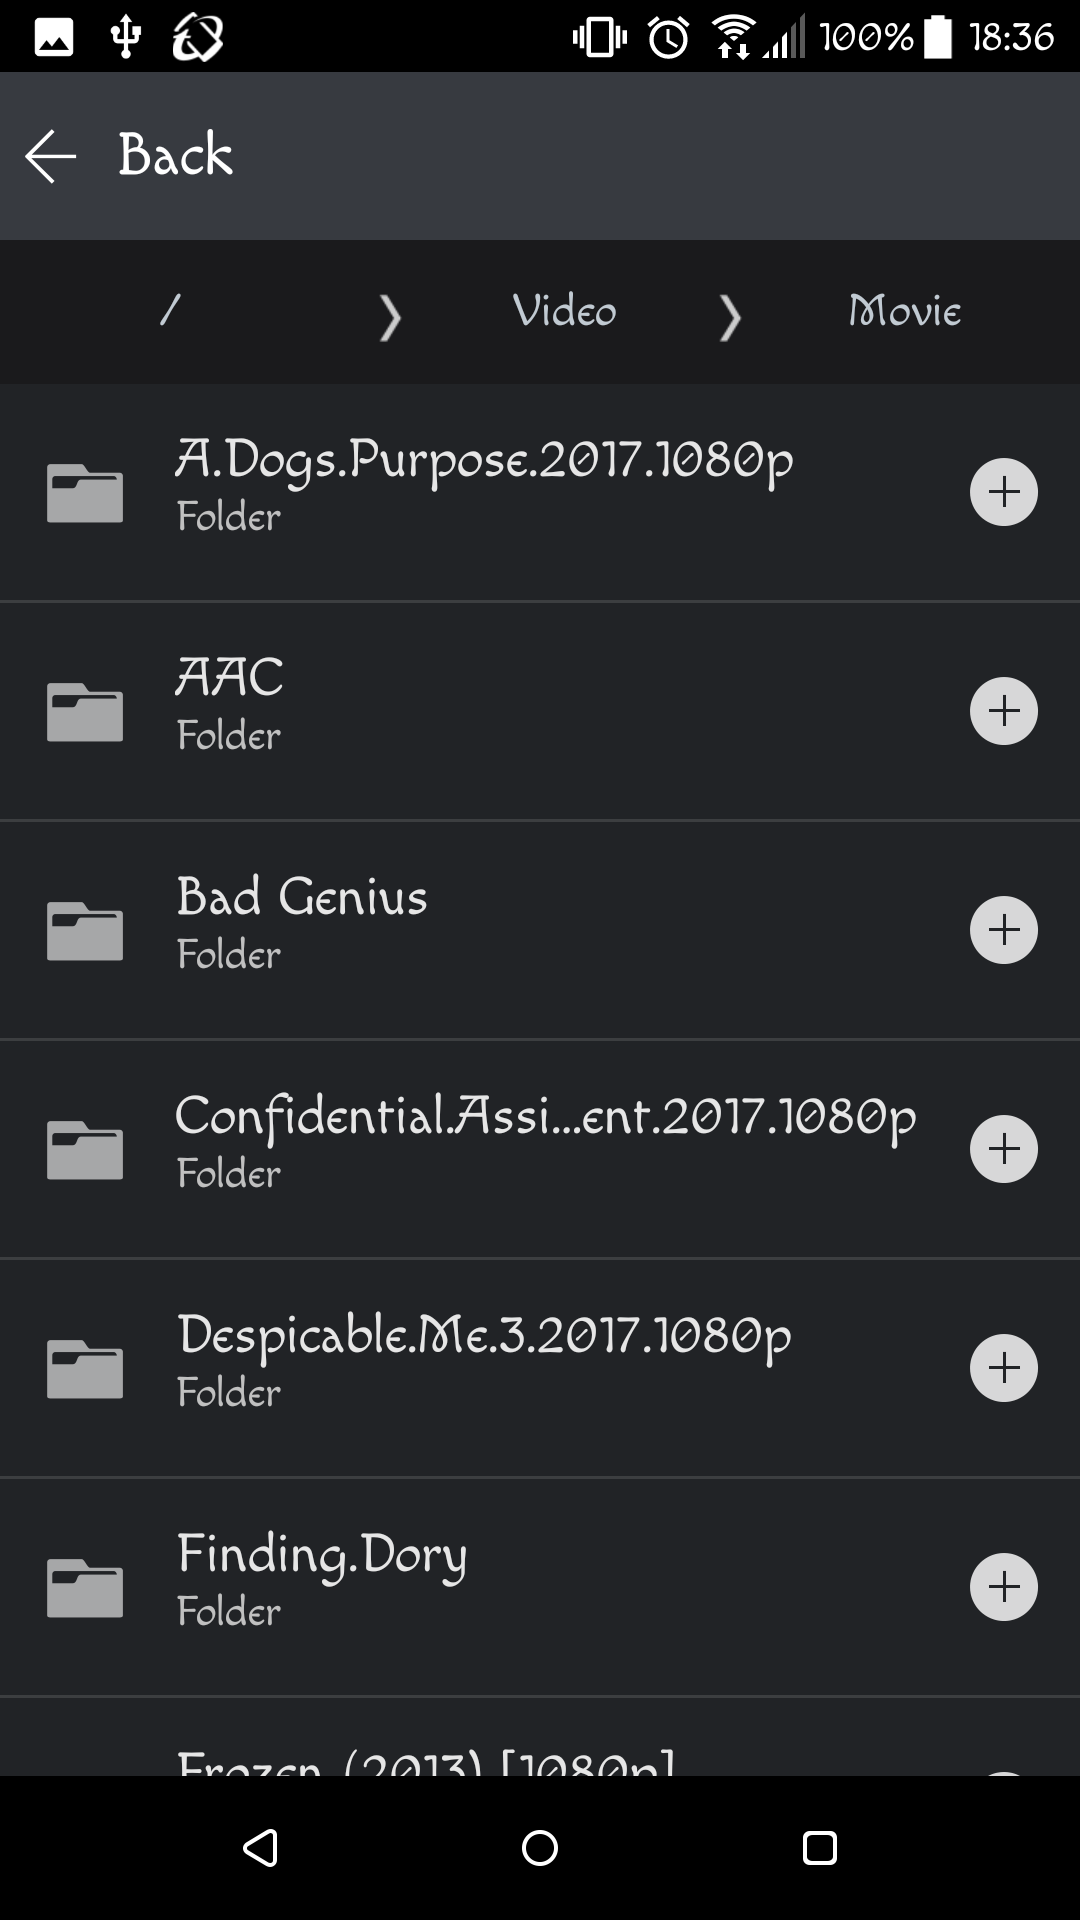
4.2.1 Add to Media Converter
Select the "More" icon for a folder or file that you wish to add to Media Converter. Select [Add to Media Converter] from the drop down menu. Your NAS will then begin the media conversion or add the file/folder to the media conversion queue. If you wish to check the file status, queue status or event log, please select [Media Converter] from the main menu.
4.2.2 Set as Smart Folder
Select the "More" icon for a folder that you wish to set as a smart folder. Select [Set as Smart Folder] from the drop down menu that appears. Once a folder has been set as a smart folder, any new video files added to the folder will automatically be converted.
4.3 Video operations
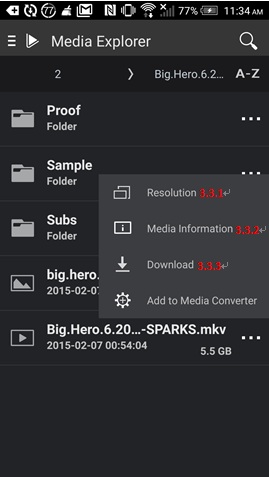
To perform operations on a video file, select the "More" icon to the right of the file. A drop down menu will then appear. The [Add to Media Converter] operation is covered in section 4.2.1.
4.3.1 Selecting the video playback resolution
Selecting [Resolution] will cause a window to appear, allowing you to select the playback resolution. After selecting the resolution, playback will begin.
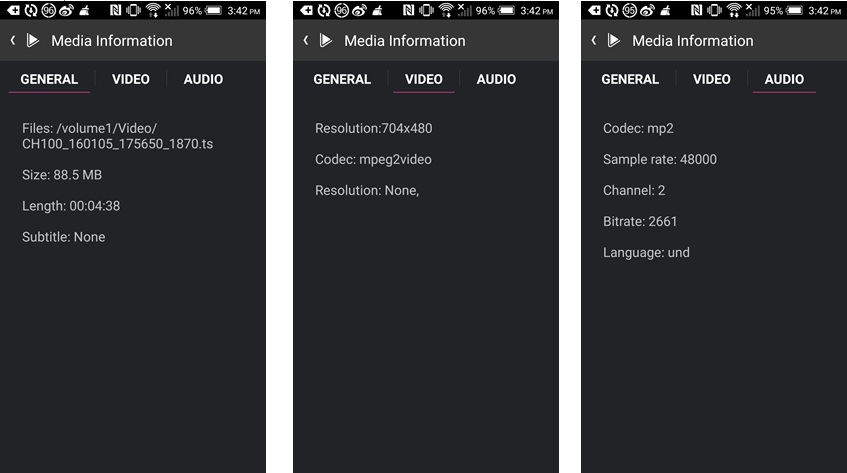
4.3.2 Media Information
Selecting [Media Information] will display the video’s media information page. This page includes the following information:
4.3.3 Video download
Selecting [Download] will cause the video to be downloaded from your NAS to your mobile device. If you wish to view the downloads in progress or completed downloads, please select [Download Directory] from the left side of the main menu.
5.1 Introduction to basic functions
1. Interface functions
2. Basic video organization (swipe left or right to change)
3. Video thumbnail and name
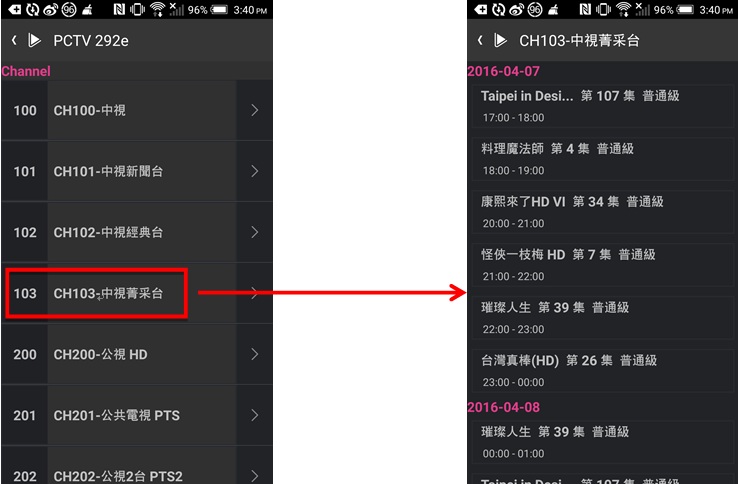
5.2 Stream digital TV programs
STEP 1

STEP 2
5.3 Browsing video information and playback
5.3.1 Browsing video information
Detailed video information allows you to learn more about the video you want to play. You can browse the following information:
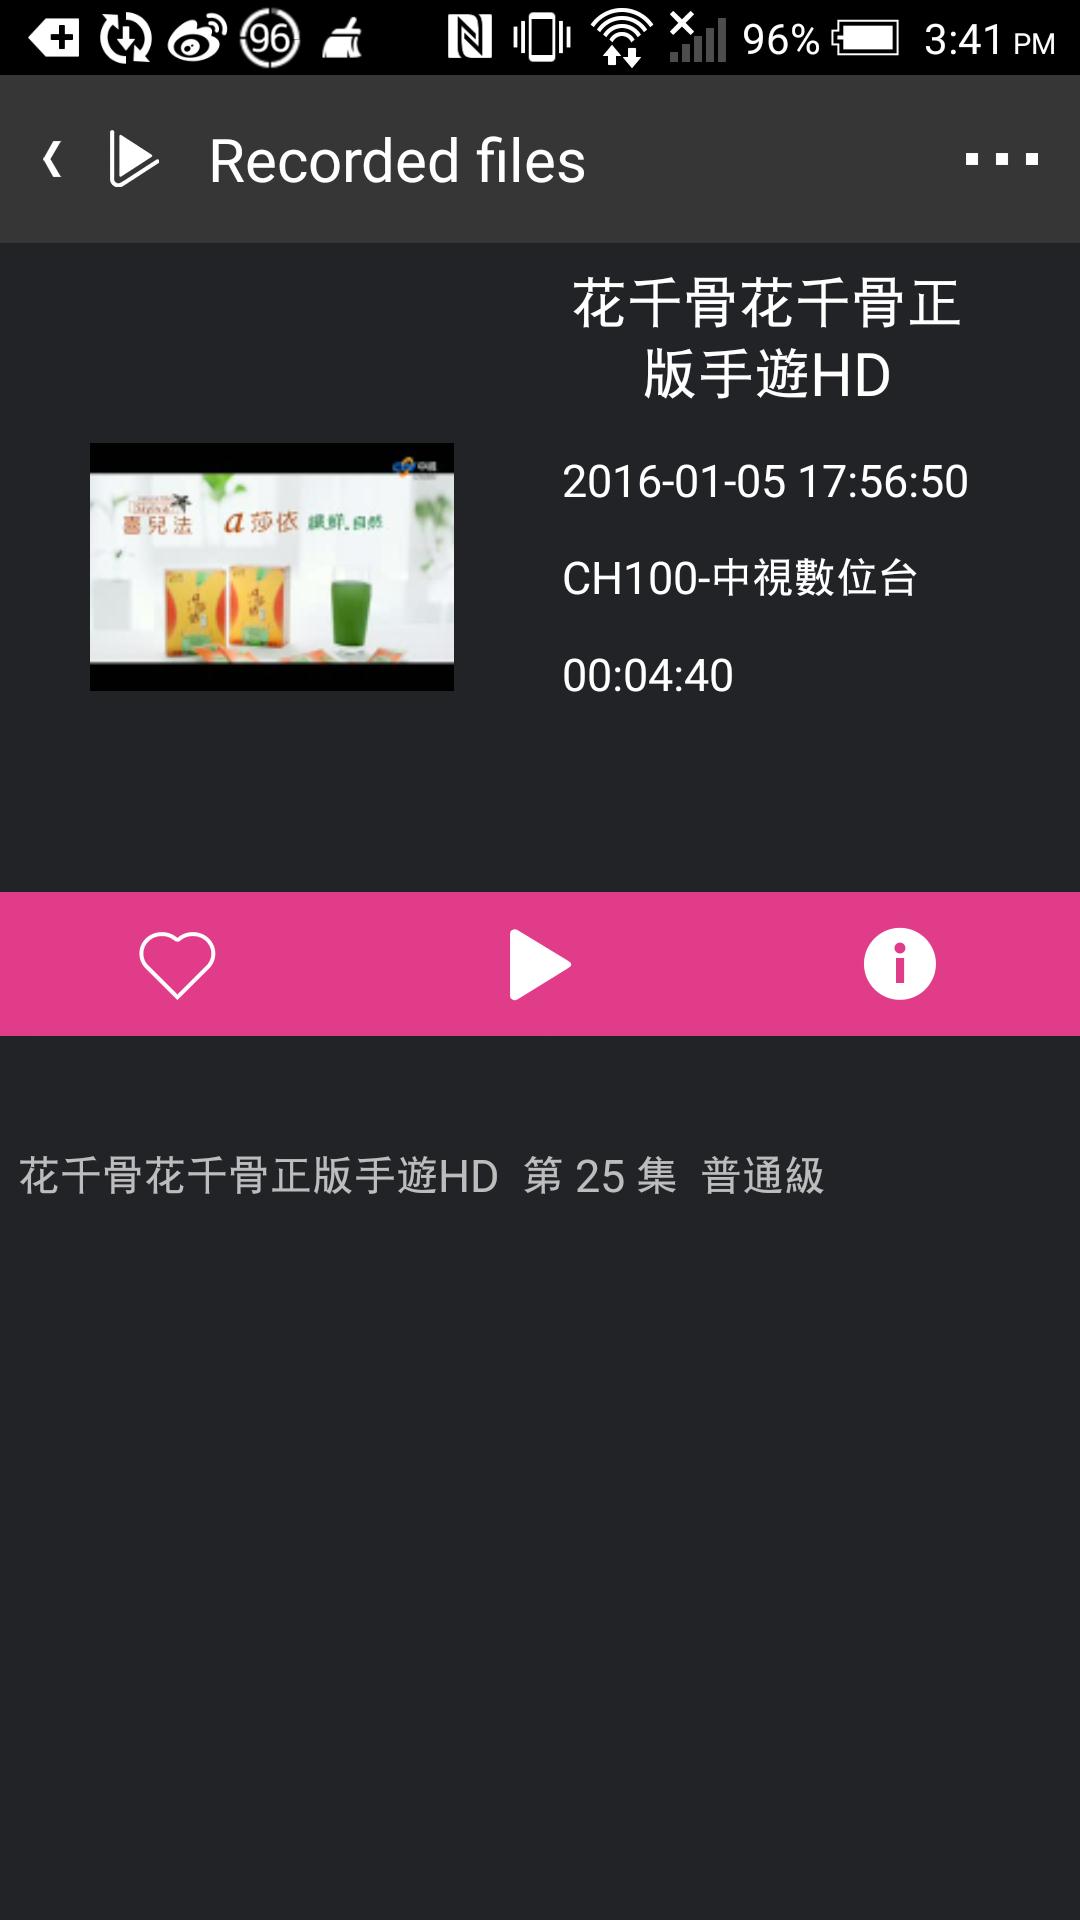
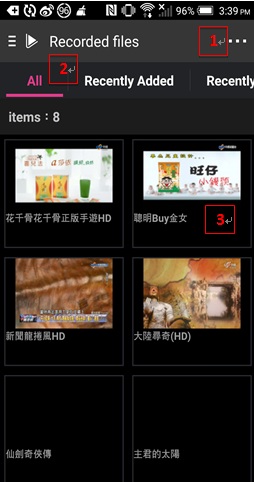
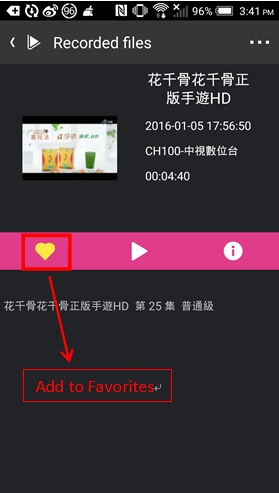
5.3.2 Adding recorded files to Favorites
Select the  button to add the recorded file to “Favorites” for convenient viewing at a later date.
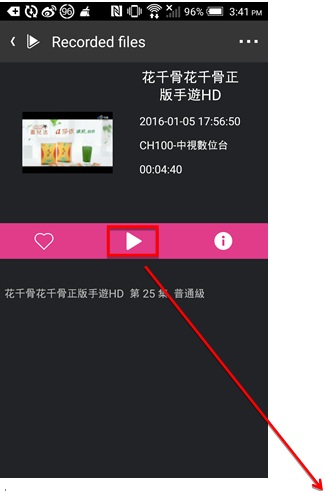
5.3.3 Playing videos
Select the  icon to play the video file.

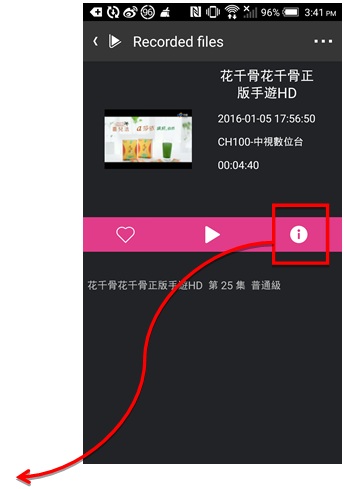
5.3.4 Browsing media information
Selecting the  icon will allow you to browse media information. Media information includes the following:
5.4. Other
The [Refresh], [Search] and [Sort by] functions accessed from the "More" icon’s drop down menu are described below.
5.4.1 Refresh
If LooksGood has a TV program that just finished recording, you can select [Refresh] and the newly recorded program will be then be displayed in the interface (thumbnail and program name).
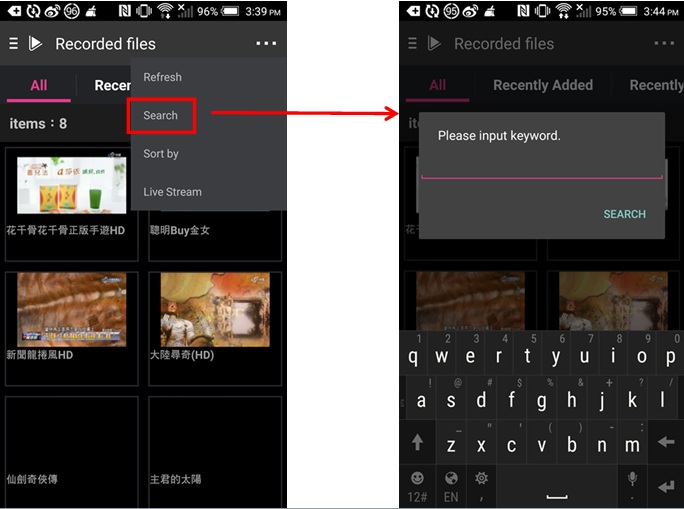
5.4.2 Search
Selecting [Search] will cause the search window to appear. Enter any keywords you wish to search for and then select [Search] to search for them.
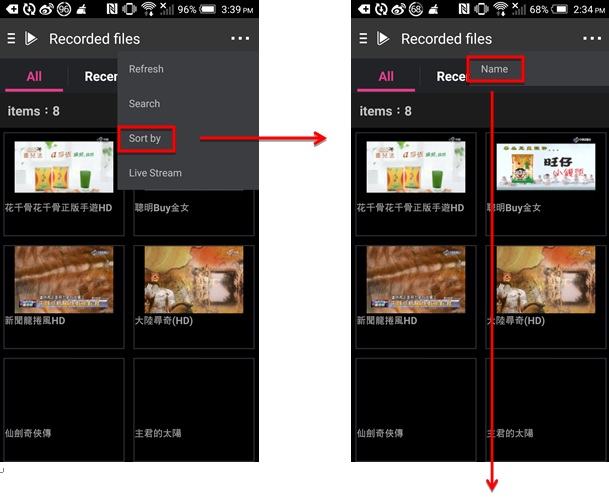
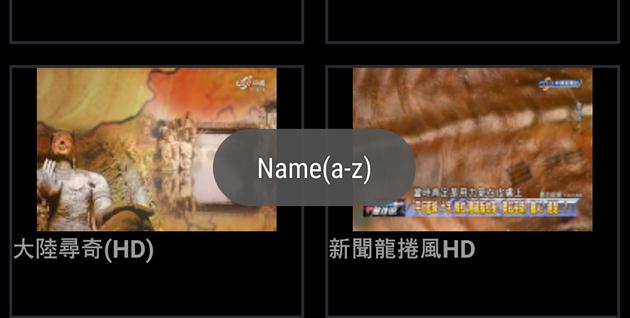
5.4.3 Sort by
Selecting [Sort by] will allow you to sort the videos in the interface alphabetically from a-z or from z-a.
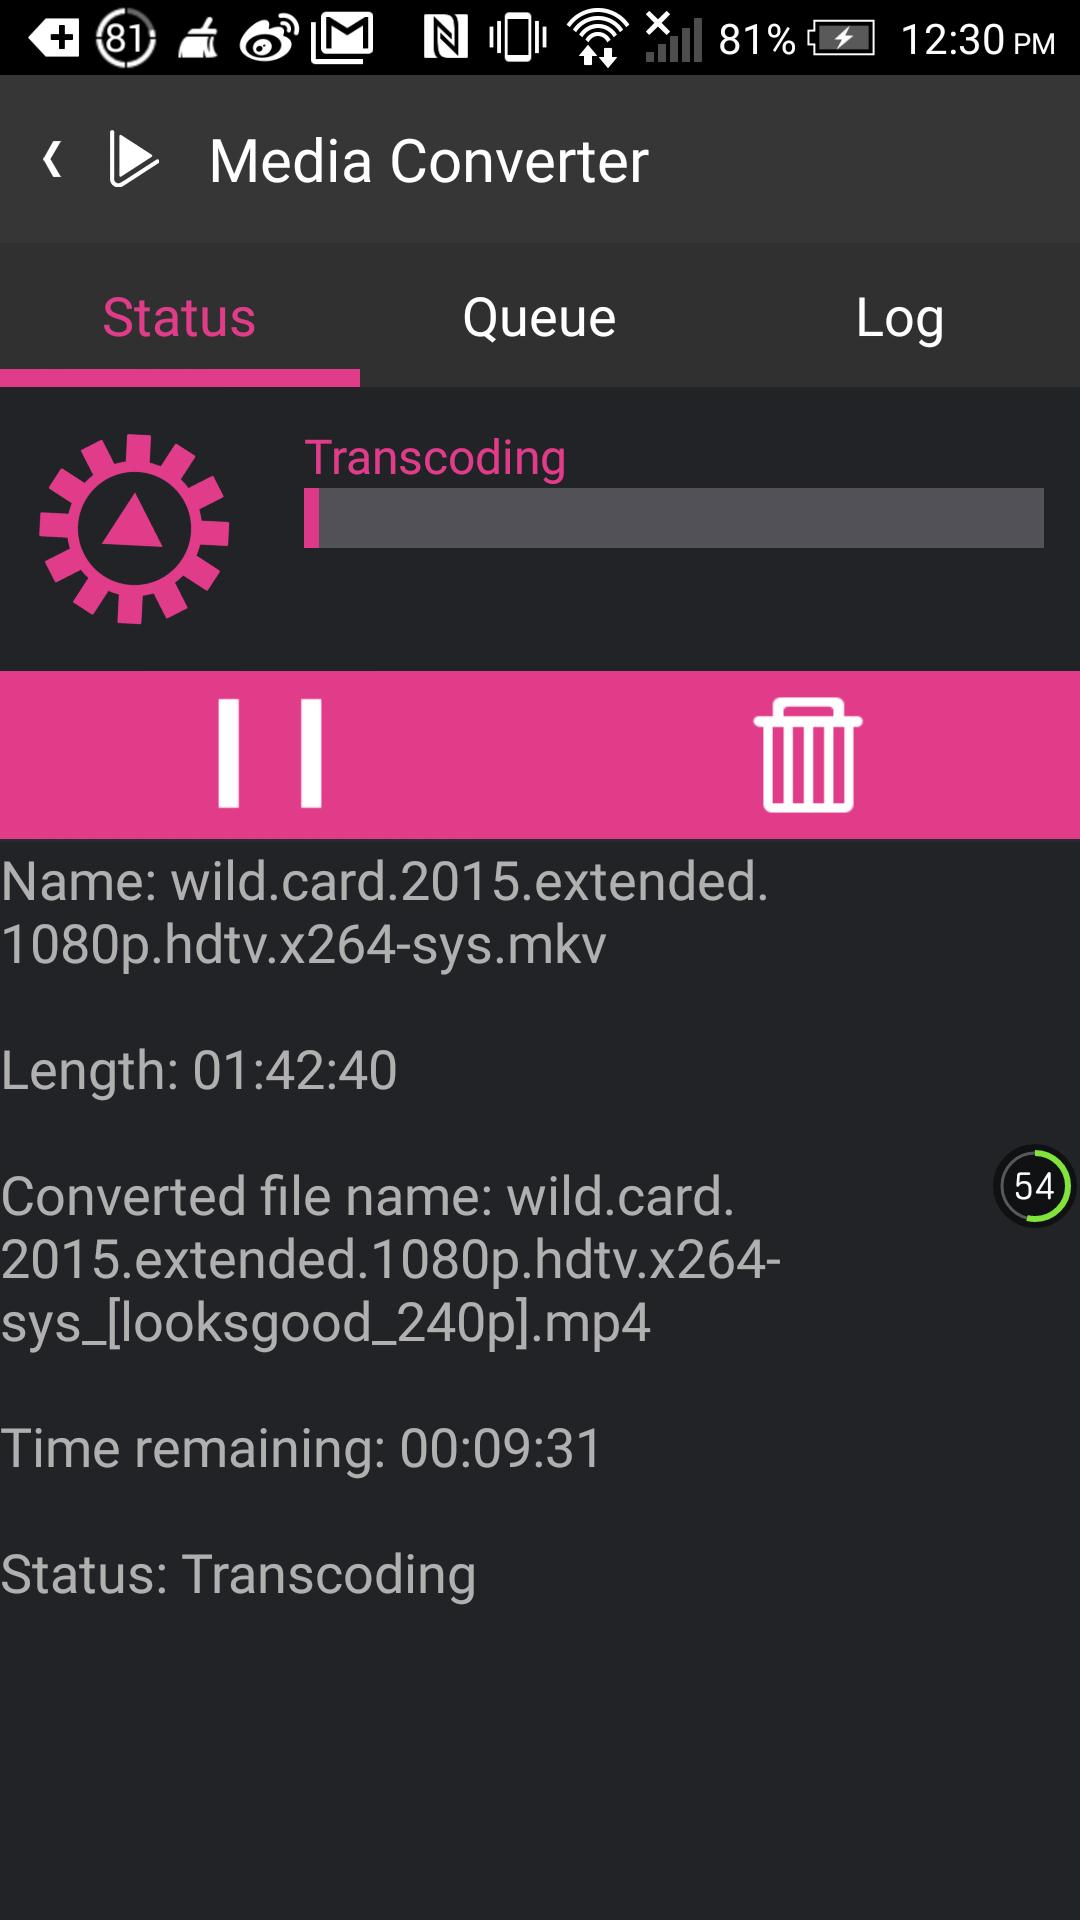
6.1 Checking the media conversion status
Select [Media Converter] from the main menu. You will now be able to view the Media Converter status page. This page will display the conversion progress bar along with associated information. You can select "Continue", "Pause" or "Delete" to continue, pause or remove any conversions in progress.
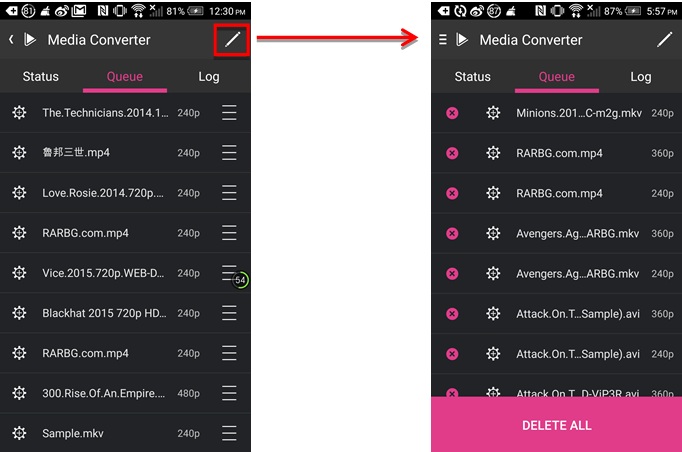
6.2 Managing the conversion queue
Swiping to the [Queue] page, will display all video files queued for conversion. You can select and hold the "Shuffle" icon to modify the order of the files in the queue or select the "Edit" icon to remove any files from the queue.
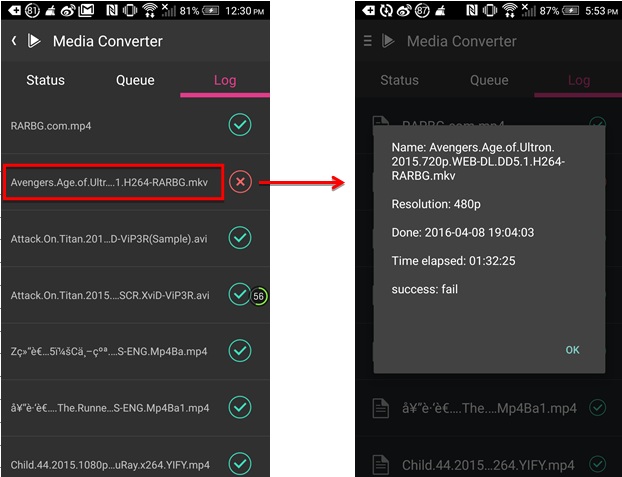
6.3 Event log
Swiping to the [Log] page will display all successfully completed and unsuccessful conversion tasks. Selecting any log item will display the name of the file, its conversion resolution, time of completion, time elapsed and whether it was successful or not.
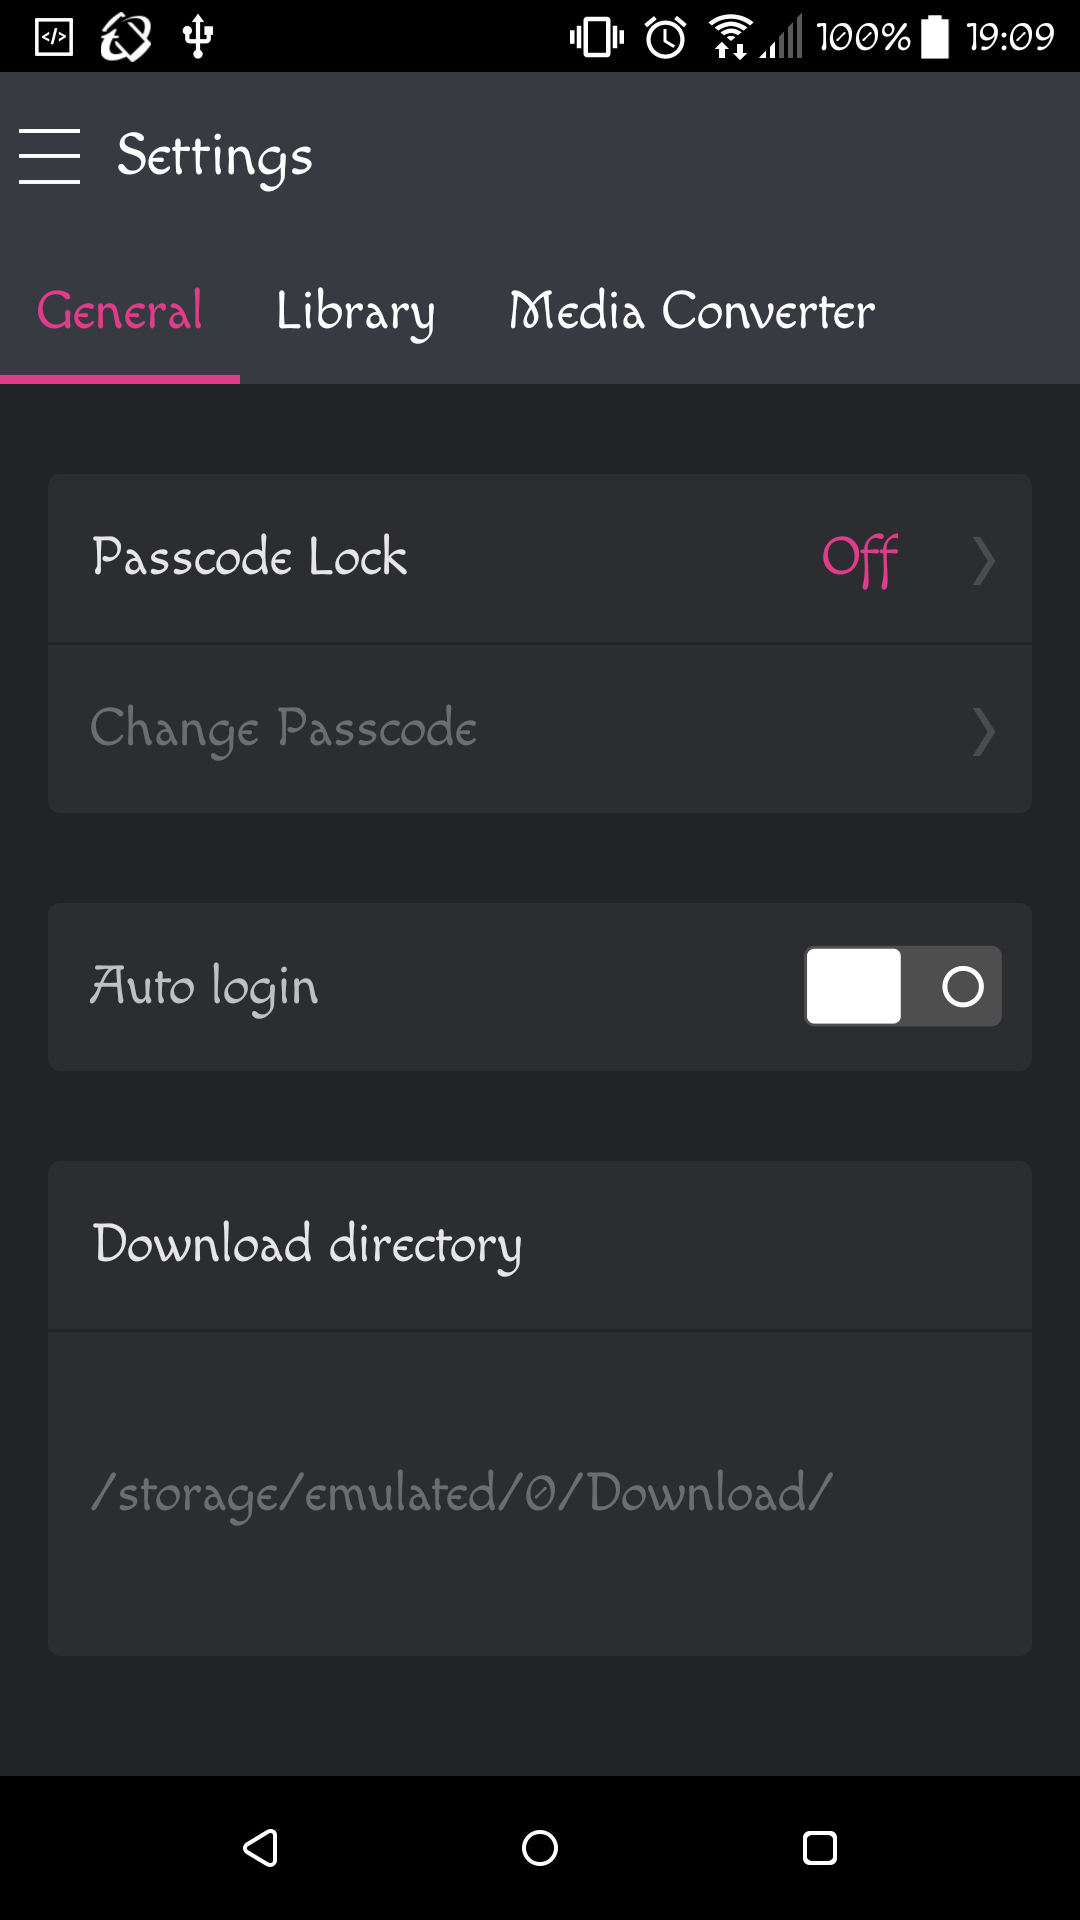
Select [Settings] from the main menu.
7.1 Passcode lock and auto login
Select the [General] page.
7.2 Edit Library
Select the [Library] page. You can create indexed folders for your videos in video library.
1. Select your library type.
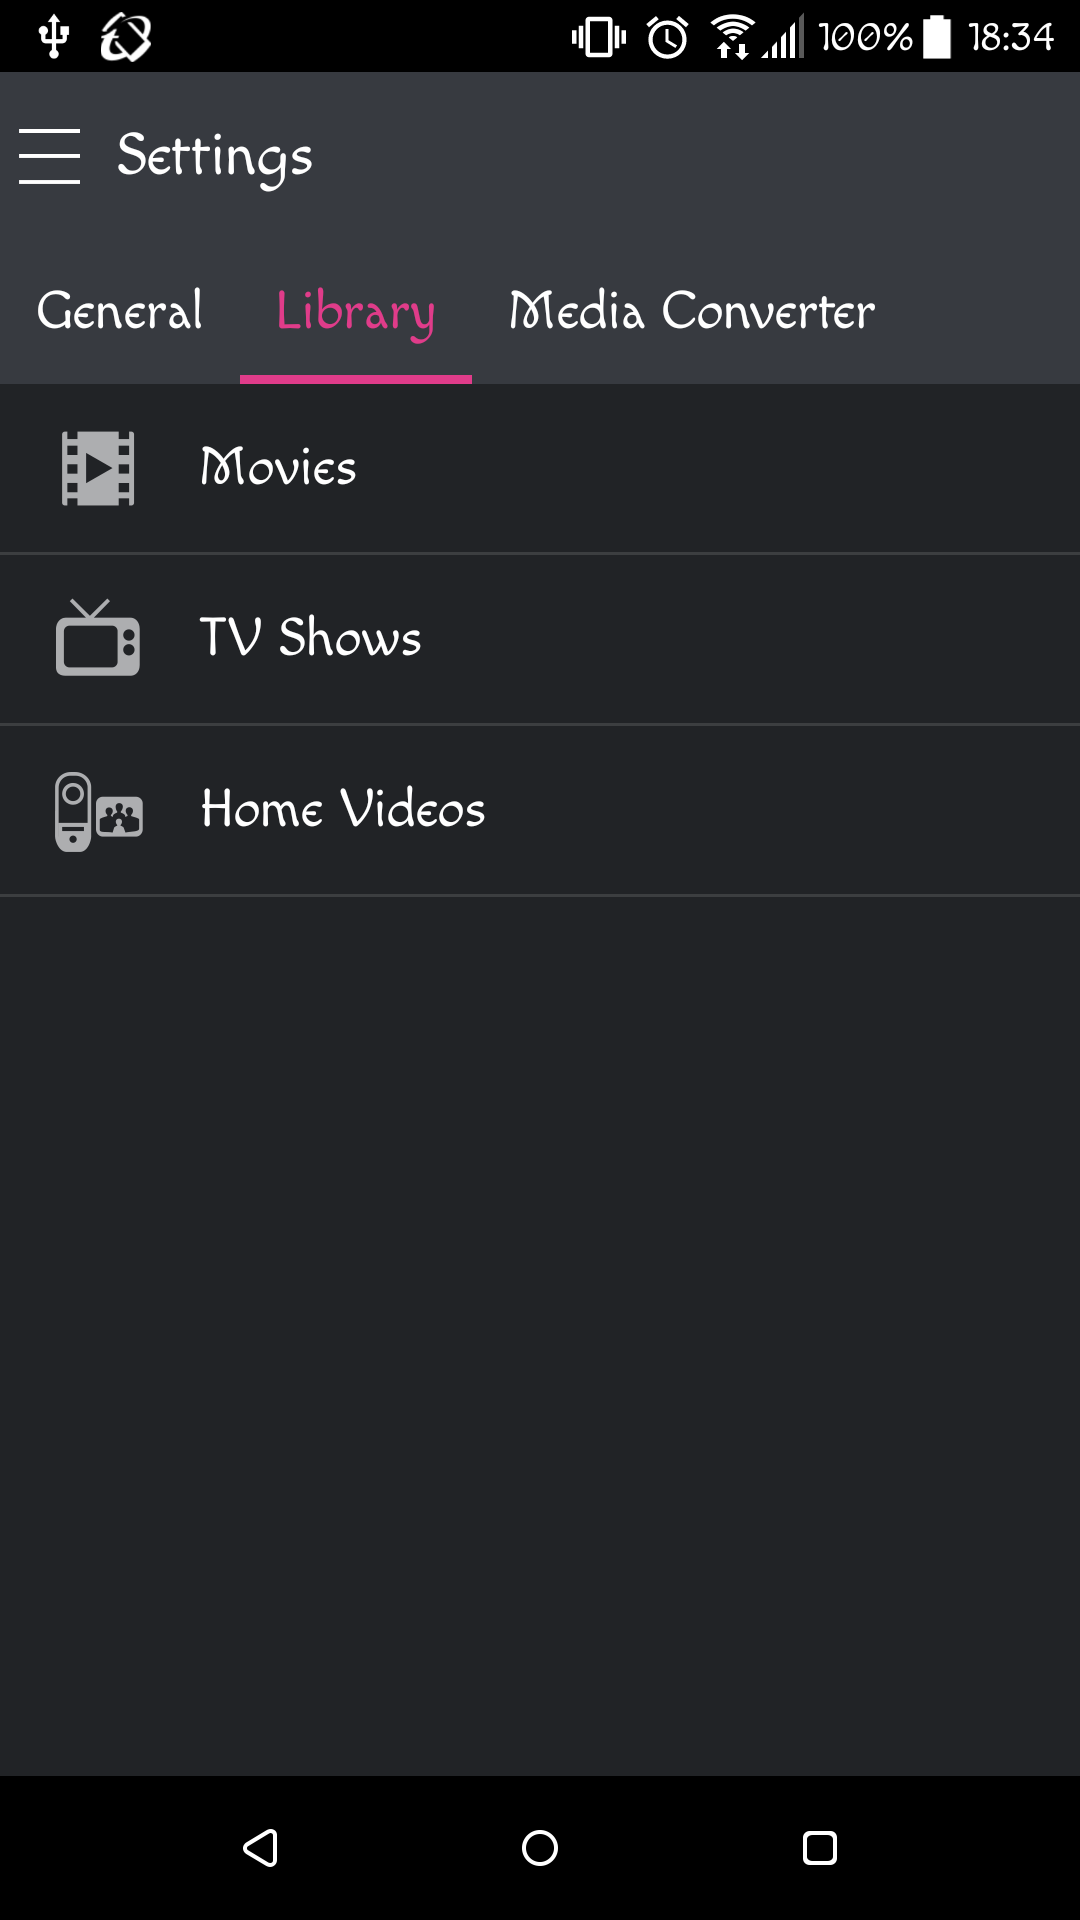
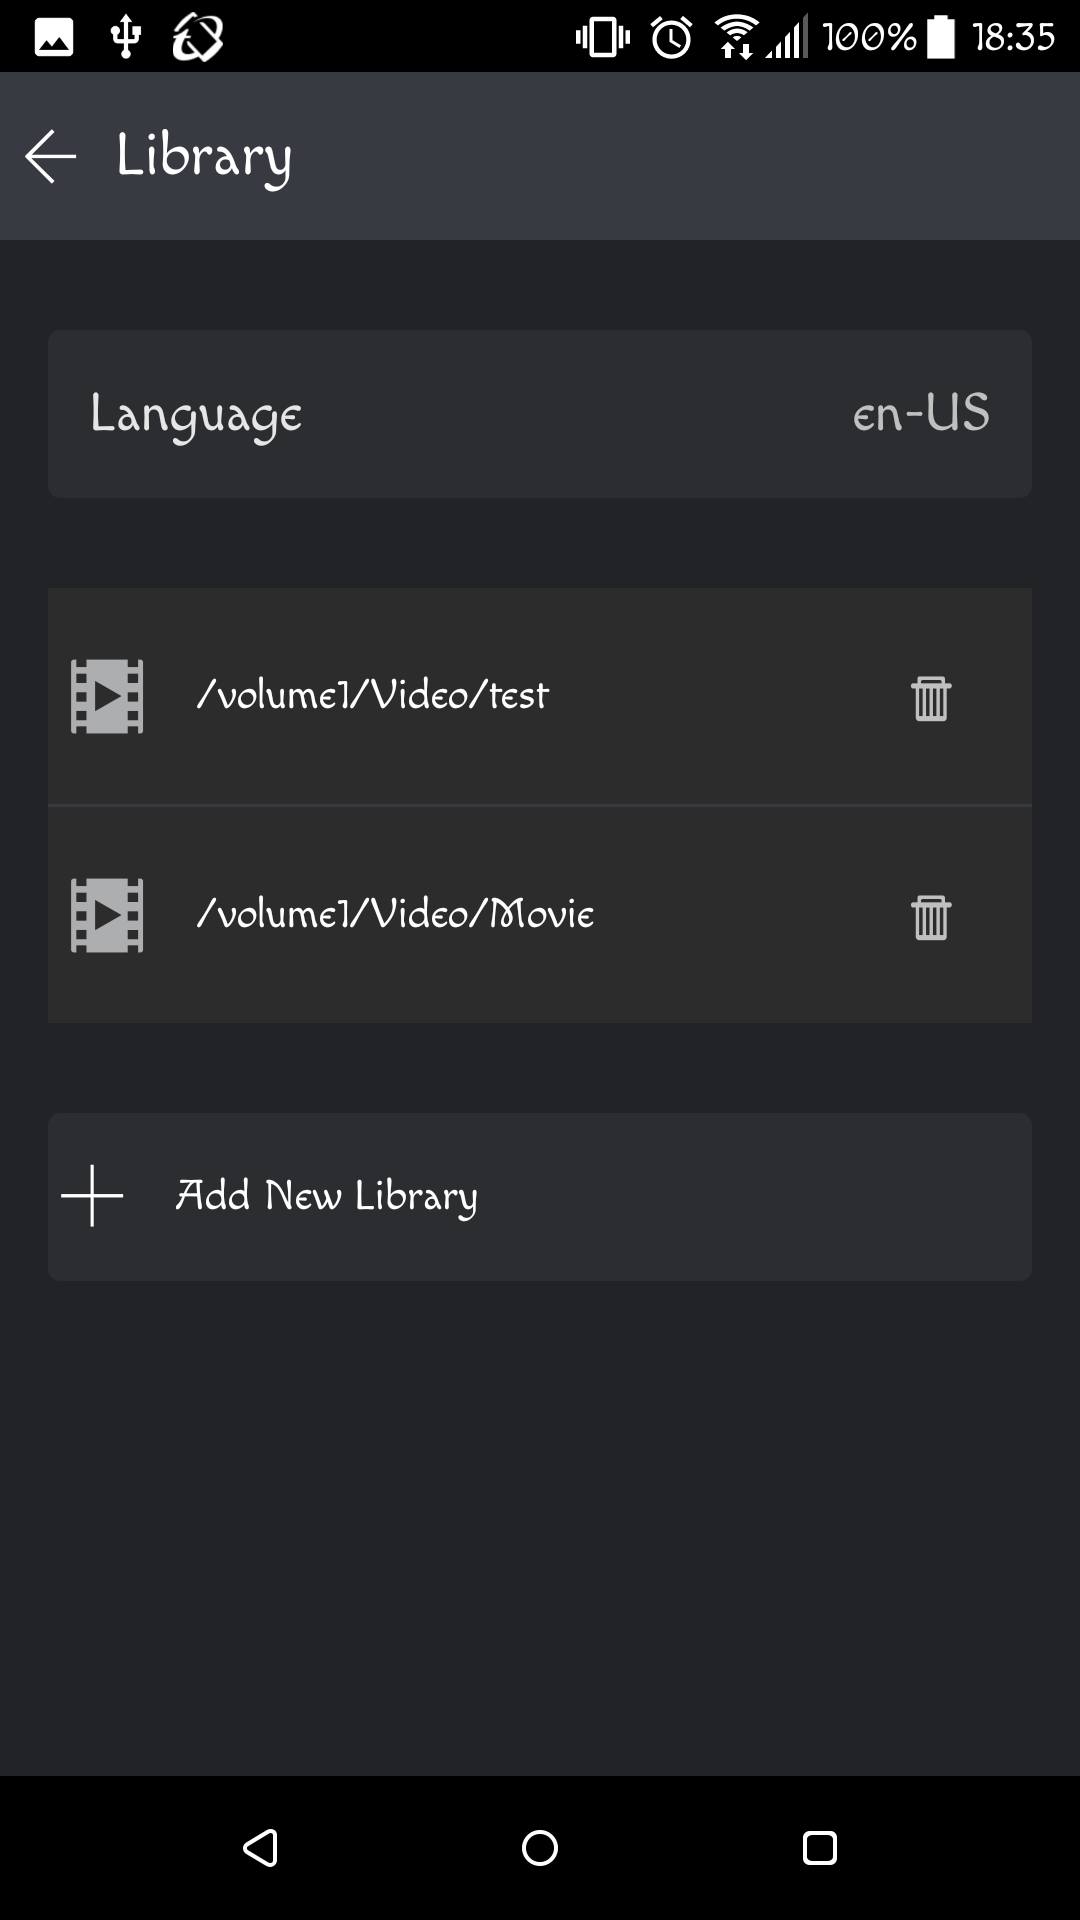
2. Add folders to your library.
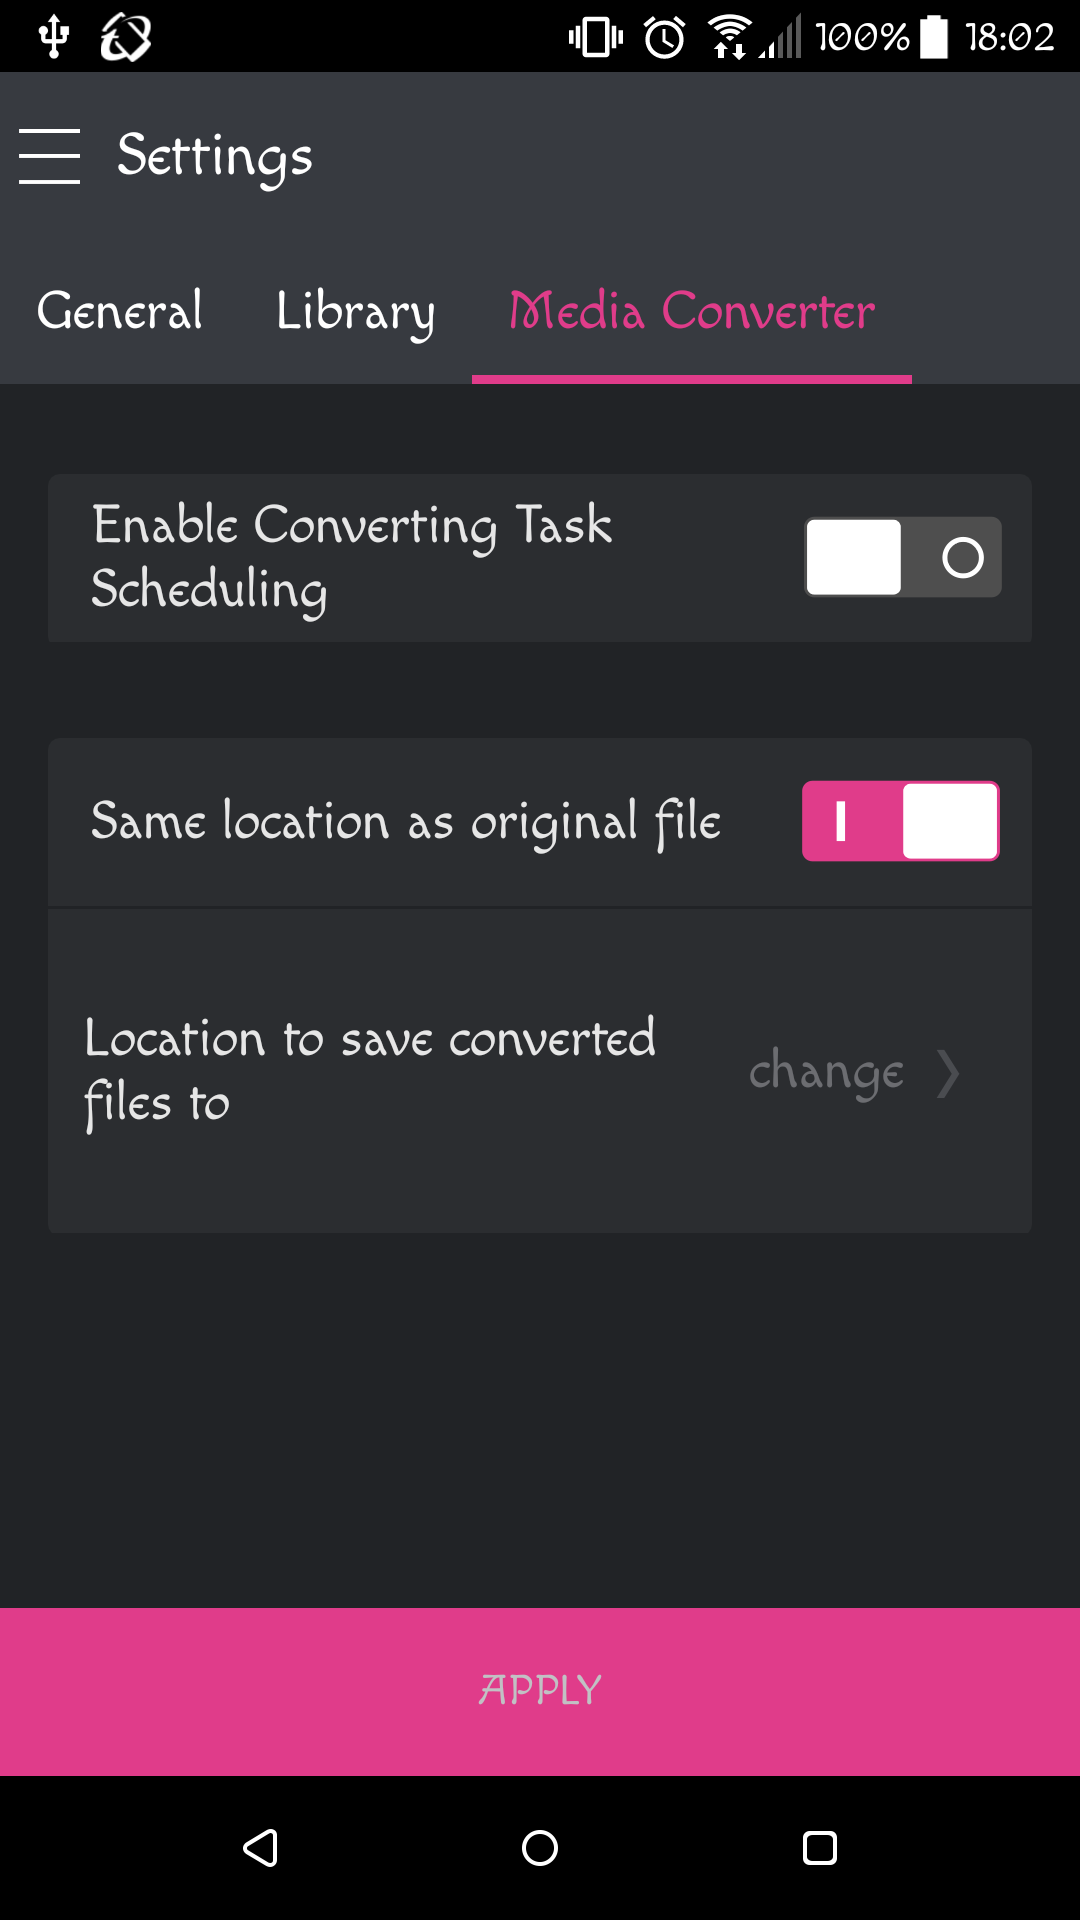
7.3 Media converter
Select the [Media Converter] page. The settings described below will be available to be configured. After configurations have been completed, select [Apply] to make them effective.
1. Enable converting task scheduling.
2. File location (location to save converted files to): You can choose to save converted files in the same location as the original file or in a different location of your choice.
1. For optimal video playback quality, ASUSTOR recommends that you set MX Player as your default media player for use with AiVideos.
2. If you encounter problems or issues with sound while playing videos, please see: NAS 247 Configuring AiVideos and MX Decoder.
3. Models currently supporting hardware transcoding: AS3 / 31 / 32 / 50 / 51/ 61 / 62 / 63 / 64 / 70 series (need to enable Media Mode)
4. An incompatible TV dongle or weak signal will affect the TV recording and streaming function. For a list of compatible TV dongles please see:
https://www.asustor.com/service/tv_stick?id=tv_stick&brand_id=&type_id=27
5. The examples in this course were conducted from within a LAN environment. Users who wish to use AiVideos with their NAS from over the Internet should note the following:
EZ-Router WAN Connection Ports for LooksGood and AiVideos
|
Type |
Port |
Protocol |
|
LooksGood |
9900~9908, 80 (Web Server Default) |
TCP/UDP |
|
AiVideos |
9900 |
TCP/UDP |
Copyright © 2025 ASUSTOR Inc.
