Utilizamos cookies para ayudarnos a mejorar nuestra página web. Lea nuestra Política de cookies .

2022-12-07
After completing this course you will be able to:
Course Prerequisites:
NAS 221: Remote Access - Using EZ-Connect
Students are expected to have a working knowledge of:
Signing up for DDNS services and setting up routers
1. Accessing your ASUSTOR NAS using the Internet
4.2 Connect to NAS using IPv6 URL
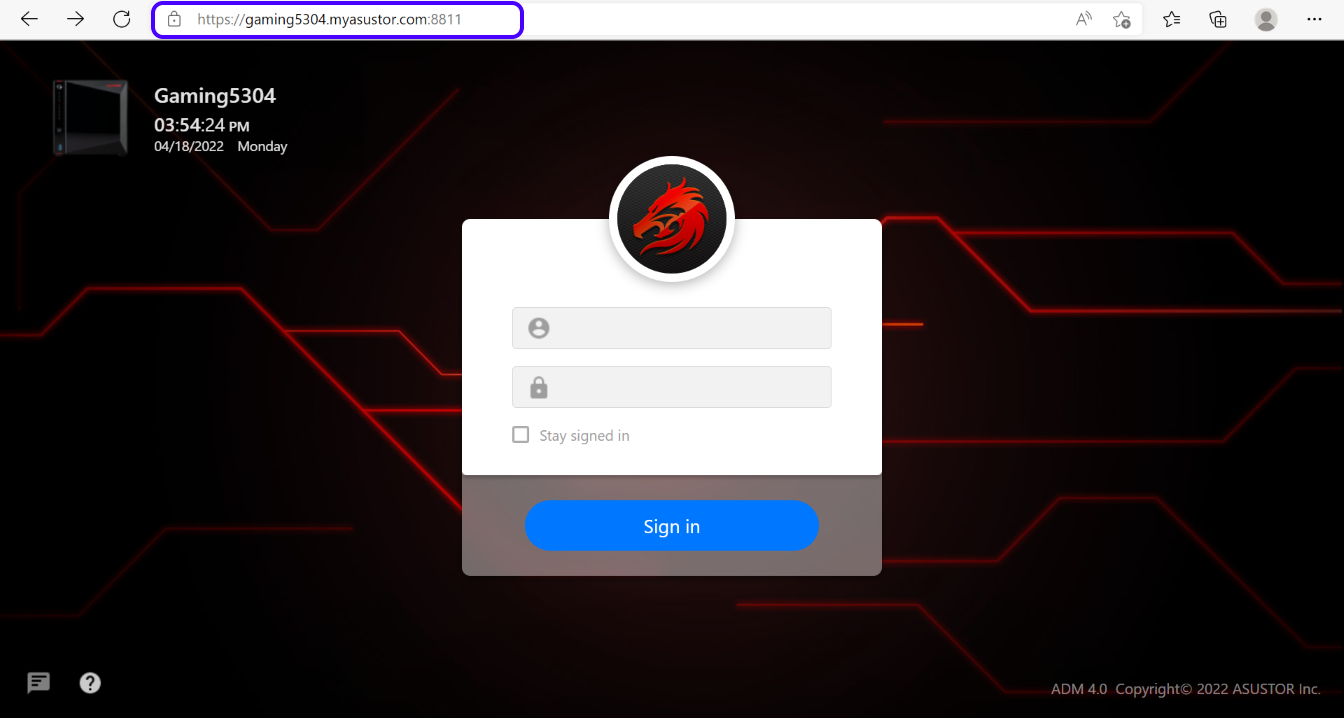
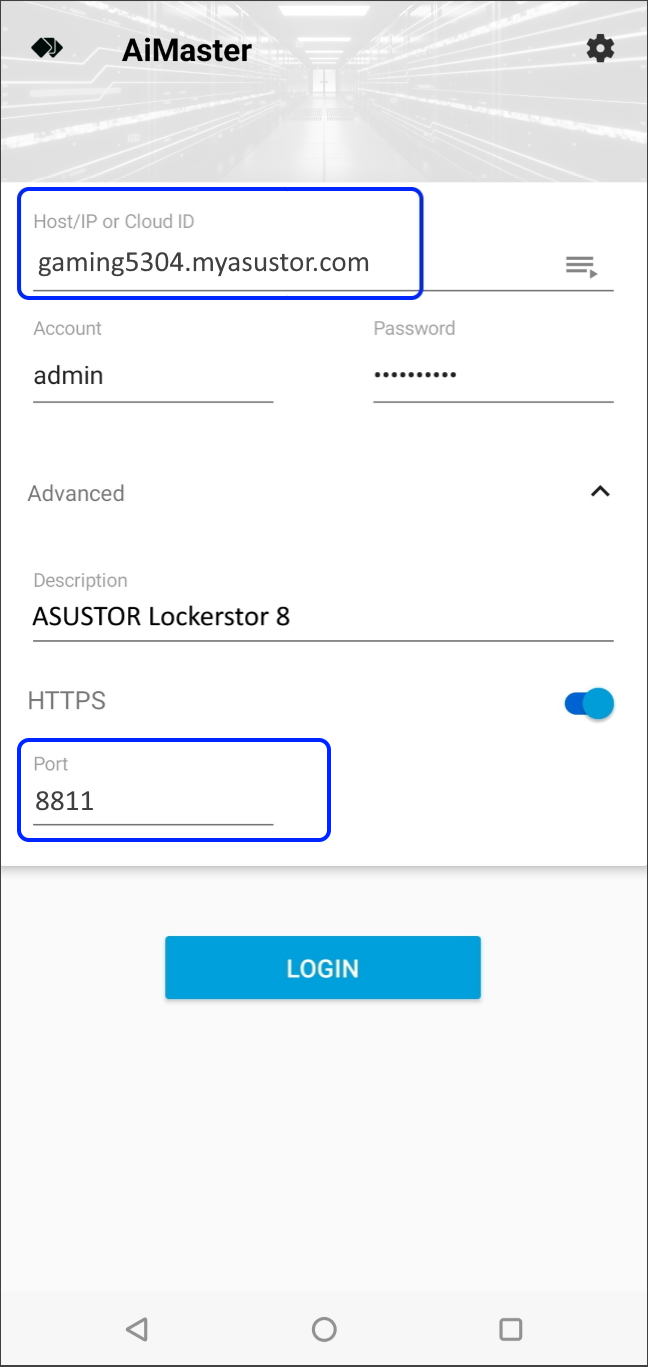
ASUSTOR provides users with quick and convenient solutions that allow them to use their NAS through the internet and remotely access their files, creating an exclusive private cloud.
If you are using an incompatible router and cannot use EZ-Connect to complete your remote connection settings, the instructions below will explain how to manually configure your router to give you remote access to your NAS.
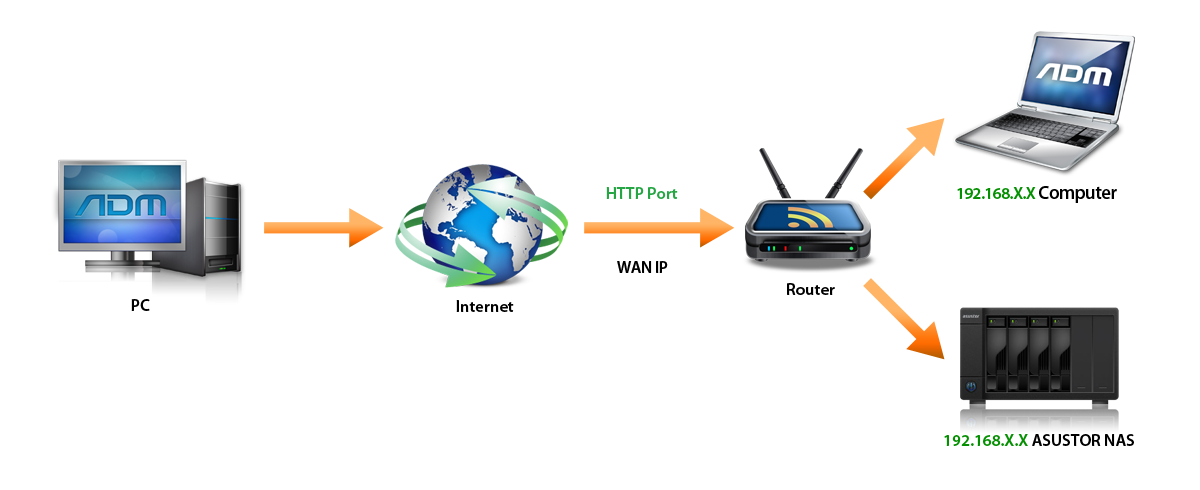
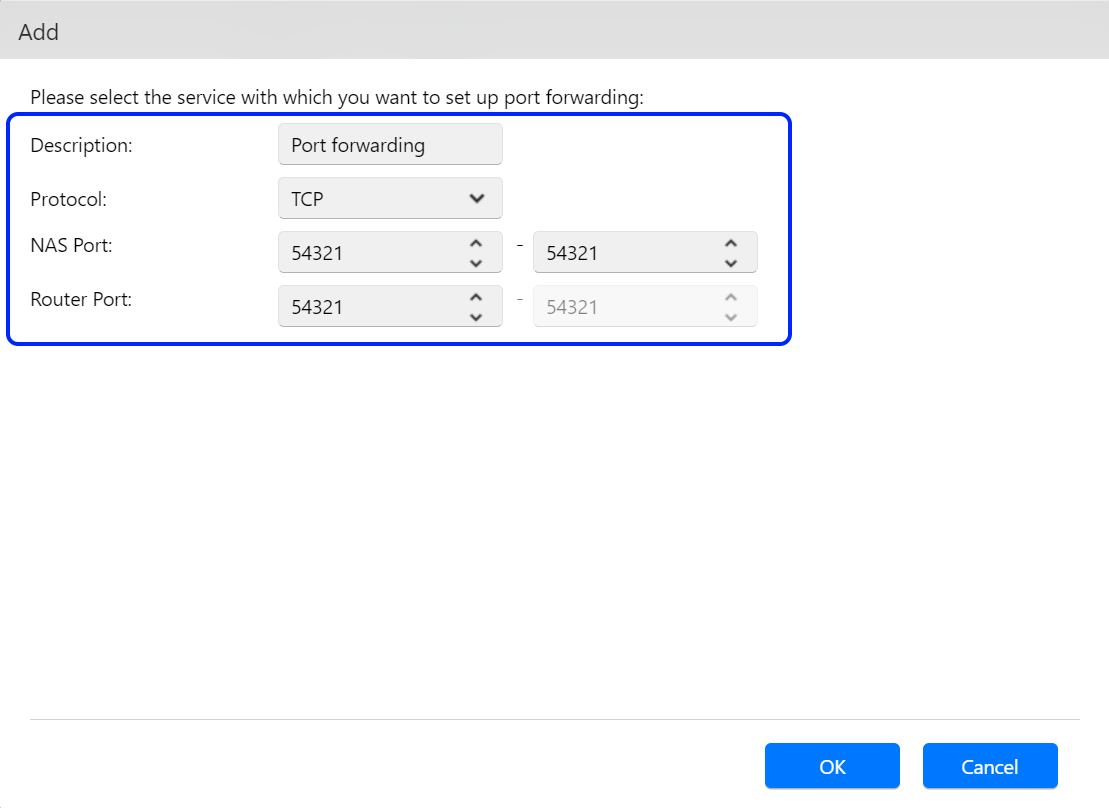
Ports are like telephone extension numbers in that they allow you to quickly find the person or service that you are looking for. To let the NAS on your local area network allow access from devices on the internet, you must first set up the correct port forwarding on your router. This way, when connection requests are received from the internet asking for the appropriate port, the router will know where to direct them.
Before configuring port forwarding please first note your router's IP address, administrator username and password. Usually port forwarding settings are located under one of the following headings on your router's settings page:
In the following example, we will demonstrate how to set up port forwarding on a router made by ASUS.
STEP 1
STEP 2
| Service Name | Port Range | Local IP | Port | Protocol |
|---|---|---|---|---|
| ADM | 8000 | 192.168.2.6 | 8000 | TCP |
As mentioned previously, the IP address of the NAS in our example is 192.168.2.6.

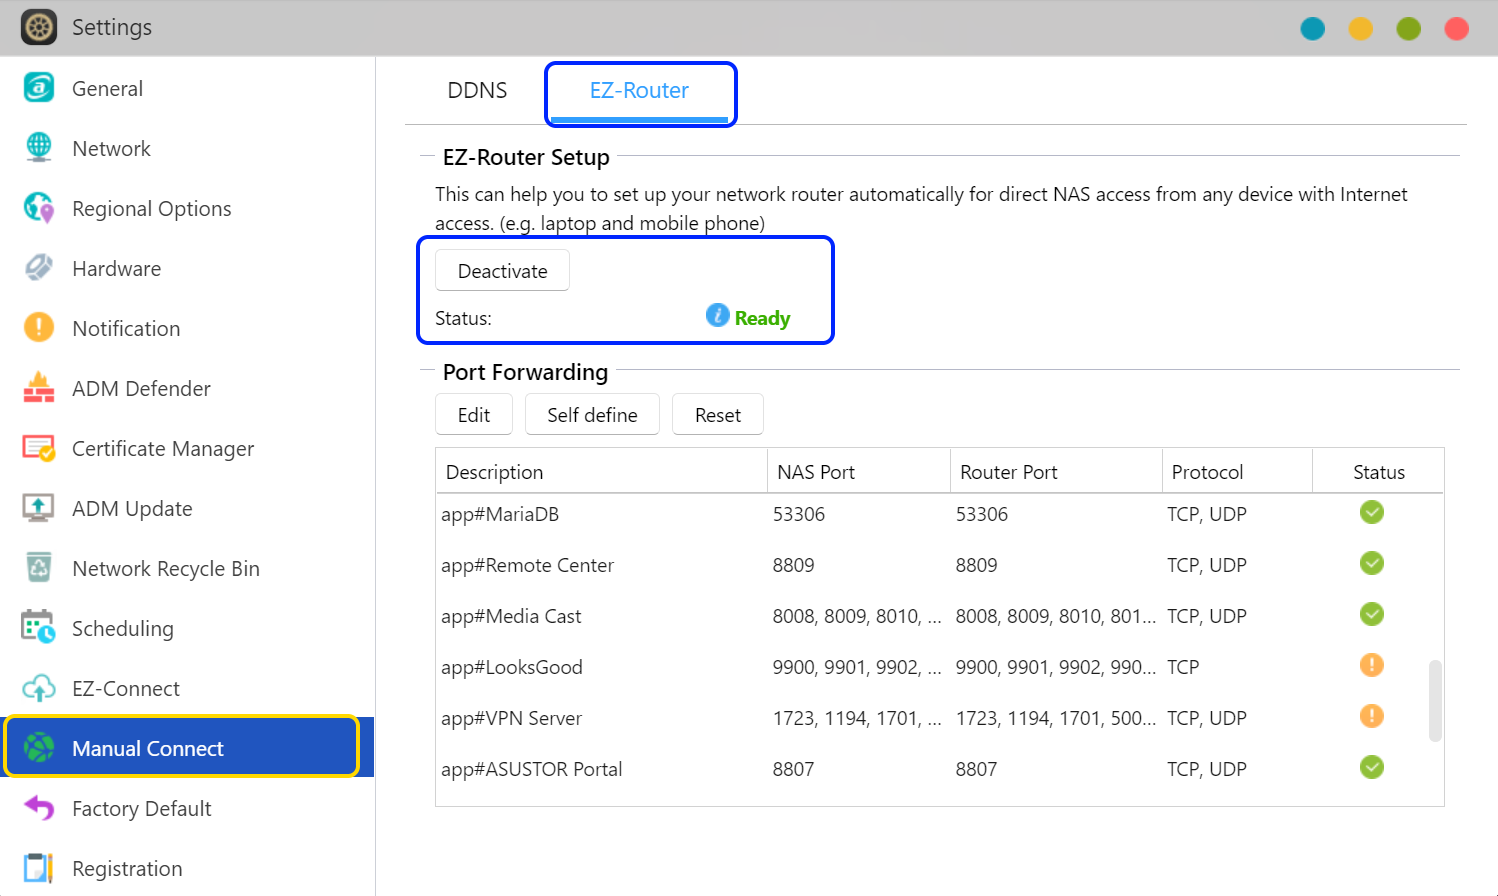
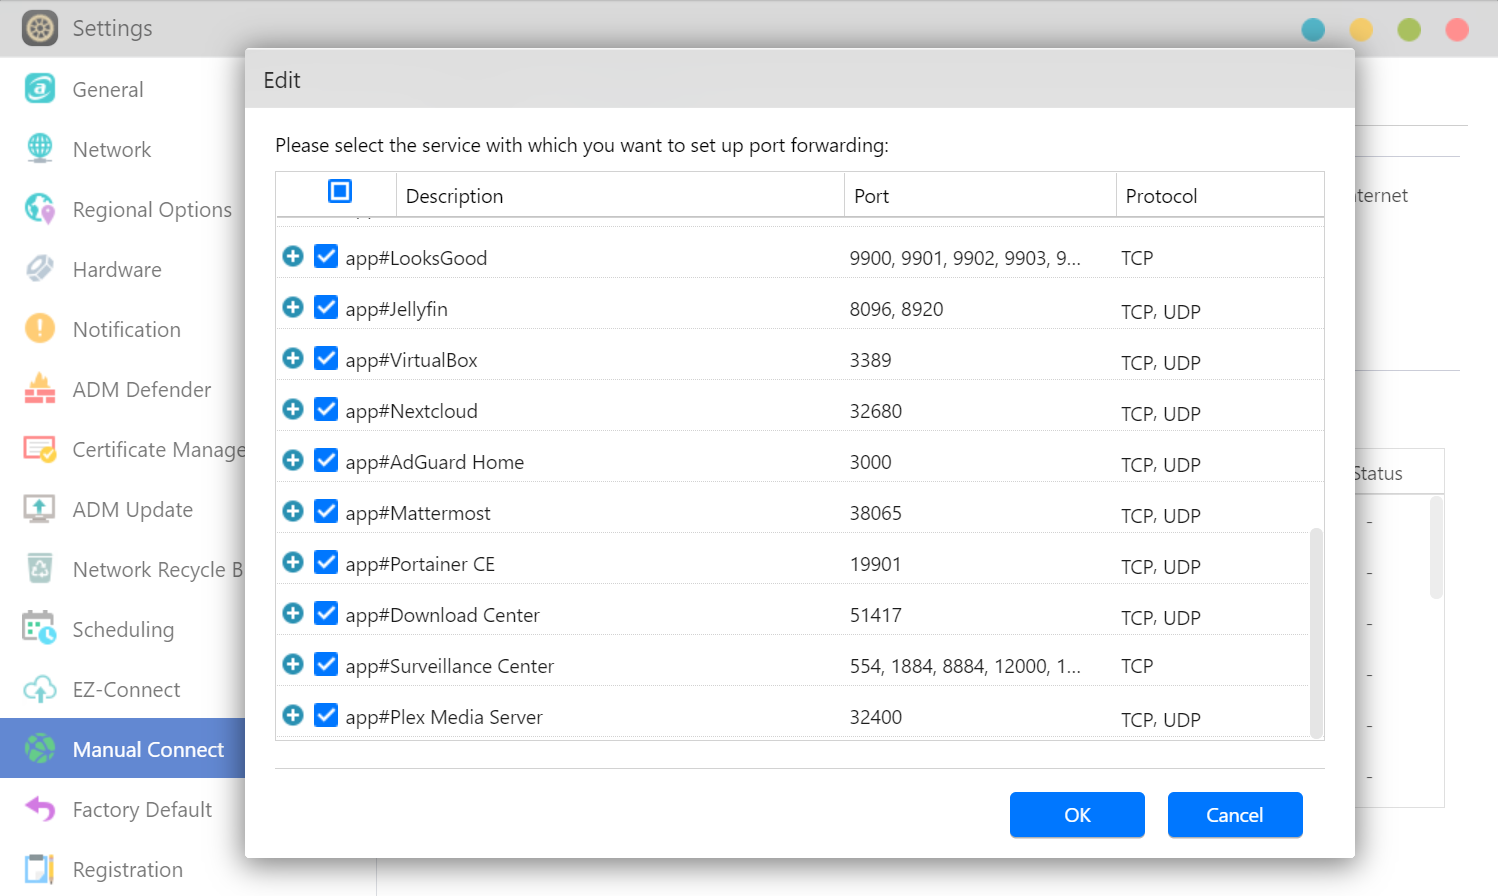
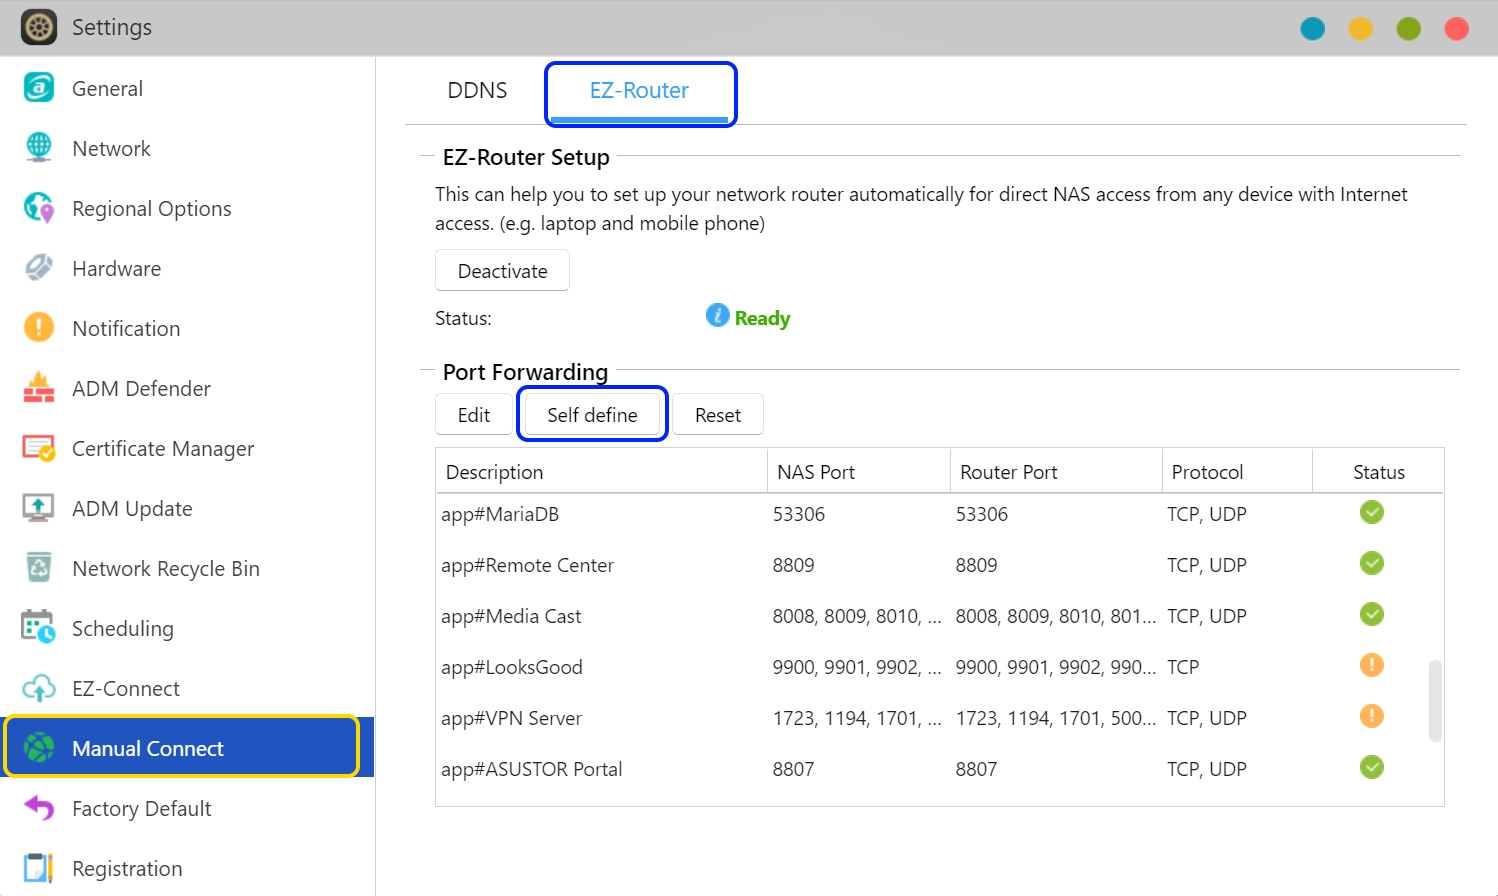
EZ-Connect will open a connection for ADM's Web server to allow for remote access from the Internet. If you wish to open additional services for remote access, the instructions below will help you to do so.
STEP 1
STEP 2
After enabling the EZ-Connect service, ADM will enable the DDNS service of Your_Cloud_ID.myasustor.com. You can also apply for other DDNS services and connect to the NAS through this Domain name.
DNS Challenge support for myasustor.com makes connecting to your NAS securely even easier. Port 80 no longer needs to be forwarded for Let’s Encrypt certificates. IPv6 support has also been added to myasustor.com for increased support. (ADM 4.1)
STEP 1
STEP 2
ADM 4.0:
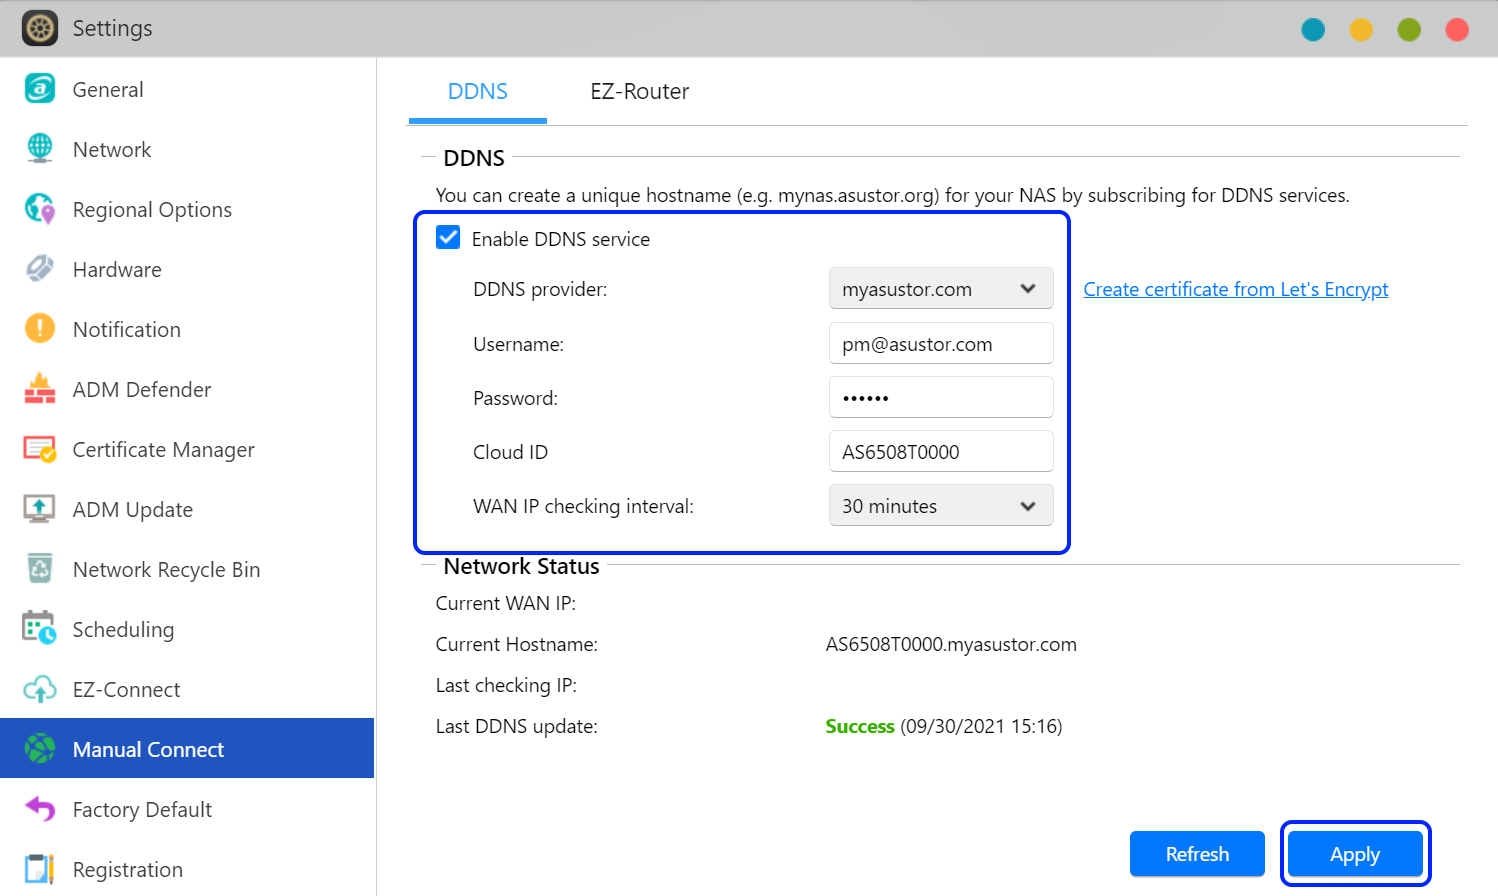
ADM 4.1:

After enabling the DDNS service, you are now ready to connect to your NAS using the internet.
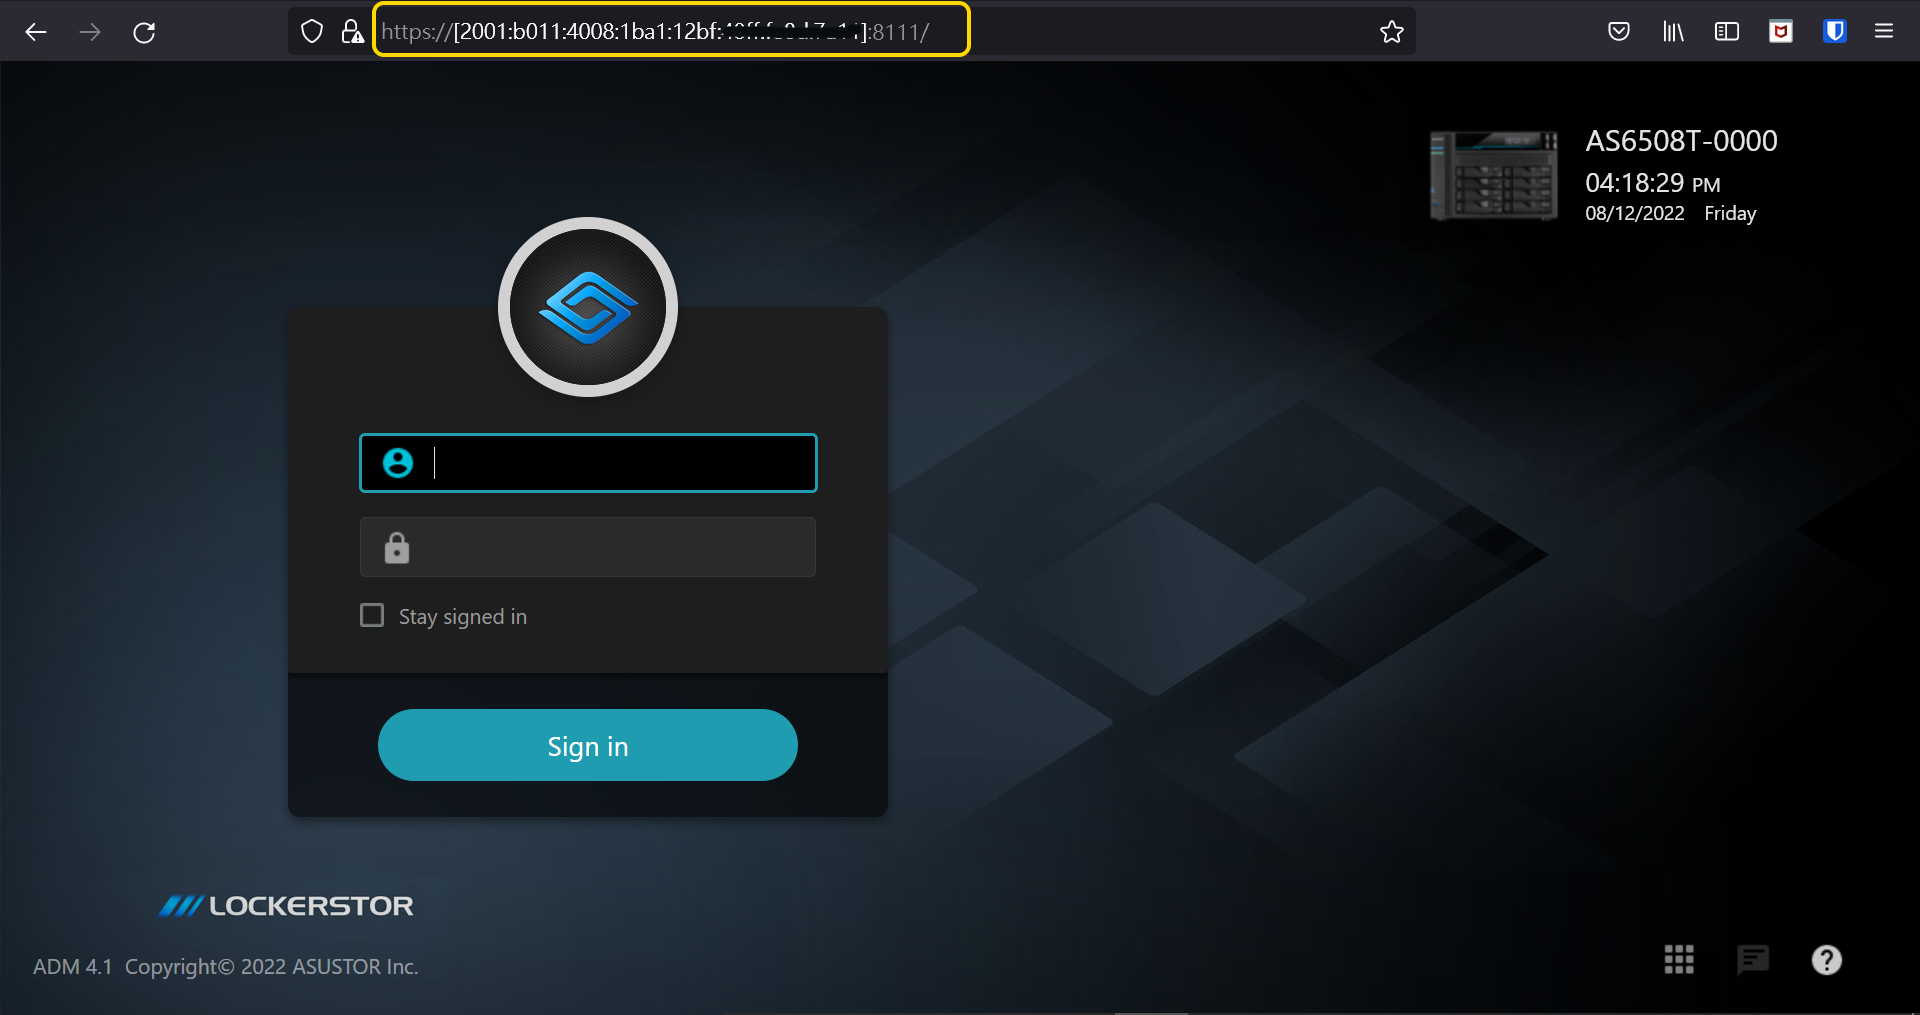
4.2 Connect to NAS using IPv6 URL
If IPv6 is available on your network, you can connect to your NAS using an IPv6 URL.
Any devices or services that can be accessed remotely on the Internet is at risk of being attacked, ASUSTOR strongly recommends taking the following actions to ensure your data is secure:
Click here to read more about how to protect your data from ransomware.
Copyright © 2025 ASUSTOR Inc.
