In the following example, we will configure the ASUSTOR NAS Syslog server.
STEP 1
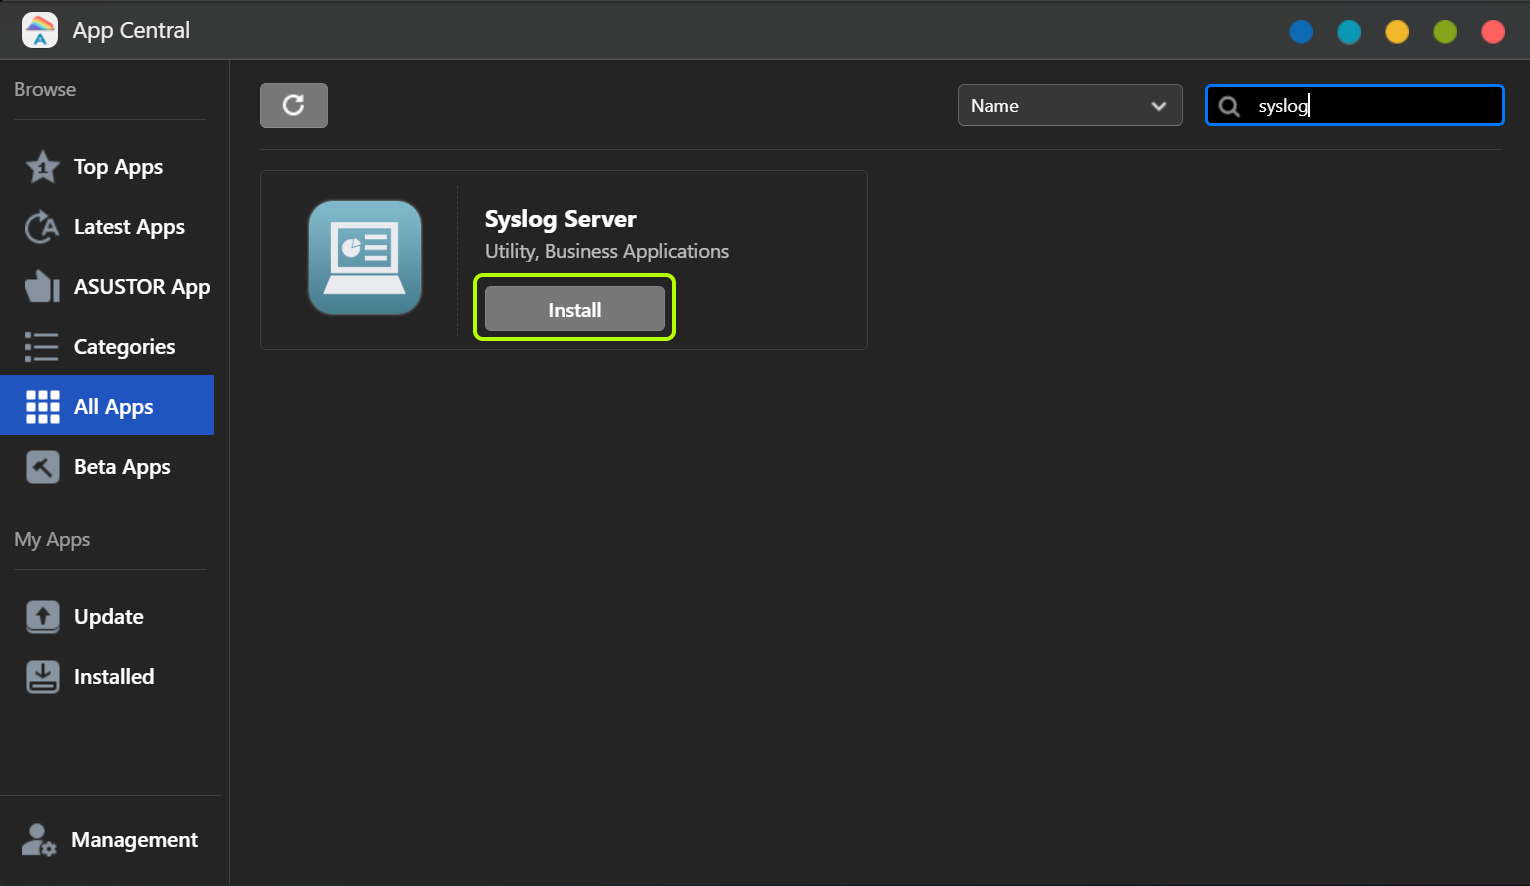
Before you start, log into ADM from a web browser, then search for and install [Syslog Server] from [App Central].
STEP 2
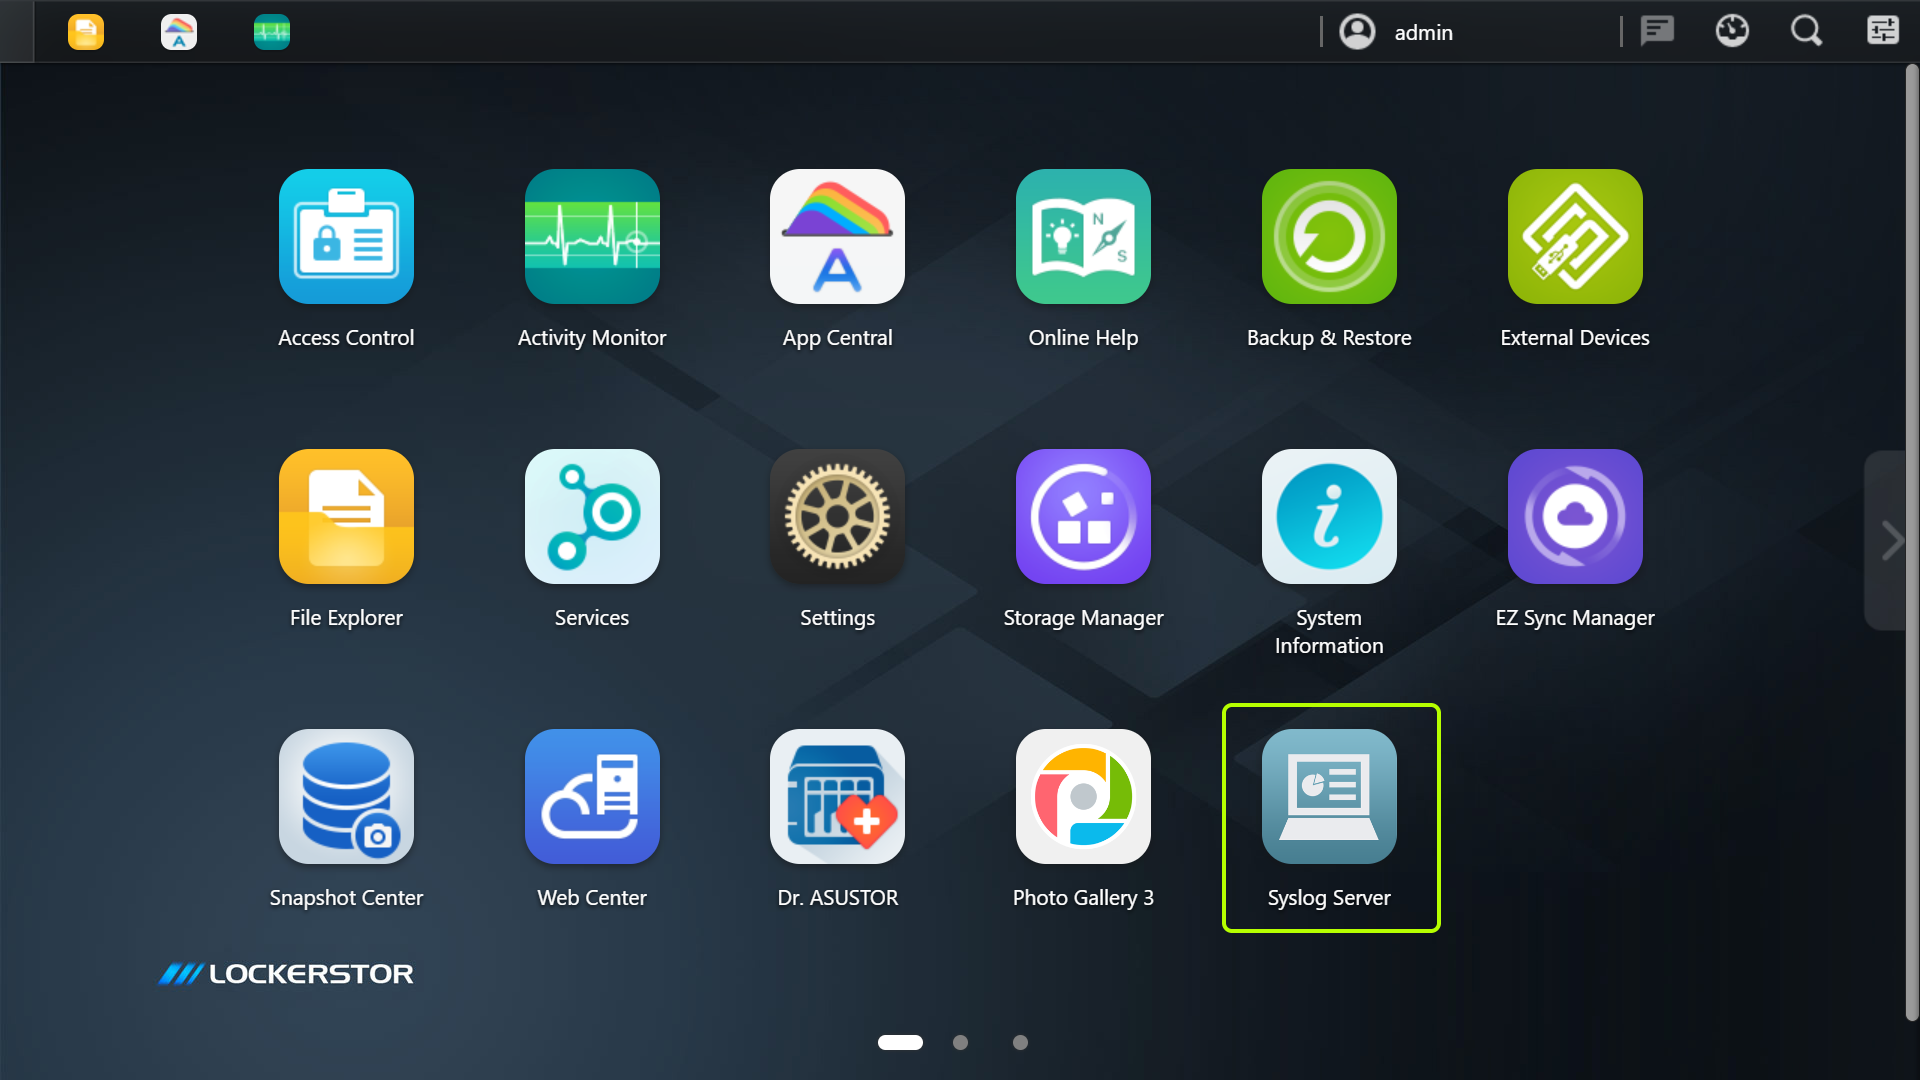
Once the installation is complete, click the [Syslog Server] icon in ADM to access it.
STEP 3
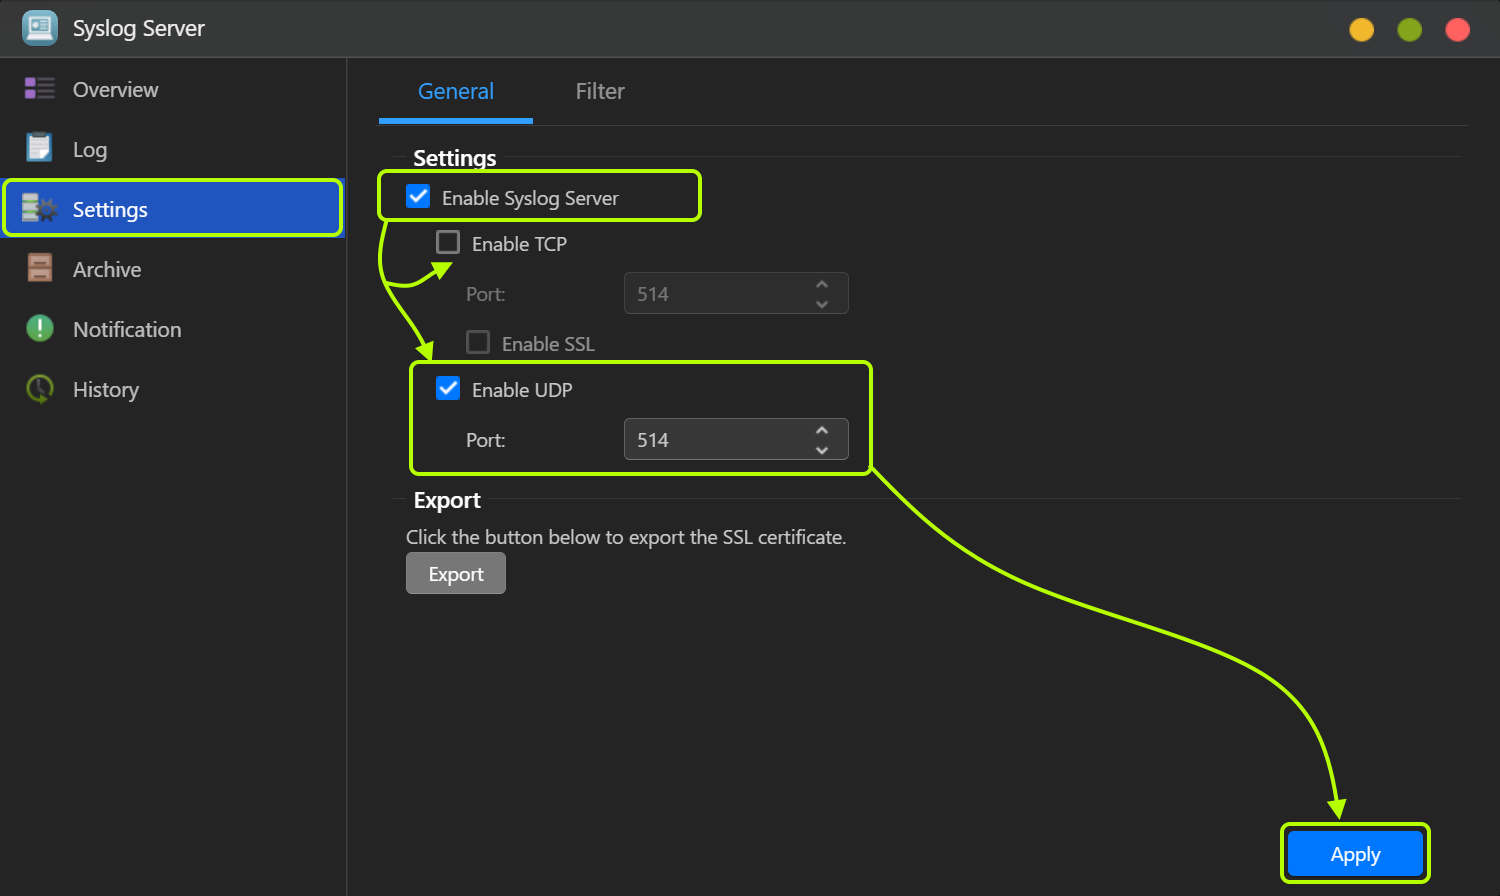
Select [Settings] from the left panel, check [Enable Syslog Server] and choose [Enable TCP] or [Enable UDP], then click [Apply].
Note:
All syslog-compatible clients can send logs via UDP, but not all syslog clients support TCP transmission. Therefore, after specifying the receiving protocol (TCP/UDP) on Syslog Server, make sure that all syslog clients can use the same protocol to send logs.
The default port number for the Syslog protocol is 514. If you change the port number on Syslog Server, use the same port on the client side.
ASUSTOR Syslog Server supports encrypted TCP transmission over SSL. If you enable SSL for TCP reception on Syslog Server, click the [Export] button below to save the SSL certificate on your local computer and import it to all Syslog clients.
If there are multiple Syslog Servers on the same local network, do not configure them in a loop. For example, devices A, B, C support Syslog Server and Syslog Client simultaneously. If the syslog route is defined as AčBčCčA , it is a loop. Messages will be repeatedly sent in a loop, which may cause the entire LAN to fail.
STEP 4
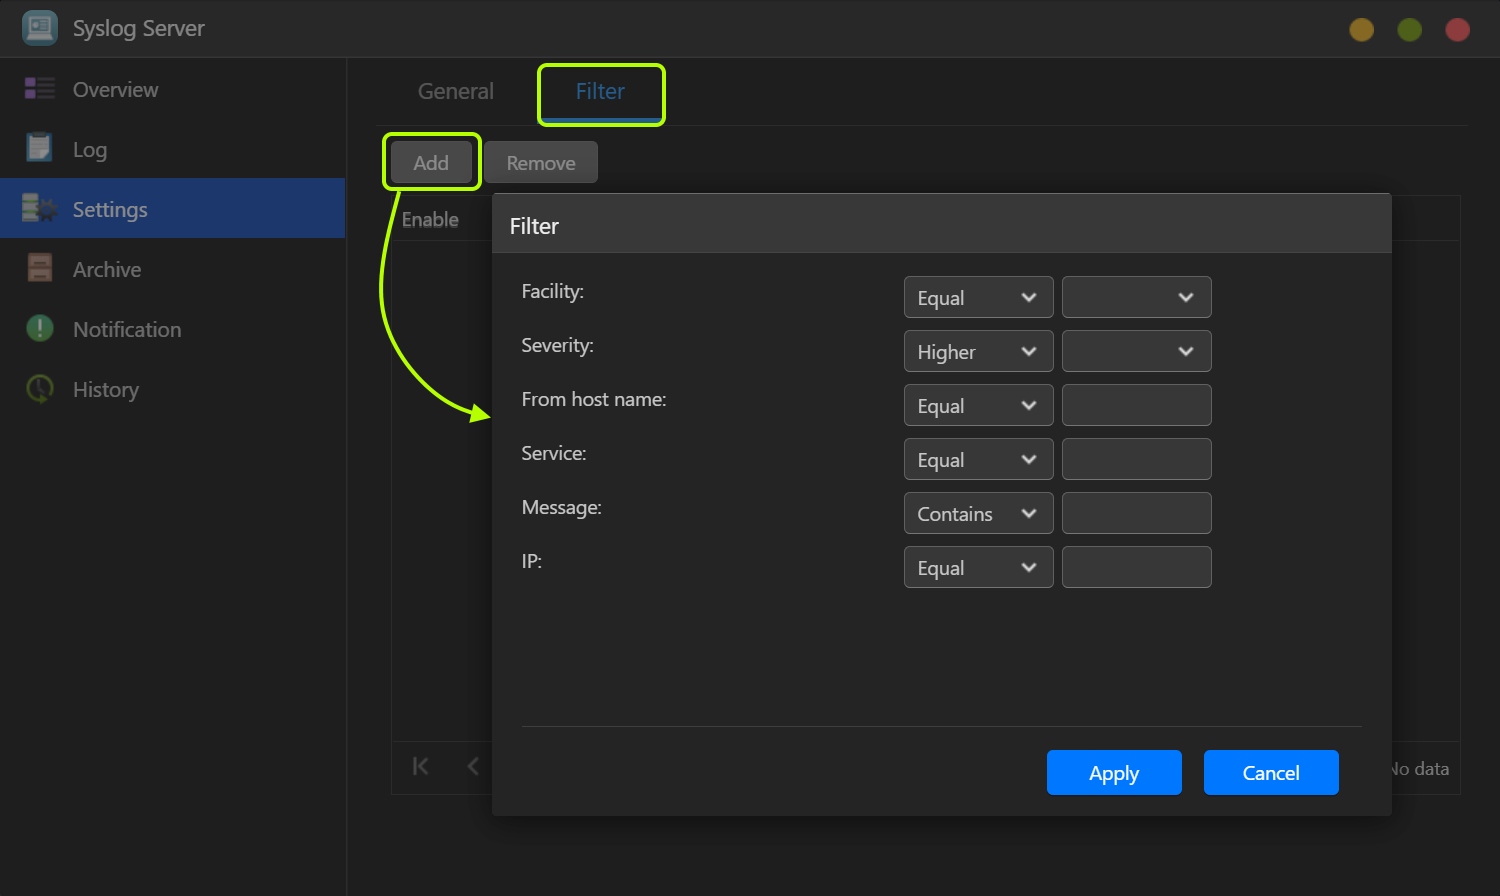
Go to the [Filter] tab and click the [Add] button to create filters. Syslog Server will only receive and save logs that meet the specified criteria.
Subject: The following parameters are provided in accordance with RFC 3164:
Value
Description
auth
authorization messages
authpriv
Non-system authorization messages
cron
planning demon
daemon
systemic demons
ftp
demon FTP
kern
kernel news
lpr
line printer subsystem
mail
postal system
news
network messaging subsystem
security
safety news
syslog
messages generated internally by syslogd
user
user-level messages
uucp
UUCP subsystem
local0
local use 0 (local0)
local1
local use 1 (local1)
local2
local use 2 (local2)
local3
local use 3 (local3)
local4
local use 4 (local4)
local5
local use 5 (local5)
local6
local use 6 (local6)
local7
local use 7 (local7)
Relevance: the following parameters are provided in accordance with RFC 3164:
Value
Description
Emerg
The system is not usable
Alert
Action should be taken immediately
Crit
Critical conditions
Err
Error conditions
Warning
Warning conditions
Notice
Normal but significant condition
Info
News releases
Debug
Debugging messages
2. Syslog client configuration
In the following example, we will configure the ASUSTOR NAS as a syslog client. As for syslog client settings for other network devices, refer to their user manuals.
STEP 1
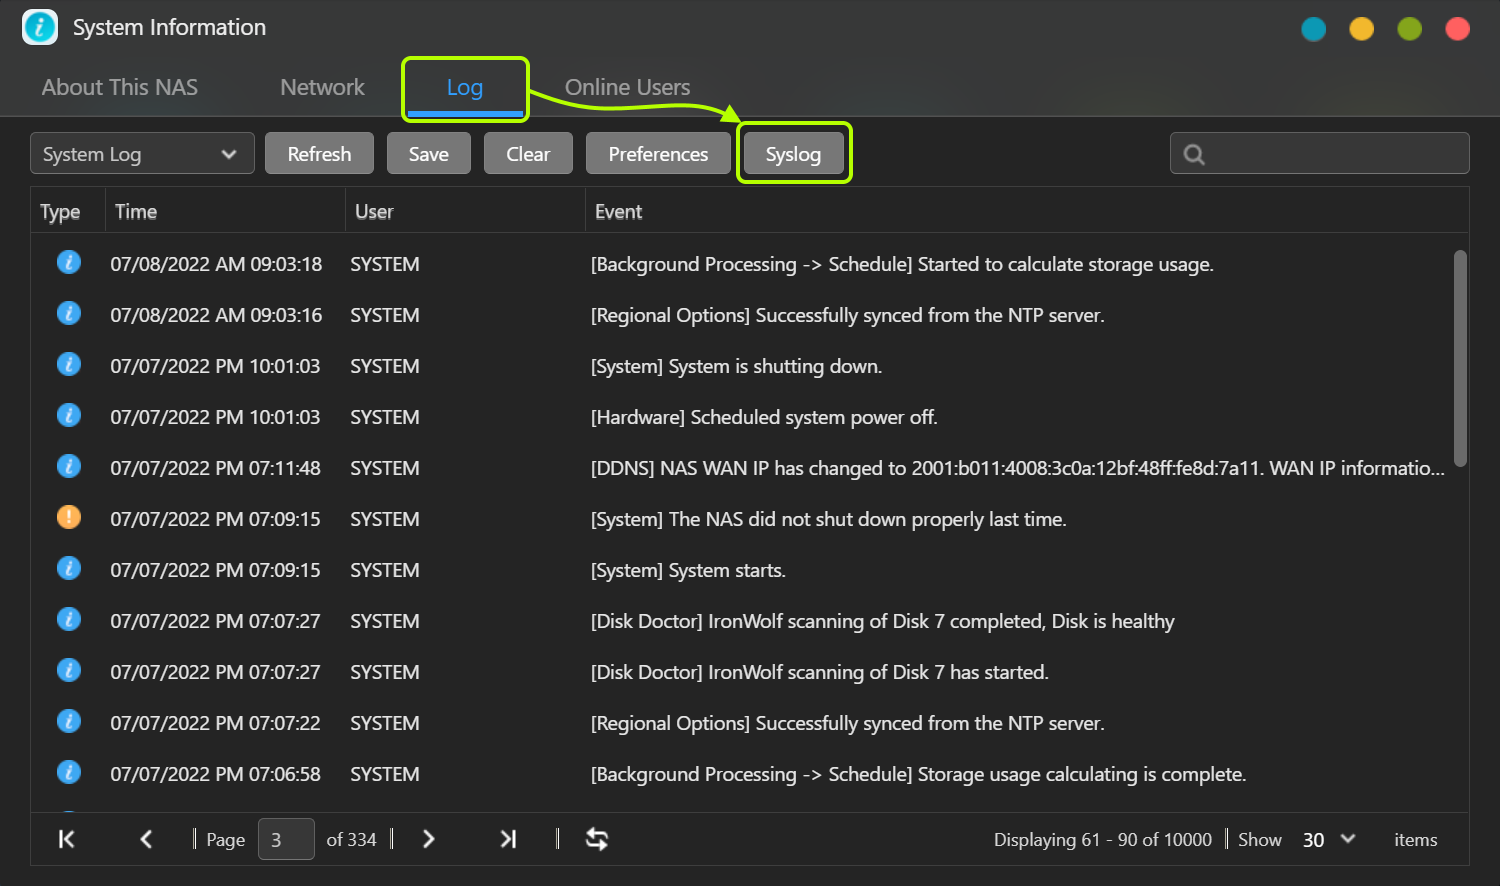
Click [System Information] in ADM, select the [Log] tab and click the [Syslog] button.
STEP 2
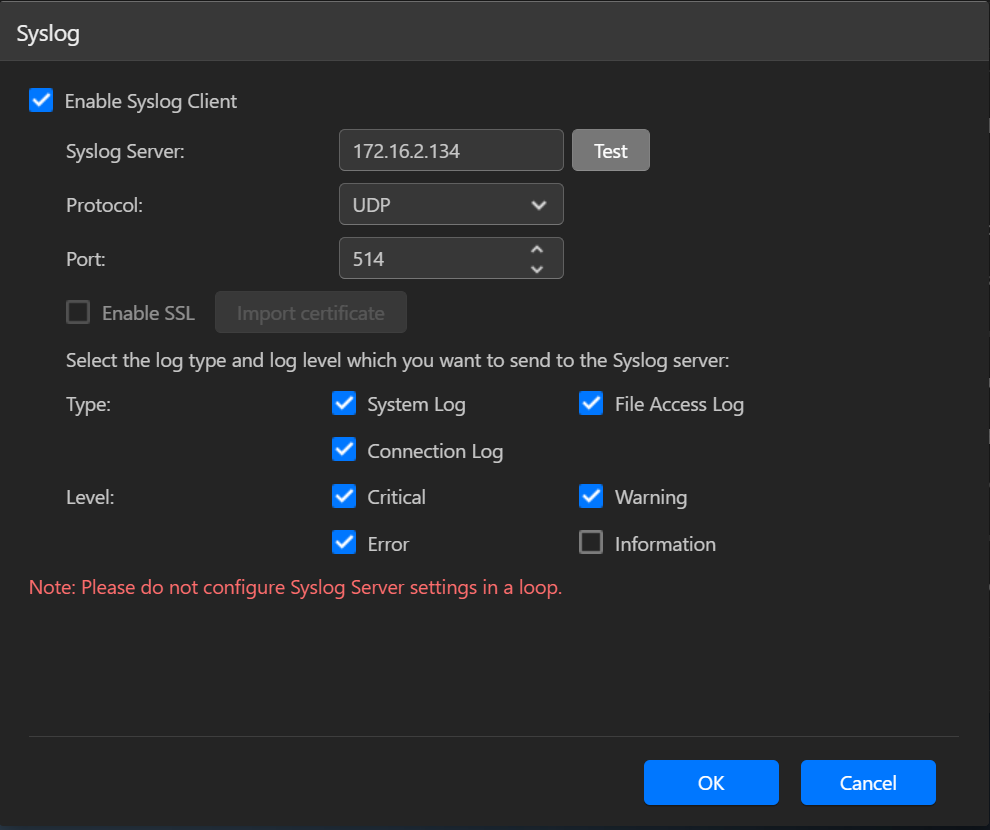
Select [Enable Syslog Client], and then enter the Syslog server's IP address, protocol type and port number. Select the type and level of log you want to send to the Syslog server, and then click [OK].
Note: If there are multiple Syslog Servers on the same local network, do not configure them in a loop.
3. Syslog server management
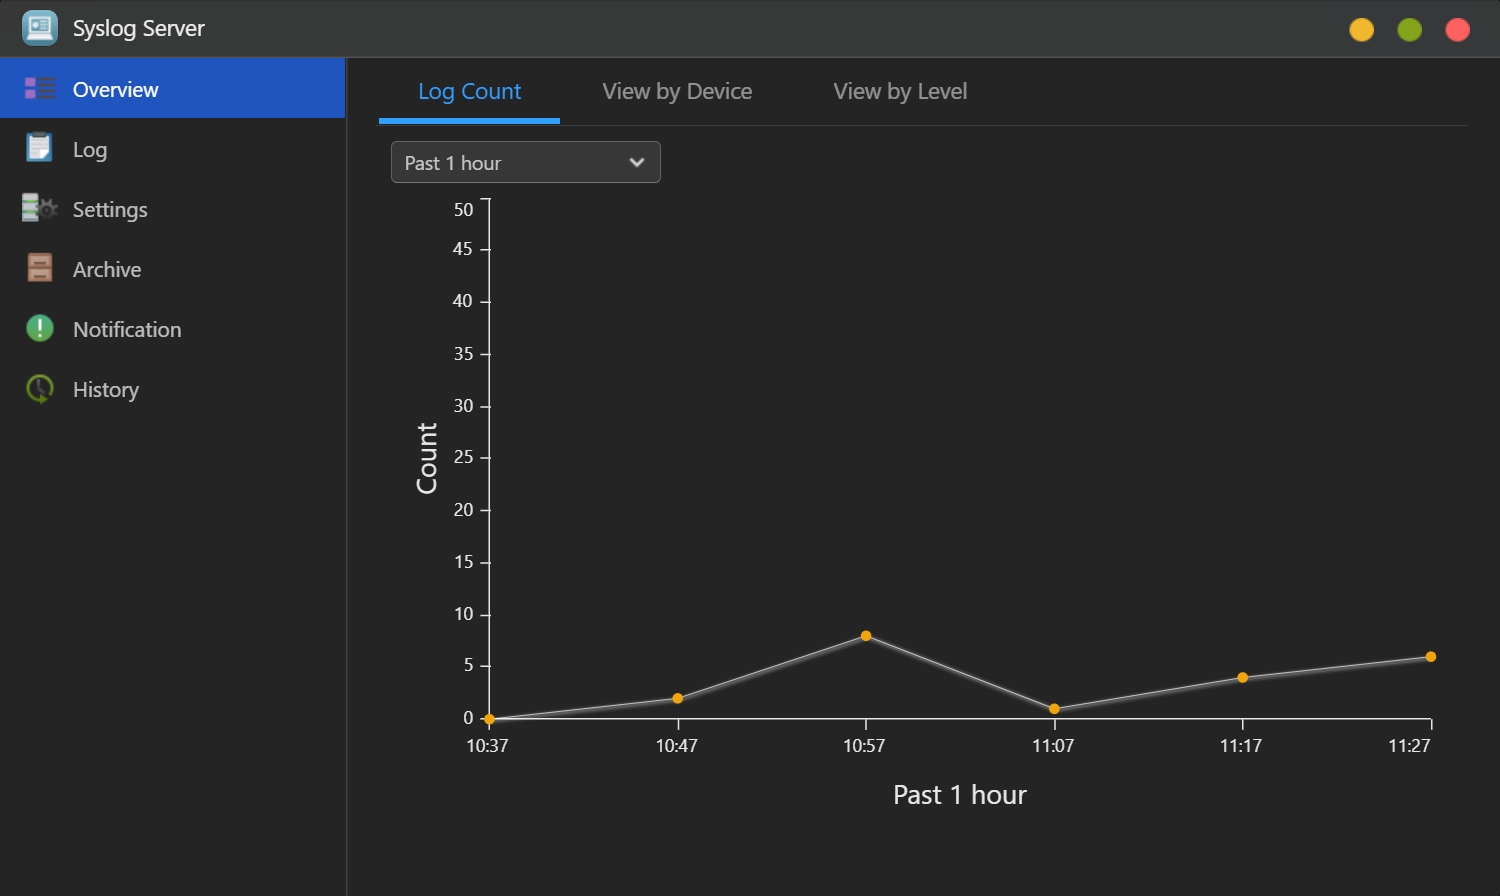
3.1 Overview
There are 3 types of graphical interfaces that allow managers to quickly view the number and distribution of logs.
3.2 Log
Here you can see all the logs received.
Export: Here you can select the export file format (HTML or CSV).
Latest log: Use this button to switch between recent and archived logs.
Clear: Use this button to clear all recent logs.
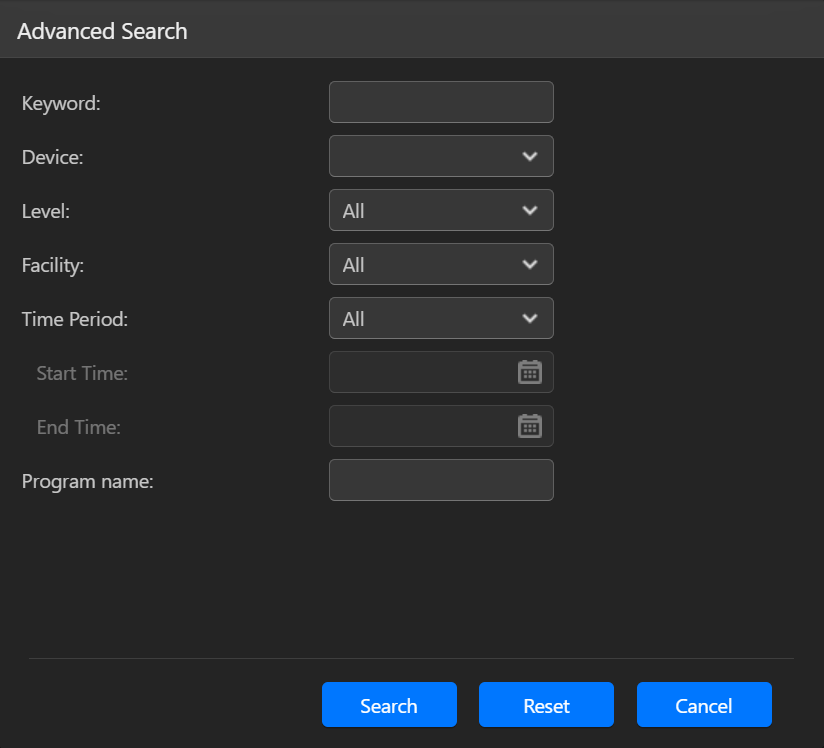
Advanced Search: Here you can define search conditions (keyword, device, level, object, period, program name) to display specific logs.
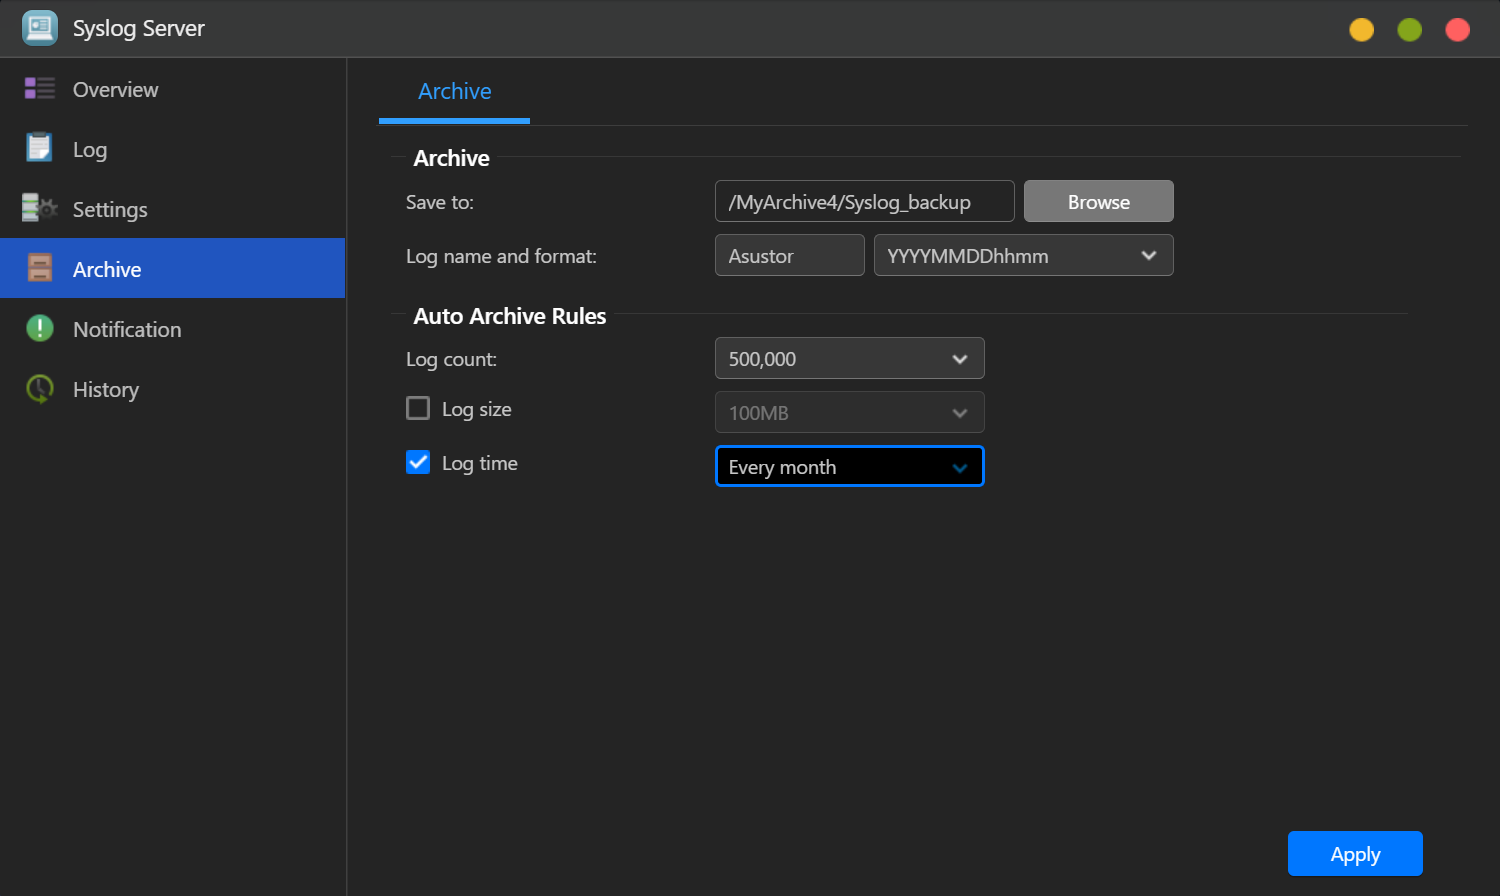
3.3 Archive
Save in: Here you can define the folder where the archived logs will be saved.
Log name and format: here you can define naming rules for automatically archived logs.
Automatic archiving rules: Here you can define criteria (log size, log number, log time) for the system to automatically archive logs.
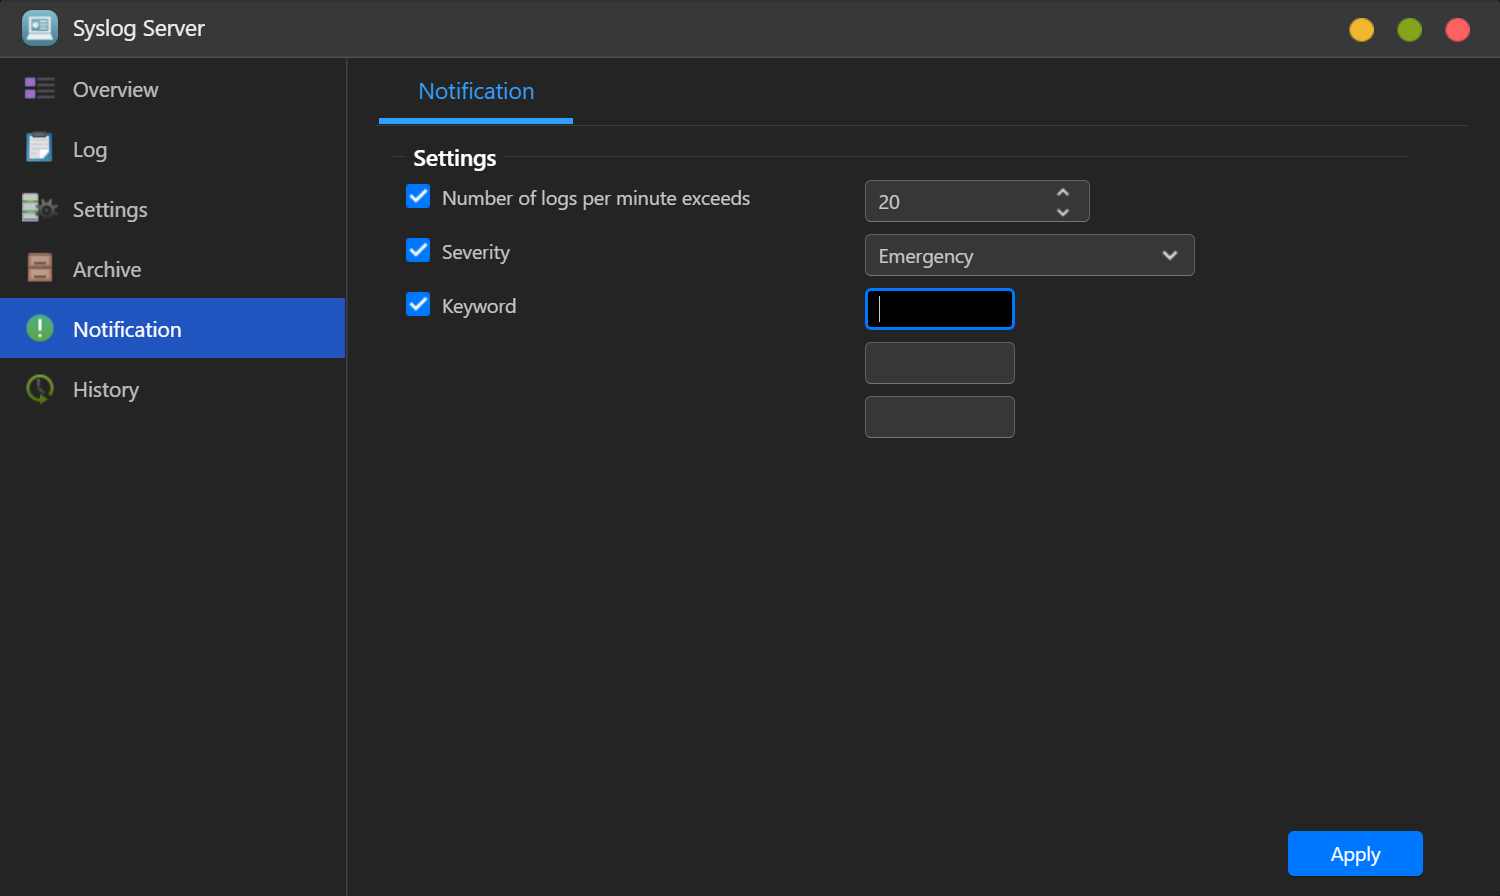
3.4 Notification
Here you can define rules to receive email notifications when certain logs are received or when certain events occur.
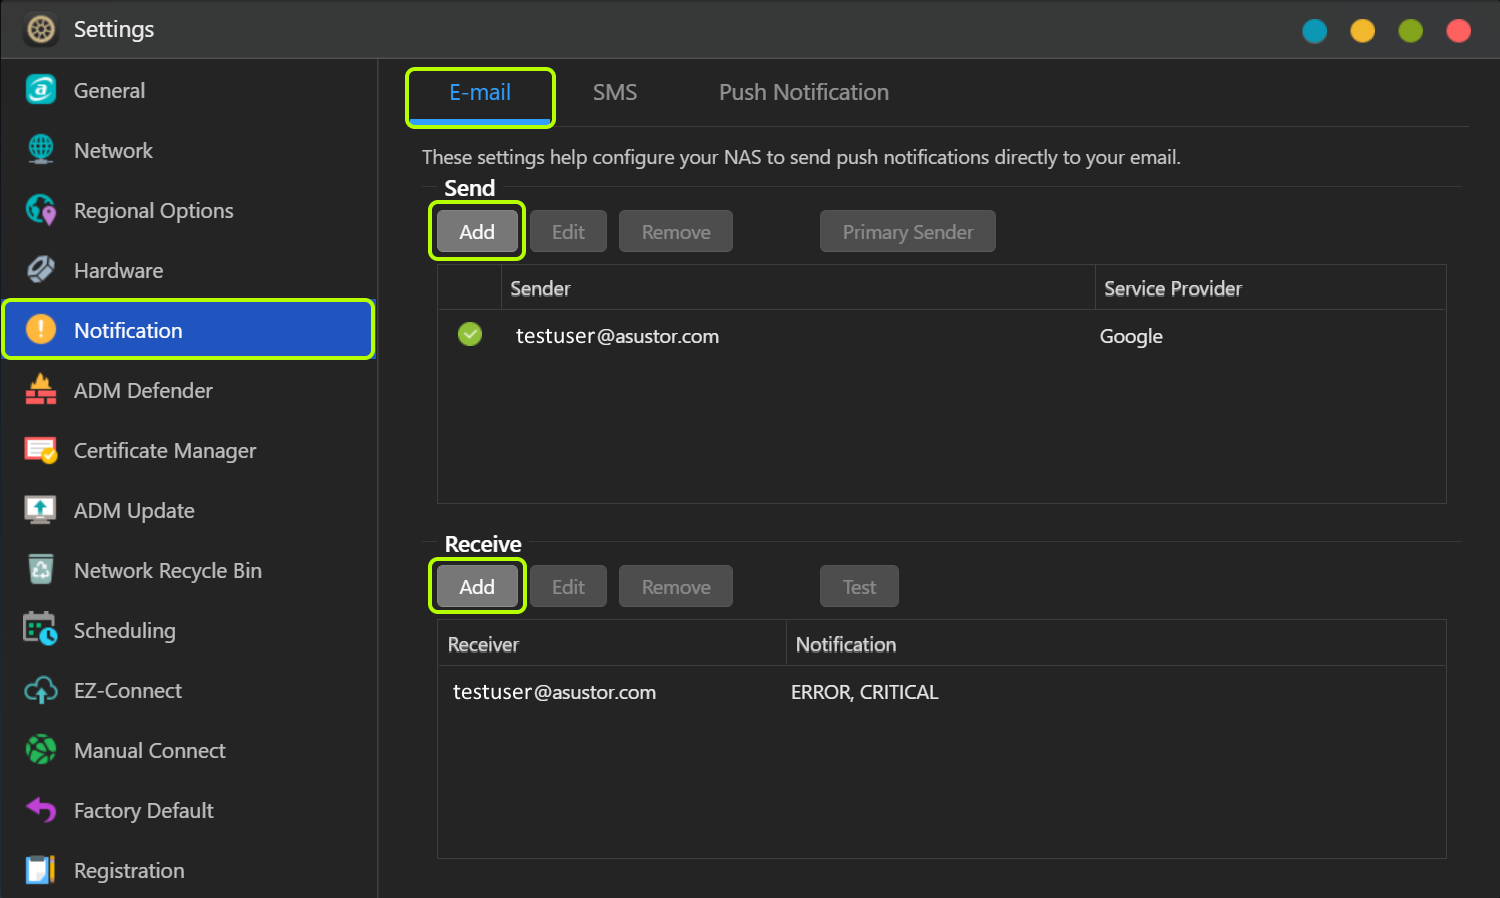
Note: Before enabling this feature, go to [Settings] → [Notification] in ADM and first complete the email sender configurations in the [Send] tab.