We use cookies to help us improve our webpage. Please read our Cookie Policy .
2025-02-24
Upon completion of this course you should be able to:
Course Prerequisites:
None
Students are expected to have a working knowledge of:
N/A
1. Introducing ASUSTOR EZ Sync
1.2 ASUSTOR EZ Sync - PC Sync tool
2. Introducing EZ Sync Manager
3.1 Installing ASUSTOR EZ Sync
3.2 Settings and operation
3.3 Delete synchronisation tasks
4. Using ASUSTOR mobile apps - Viewing synchronized folders on AiData
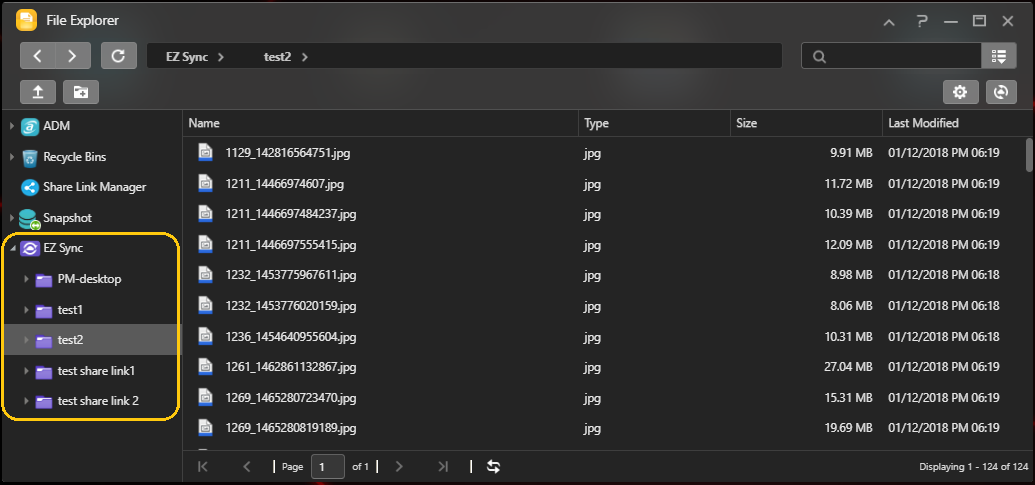
5. Viewing Synchronized Folders with File Explorer
ASUSTOR EZ Sync is a new feature on ADM3.2. It is for synchronizing data between computers and your NAS. Turning your NAS into a personal cloud space like Dropbox™ with ample capacity at your fingertips with historical version management. If a file is unintentionally overwritten with the wrong information, it can be restored using a previously saved backup copy. ASUSTOR EZ Sync includes two parts, EZ Sync Manager which is preinstalled on every NAS and ASUSTOR EZ Sync which can be installed on your PC.
Note: It is recommended to turn on the EZ Connect option while using ASUSTOR EZ Sync.
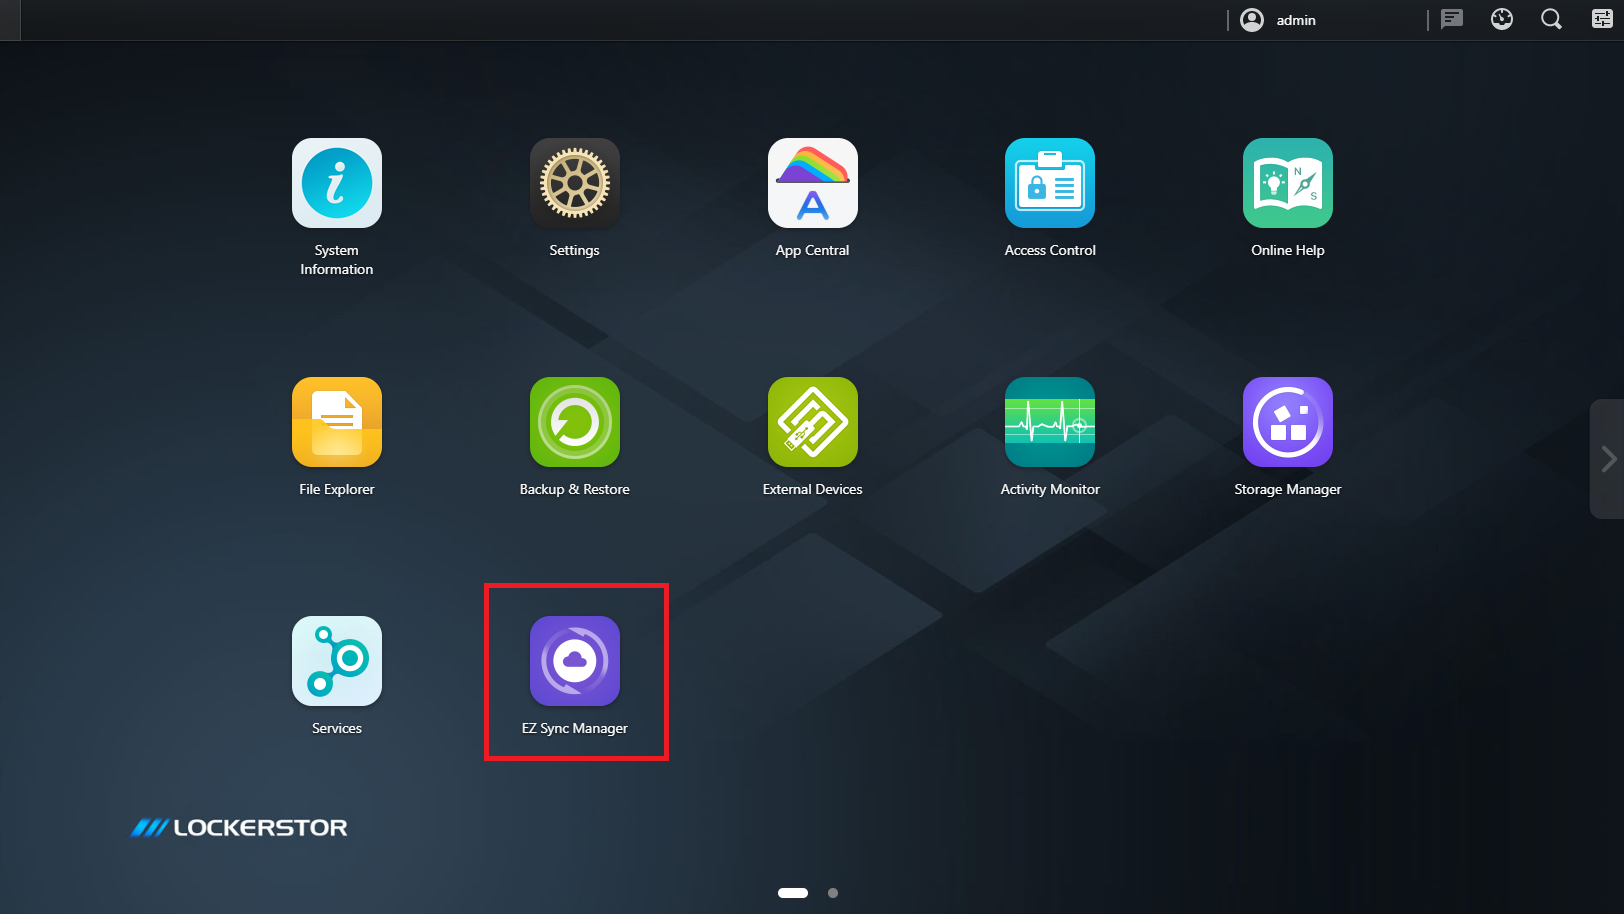
Please upgrade ADM to version 3.2 or above. EZ Sync Manager is preinstalled on ADM’s Desktop.
The EZ Sync folder from system volume can be found from EZ Sync Manager or you can find it from File Explorer under EZ Sync Manager tab.
1.2 ASUSTOR EZ Sync for Windows.
How to obtain: Please download from EZ Sync Manager or from the ASUSTOR official website.
Note: ASUSTOR EZ Sync currently only supports Windows.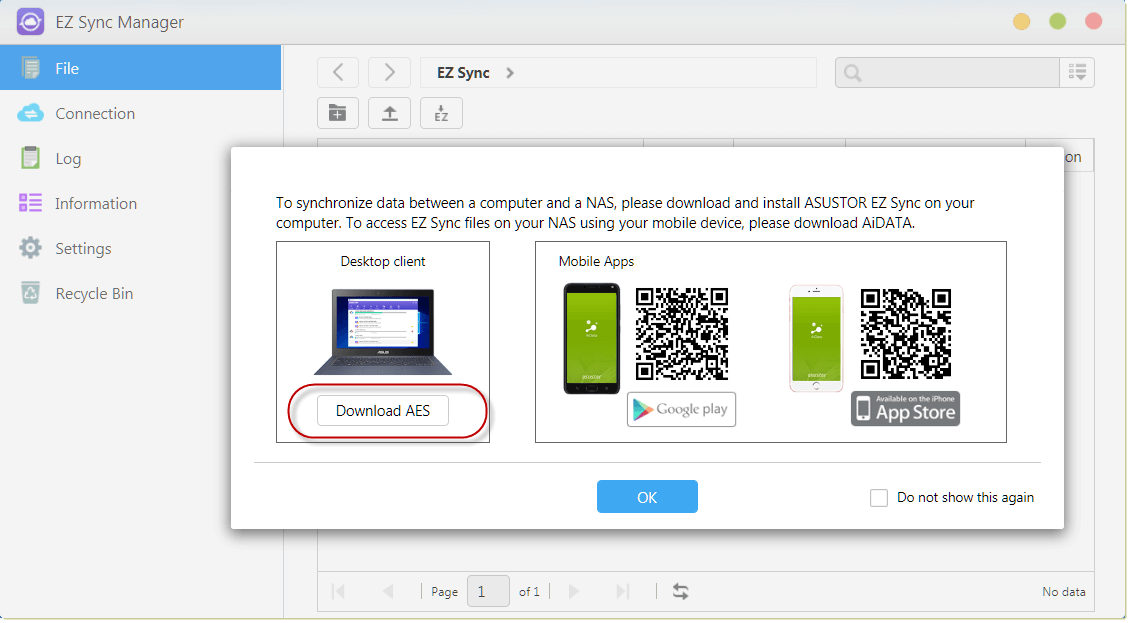
2.1 File
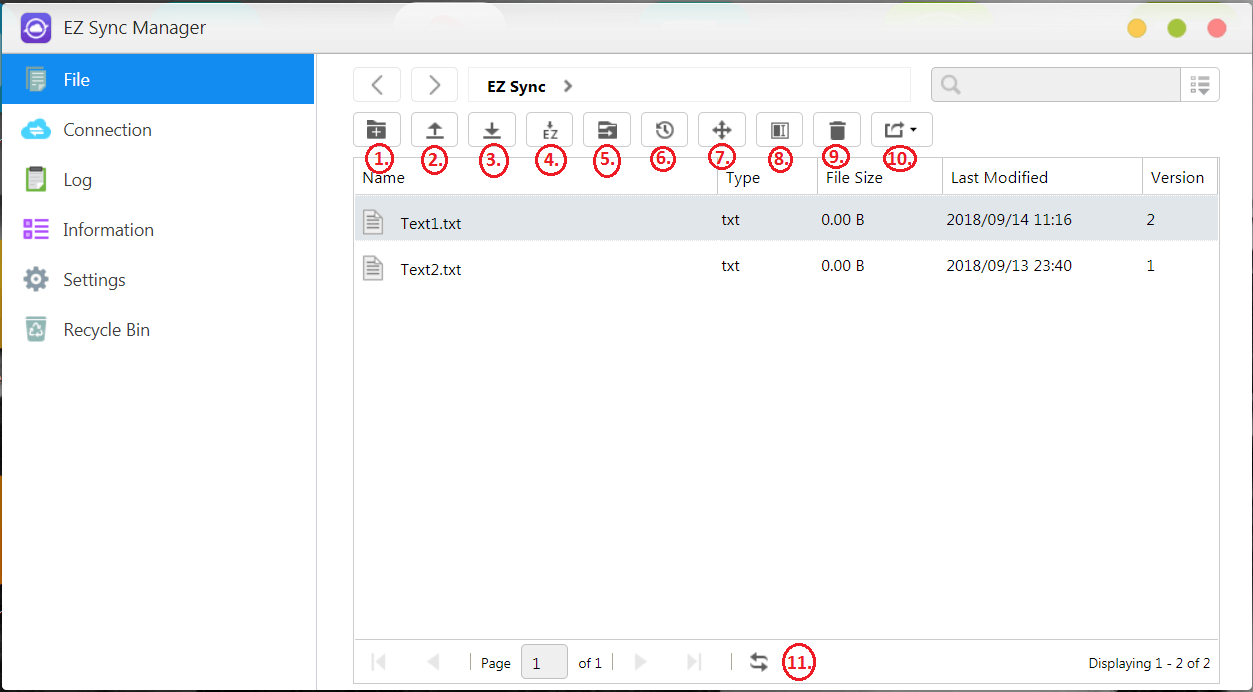
1. Create Folder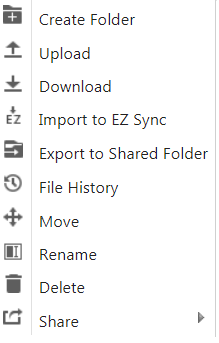
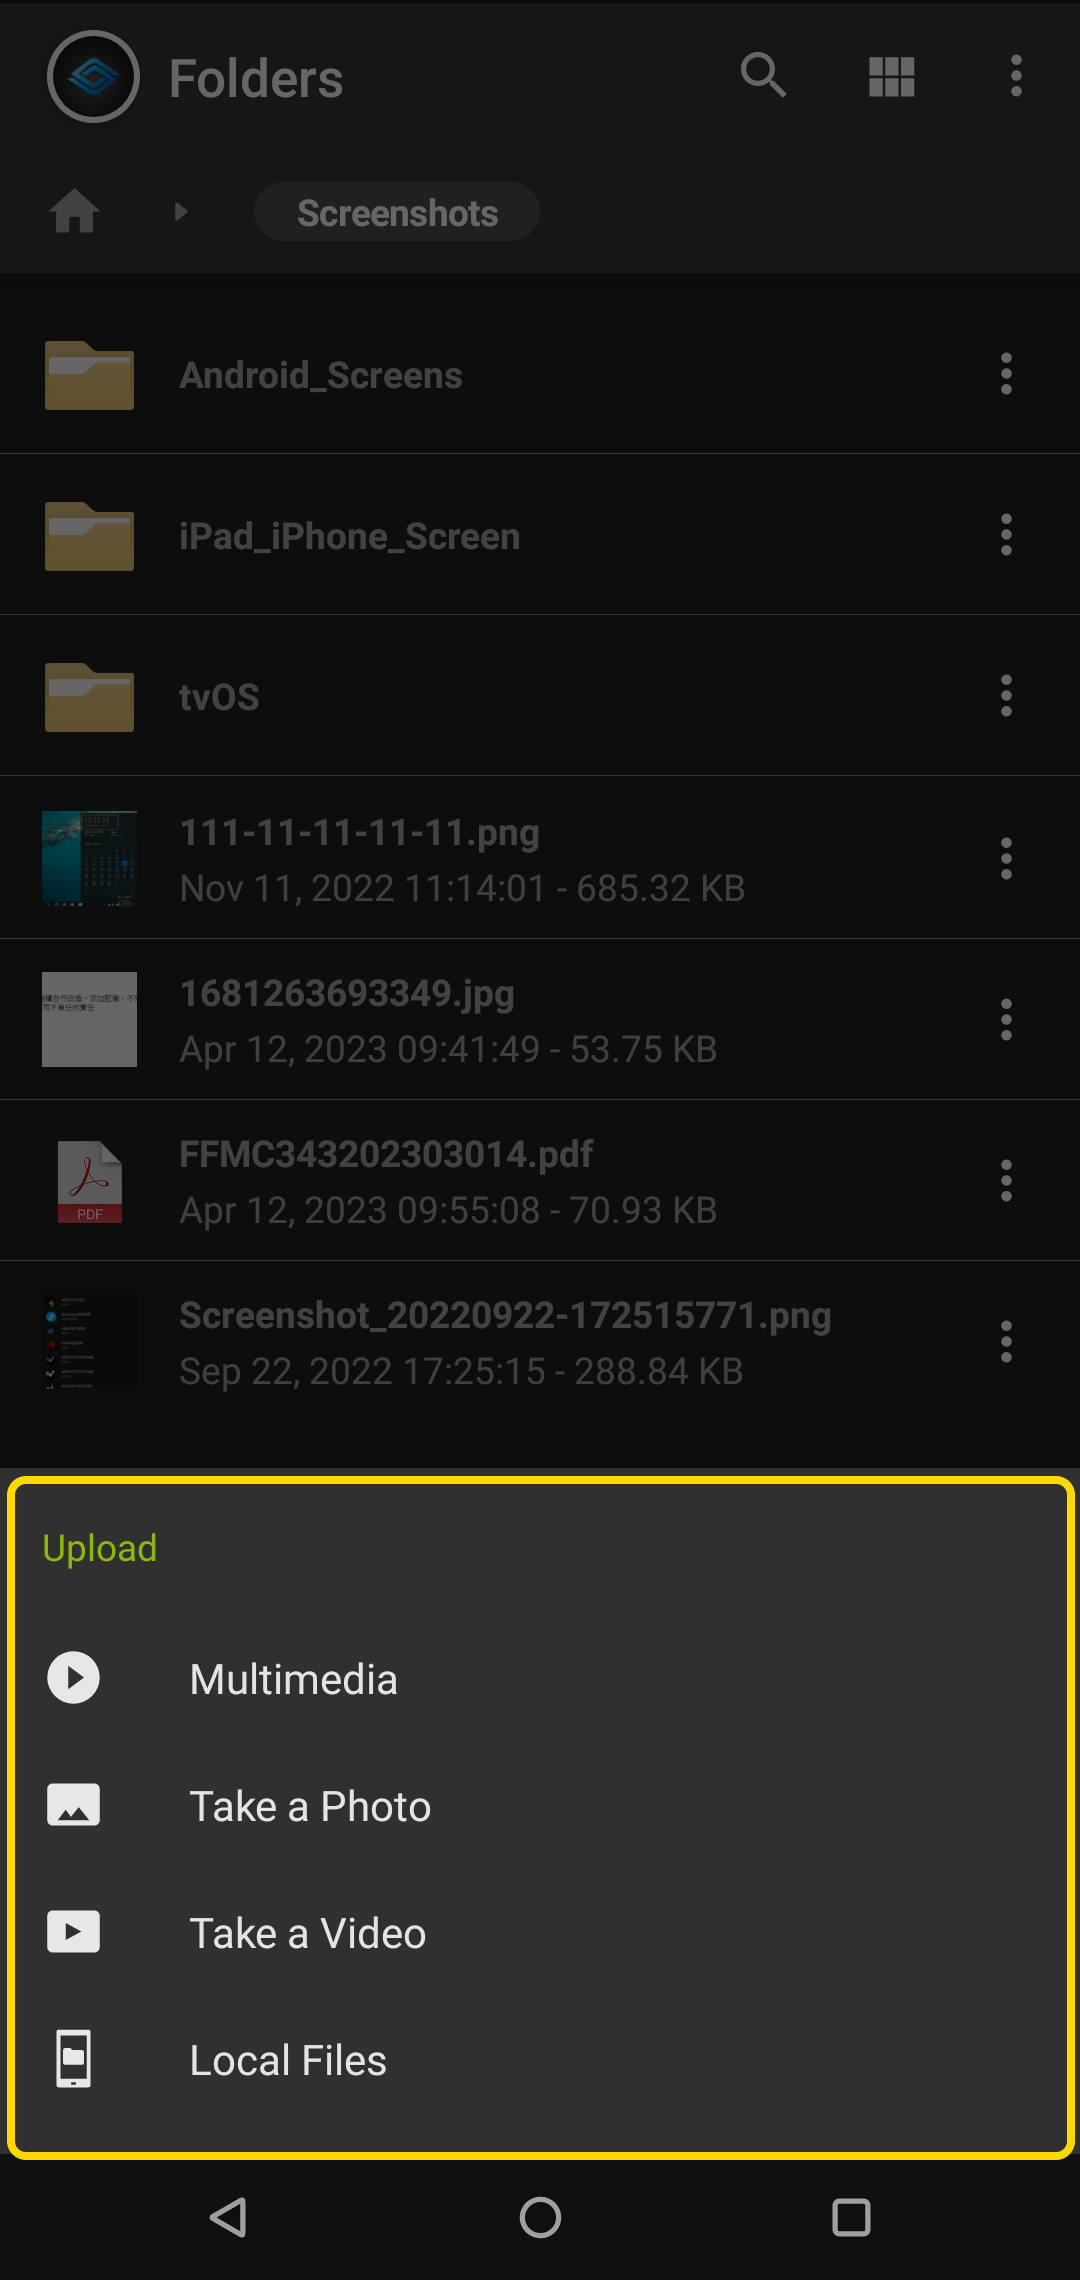
2. Upload
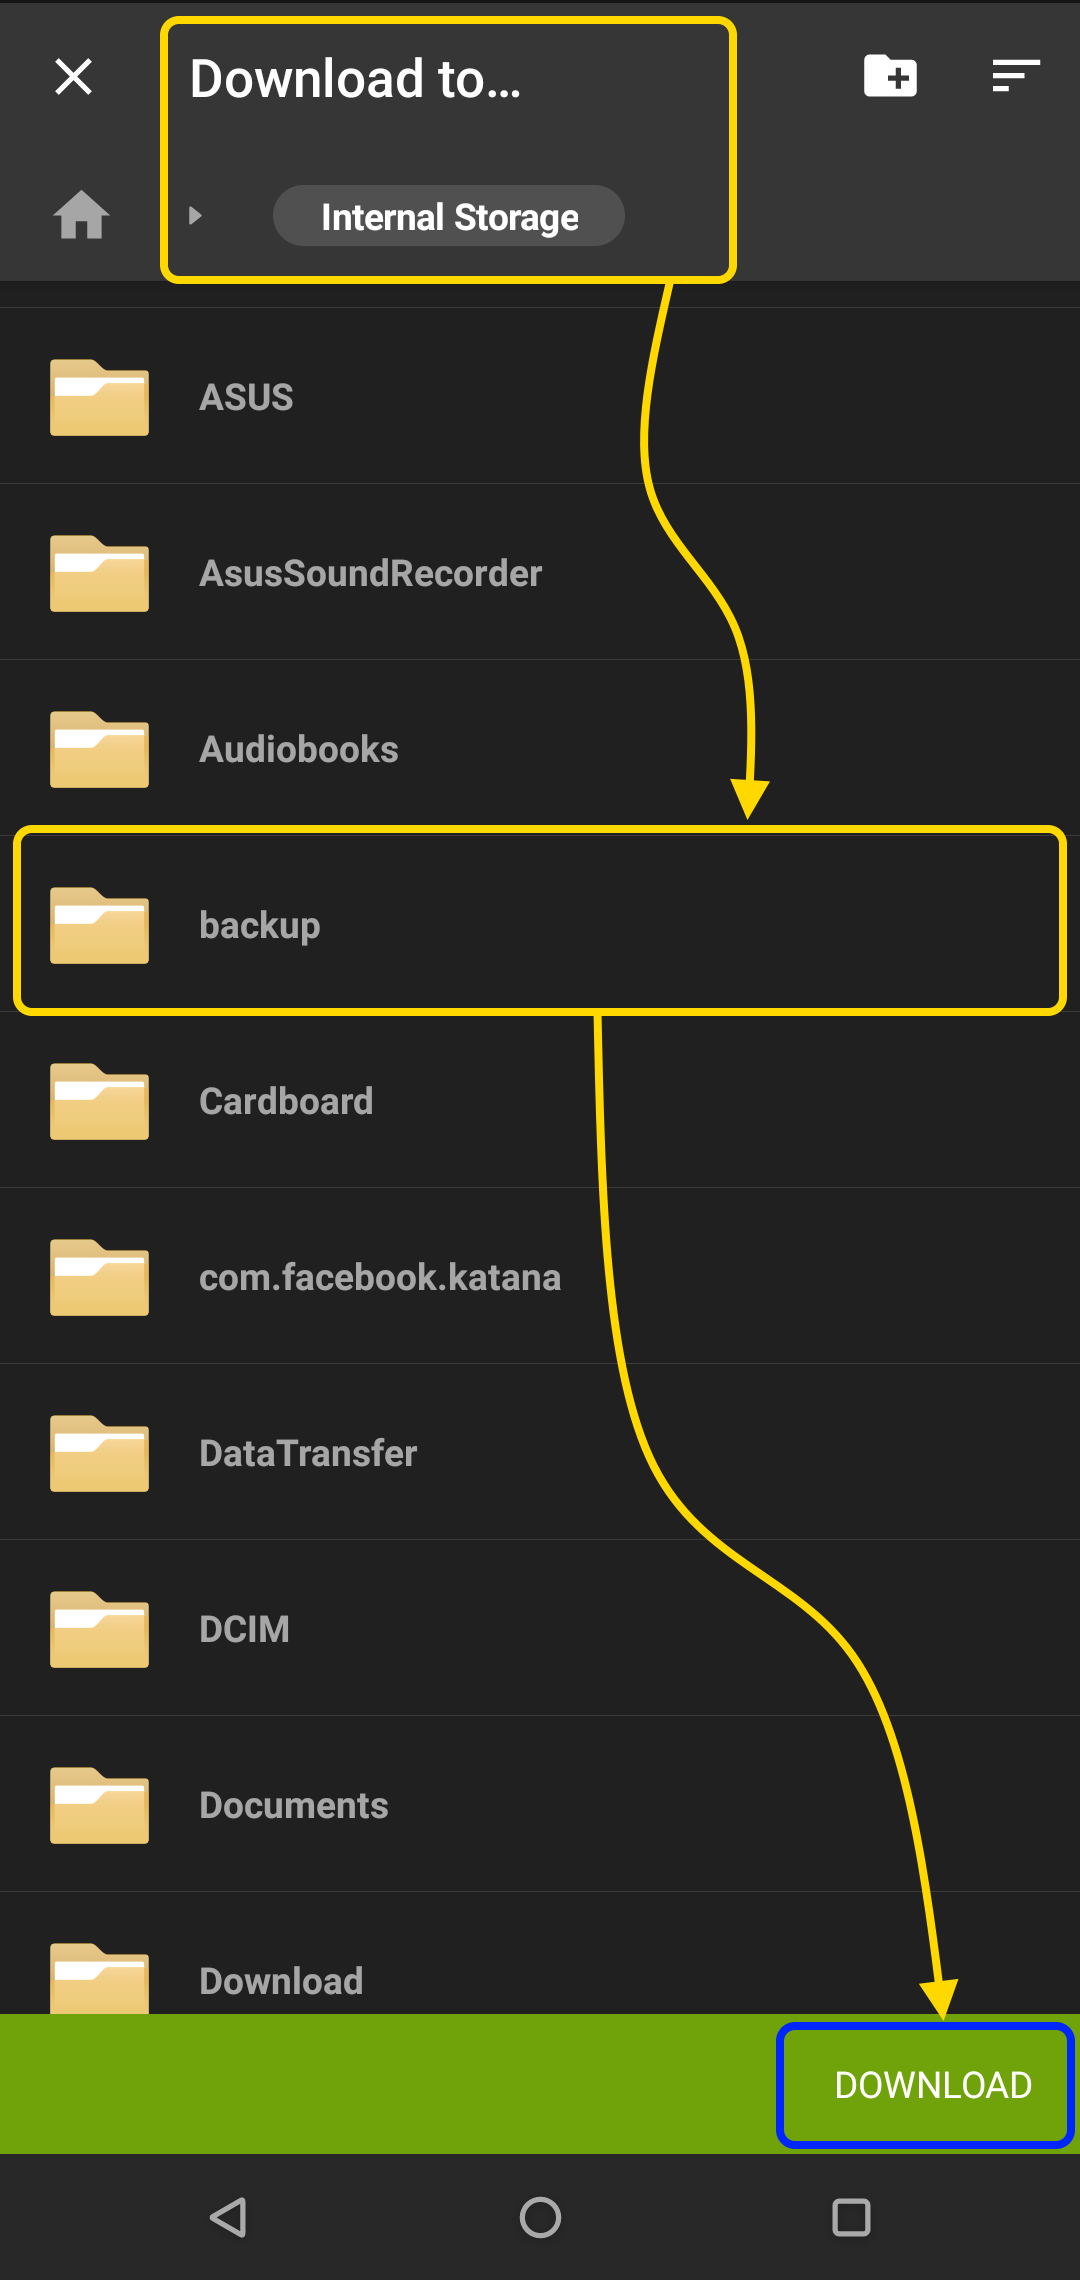
3. Download
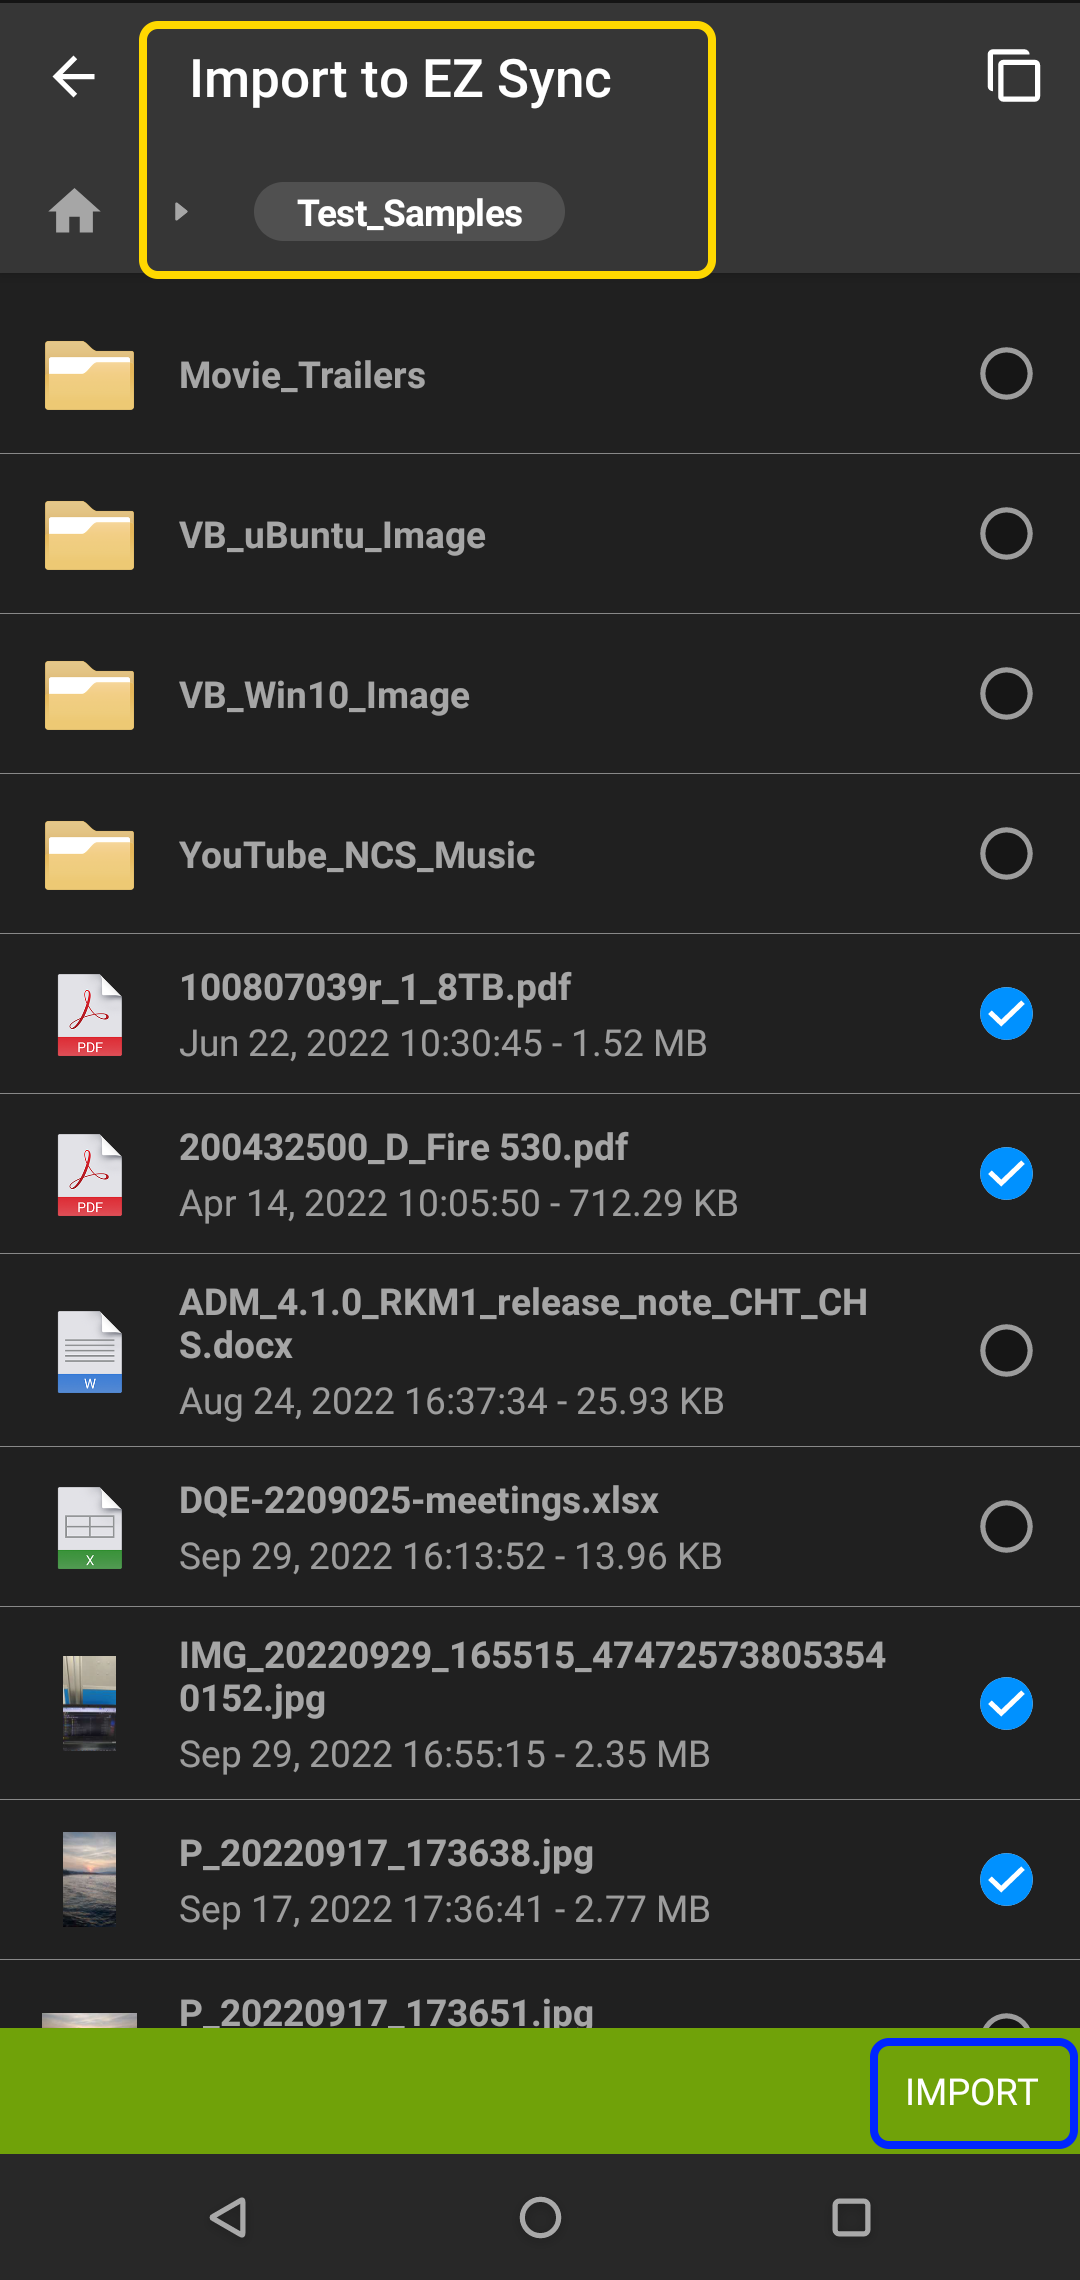
4. Import to EZ Sync
5. Export to Shared Folder
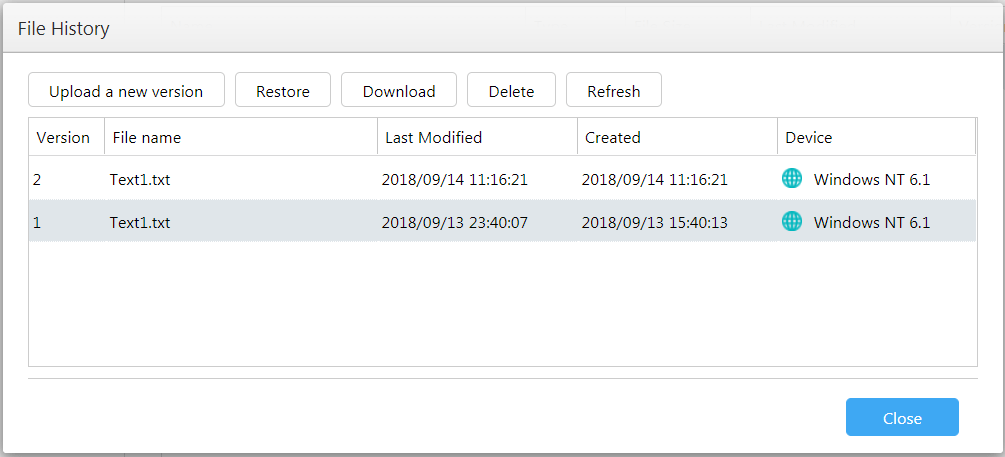
6. File History
7. Move
8. Rename
9. Delete
10. Share
11. Refresh
Additional guides:
2.1.1 To set different sync folders on your computer separate from the default folder, please create a new folder in EZ Sync Manager.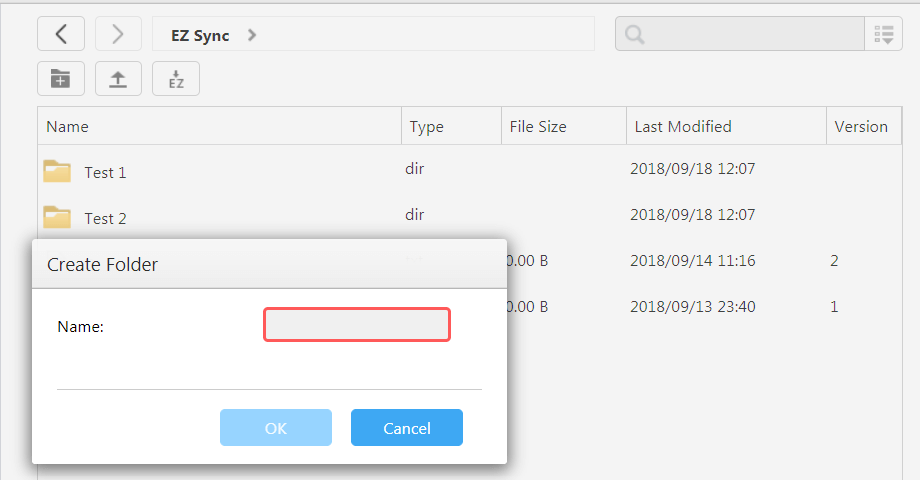
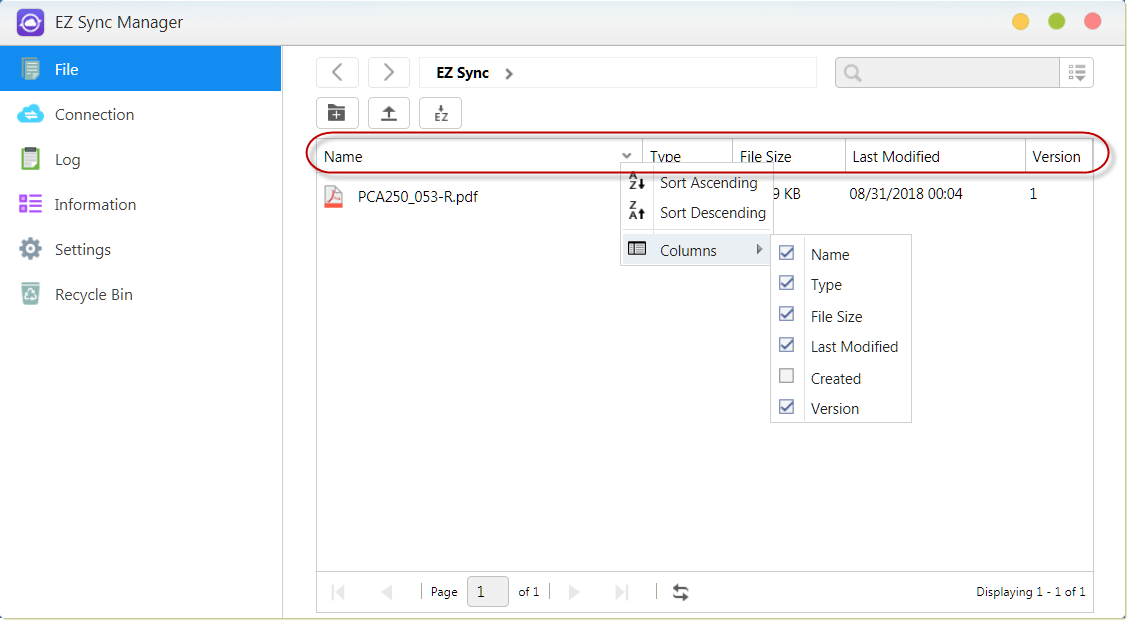
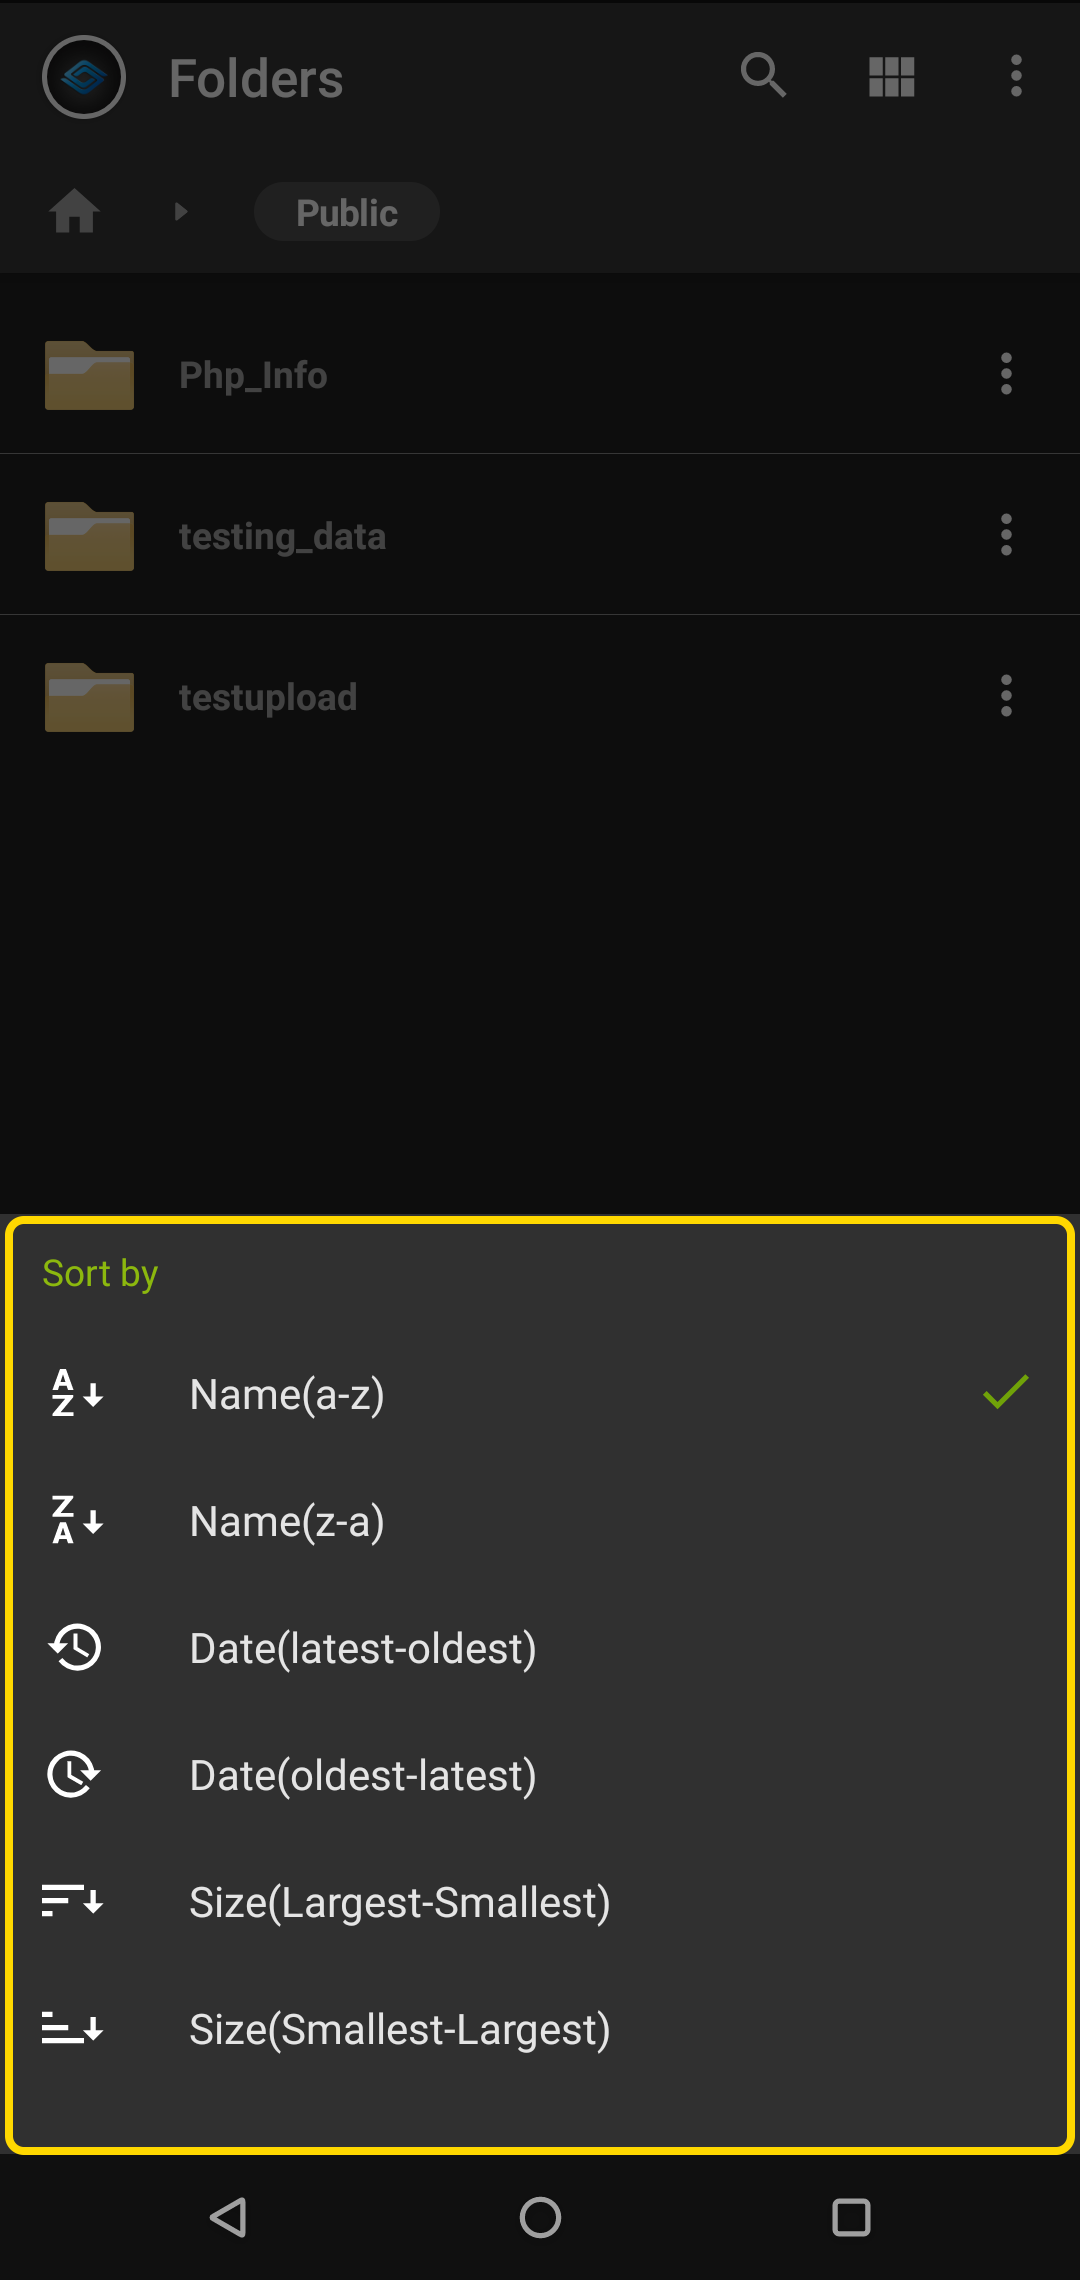
2.1.2 Sorting is easy in EZ Sync Manager. Columns can be enabled and disabled and files can be sorted under these categories.
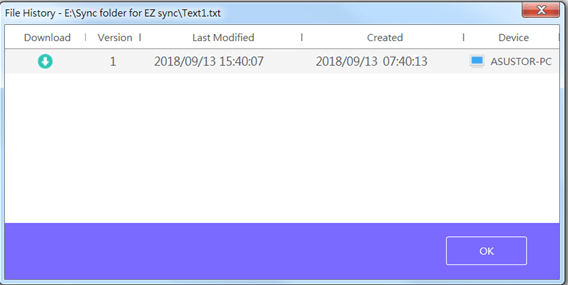
2.1.3 “File History” Allows you to restore files to their original versions or update to a newer version.
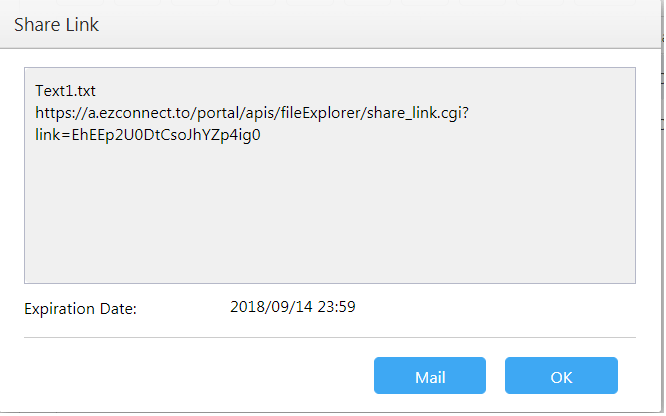
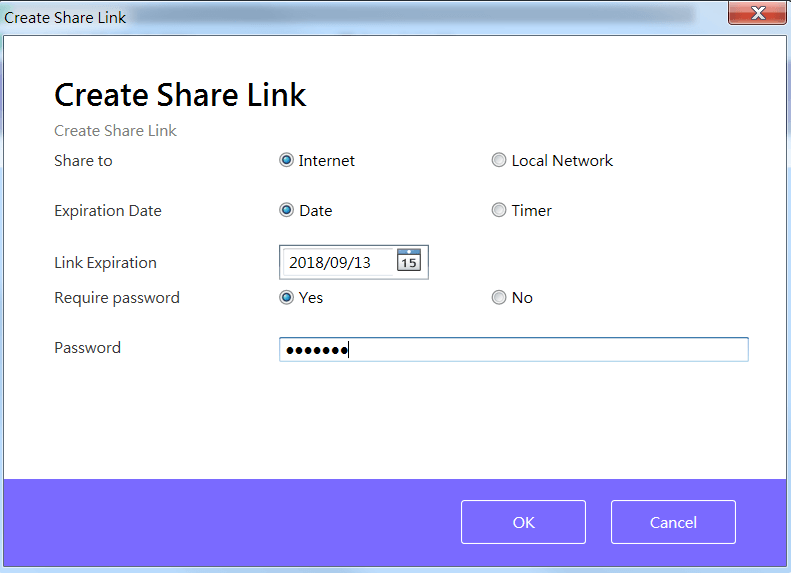
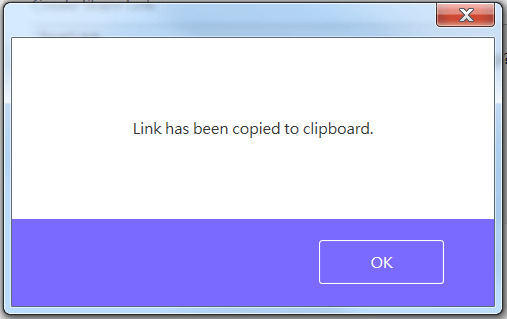
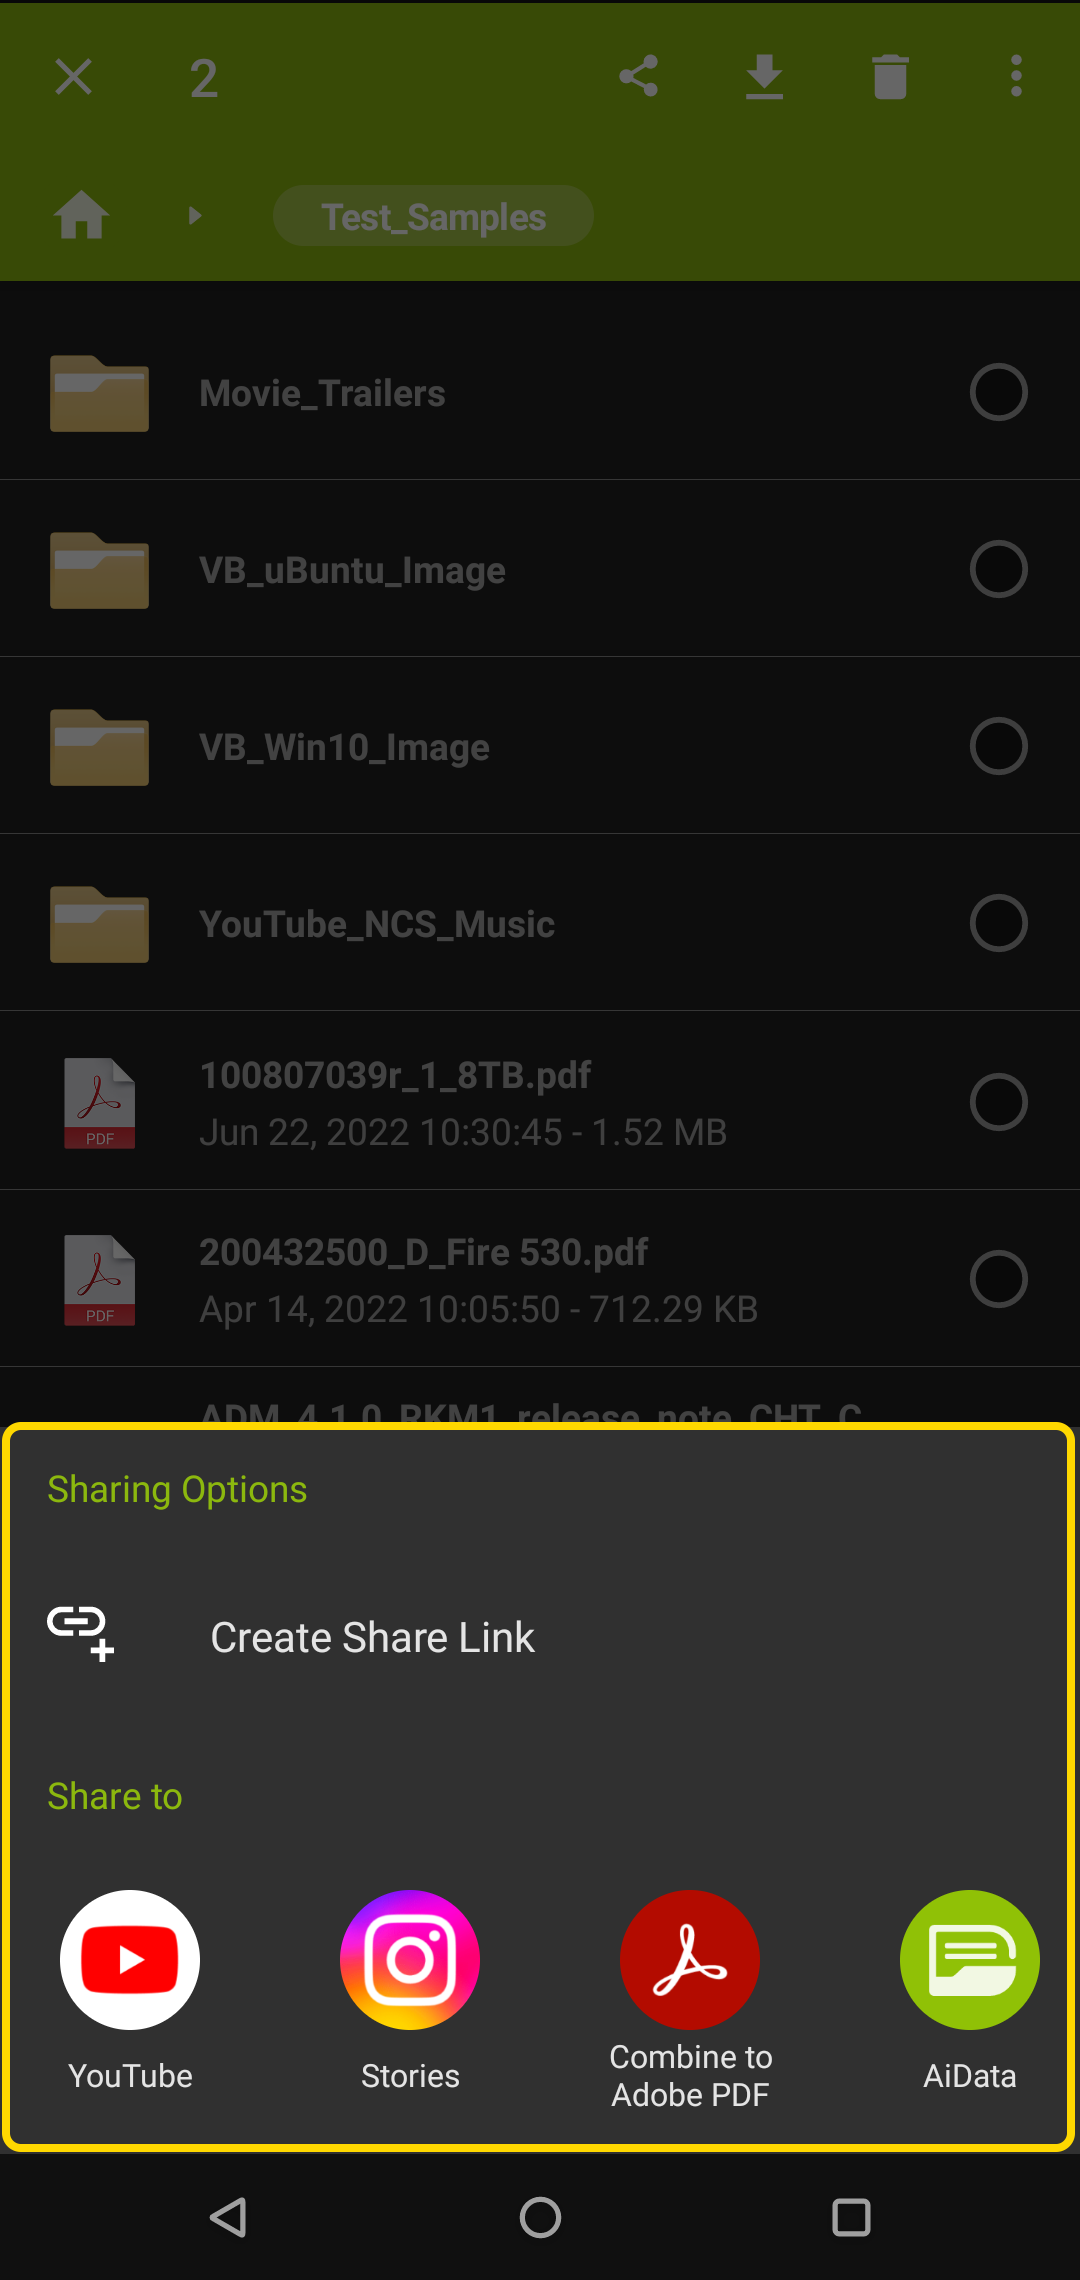
2.1.4 Pressing Share allows you to create a Share Link.
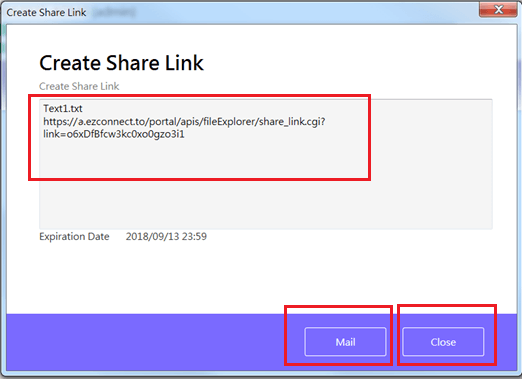
After pressing OK, the Share Link can be copied and mailed as shown below.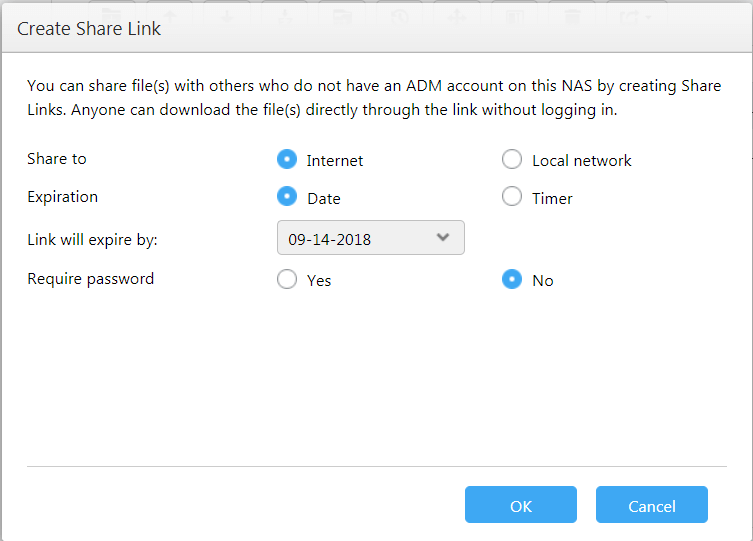
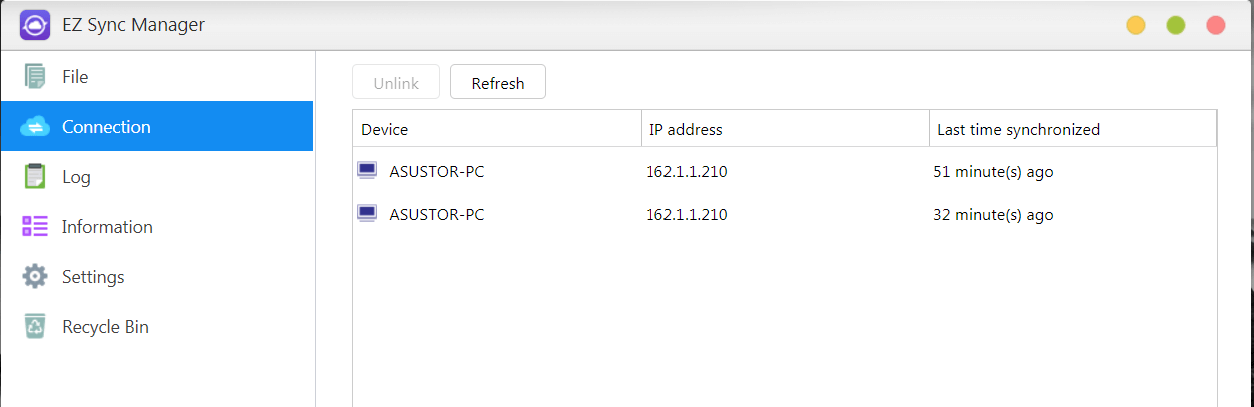
2.2 Connection: This option allows the user to view connected computers, IP addresses and the last time a computer made a connection to EZ Sync.
2.3 Log: View logs here!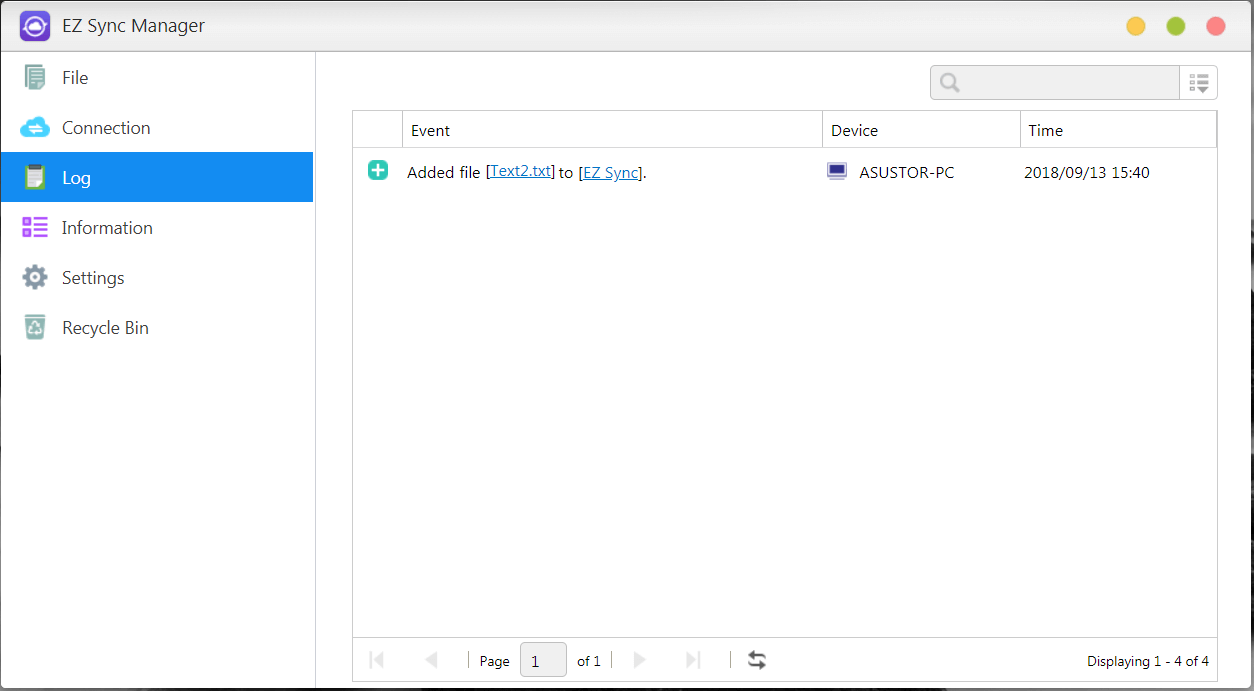
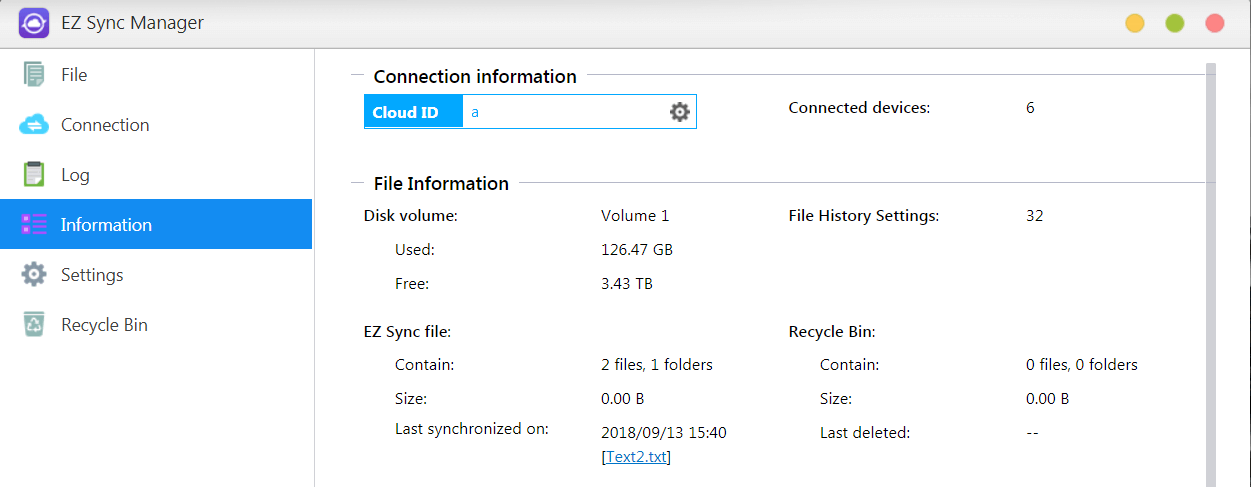
2.4 Information: View NAS connection information, usage status, and more.
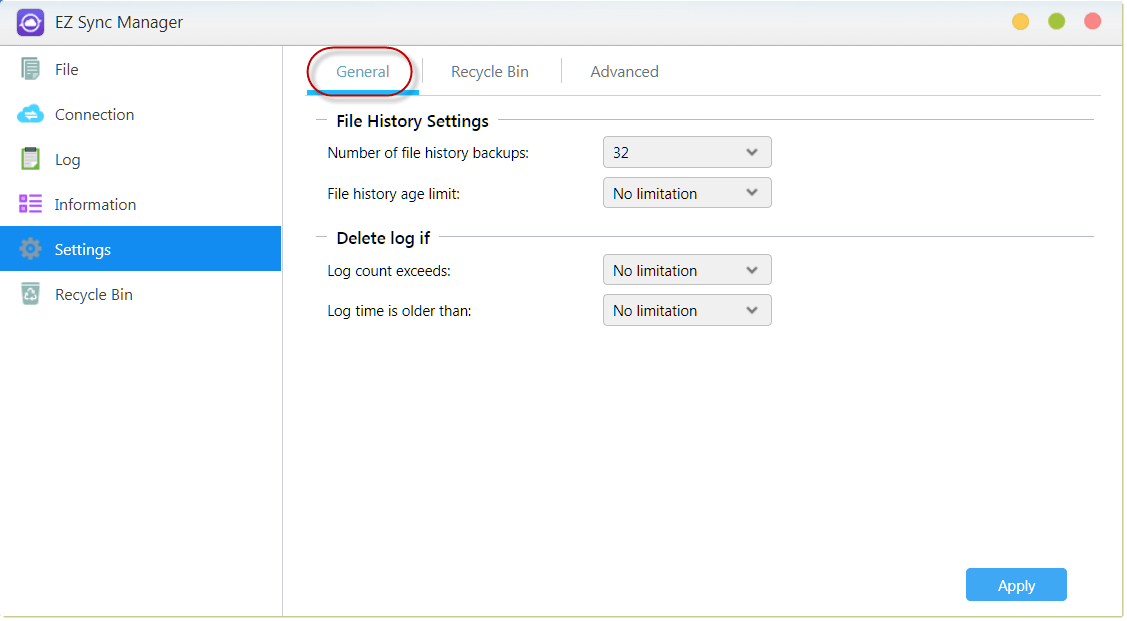
2.5 Settings: General, Recycle Bin, Advanced.
2.5.1 General: File History can save up to 64 versions of a file, and will automatically delete the oldest version when the amount set has been exceeded.
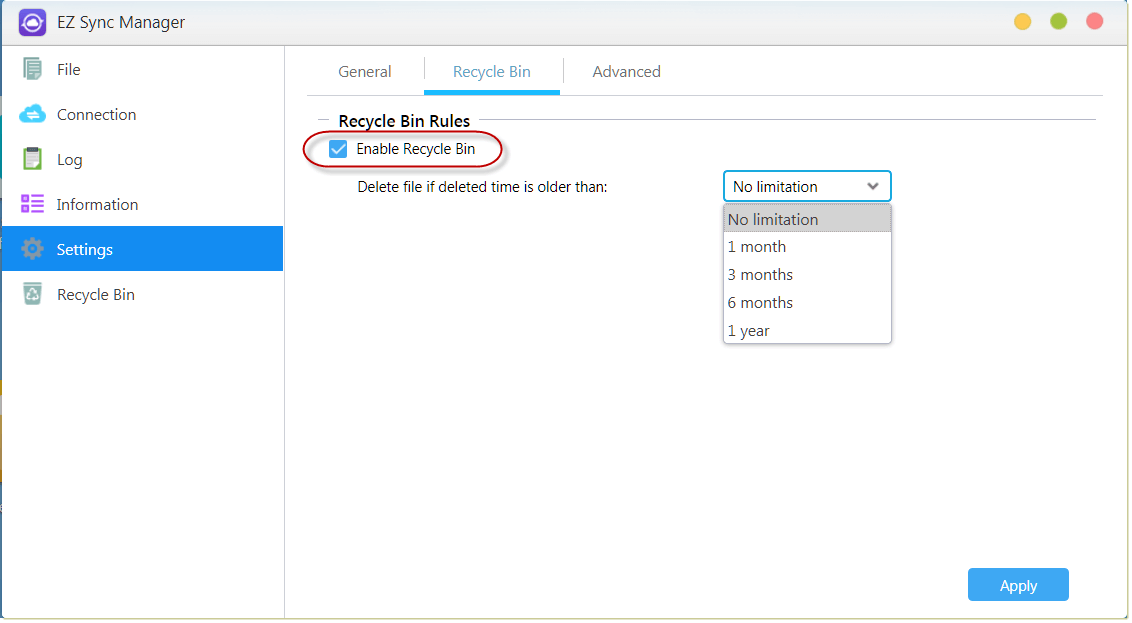
2.5.2 Recycle Bin Rules: Enable or disable Recycle Bin and set automatic deletion rules.
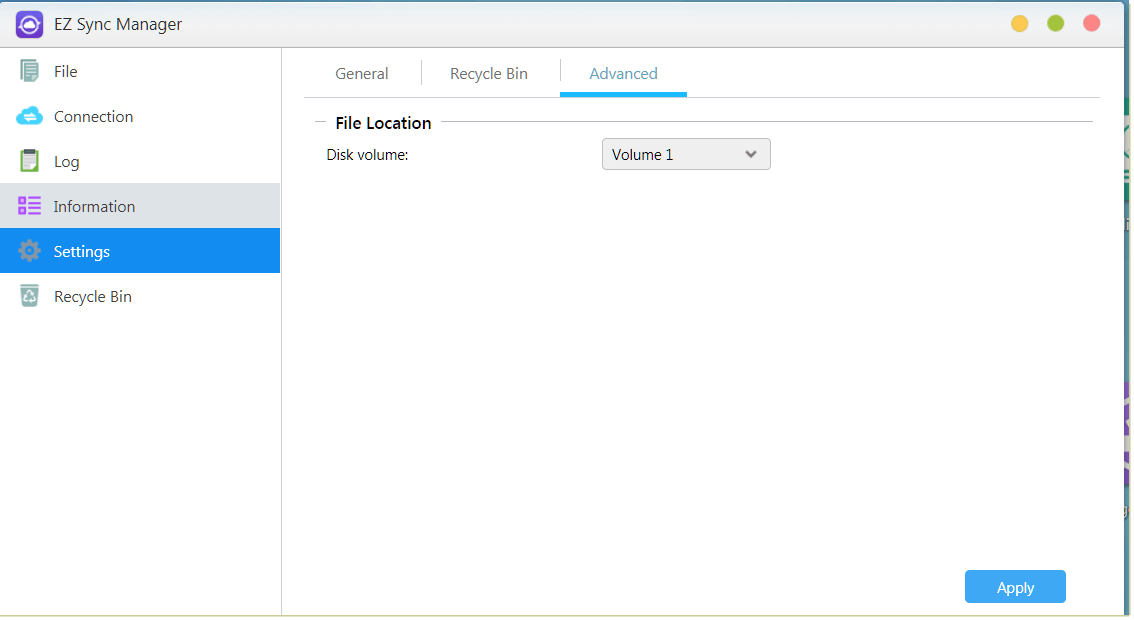
2.5.3 Advanced: Choose which volume data will be synchronized.
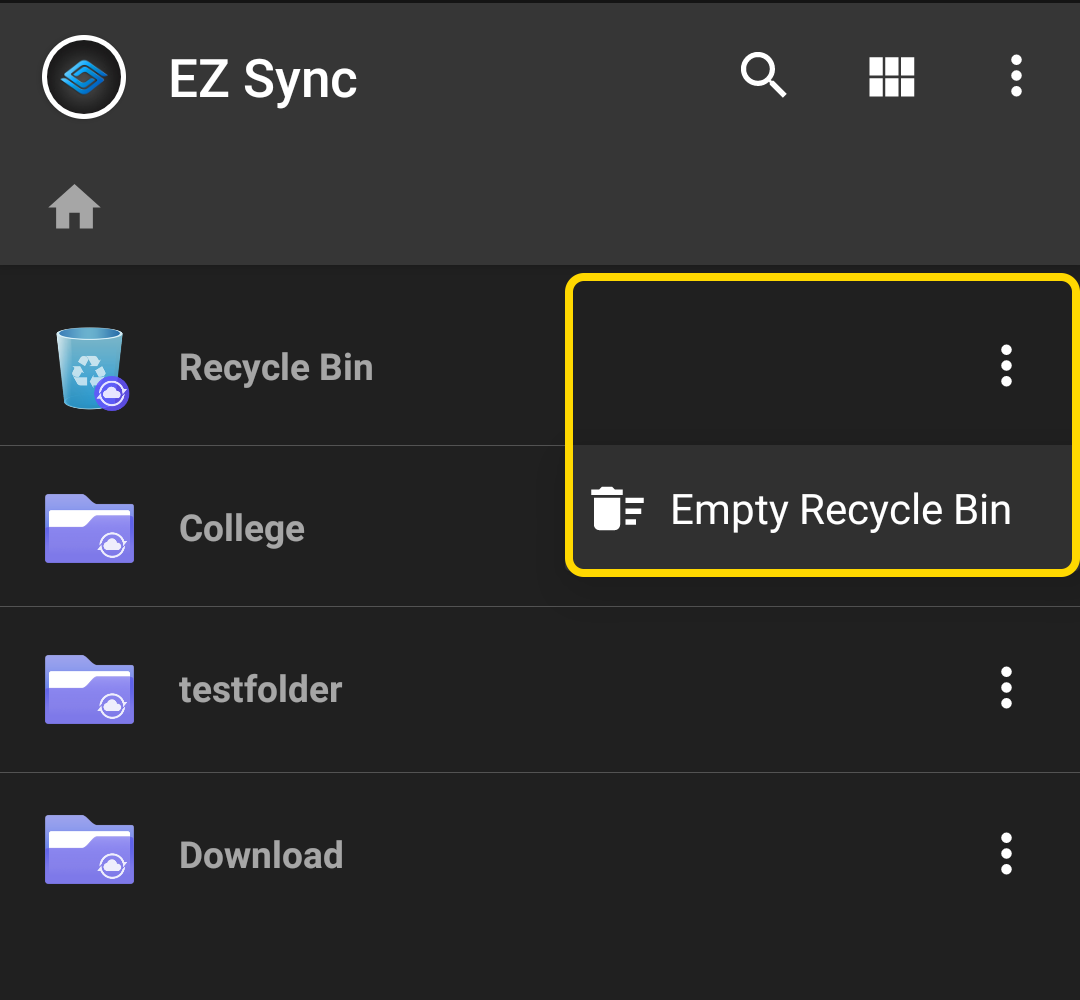
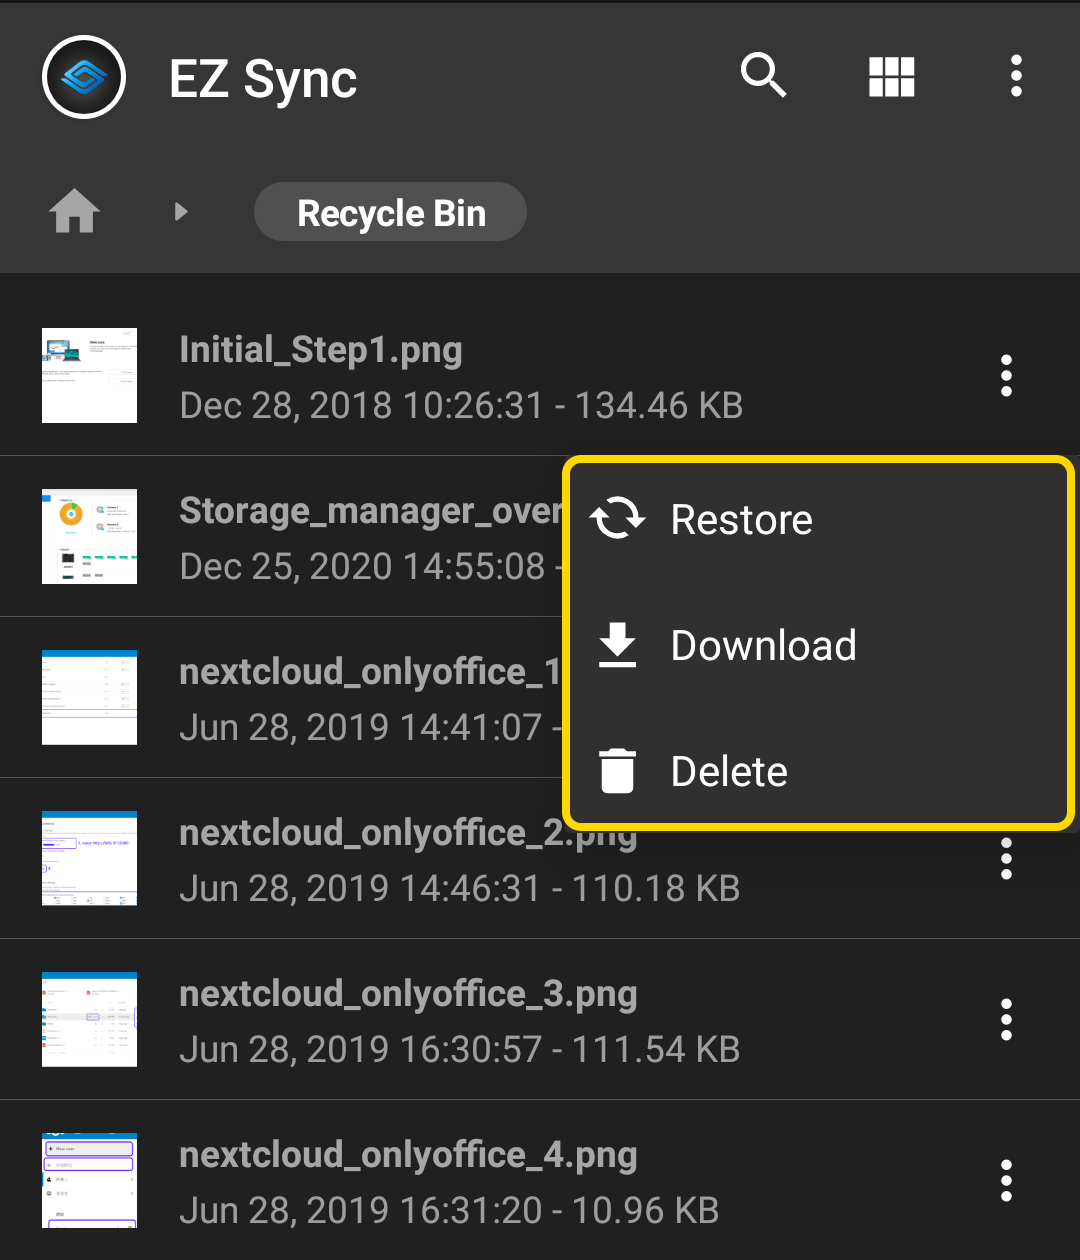
2.6 Recycle Bin
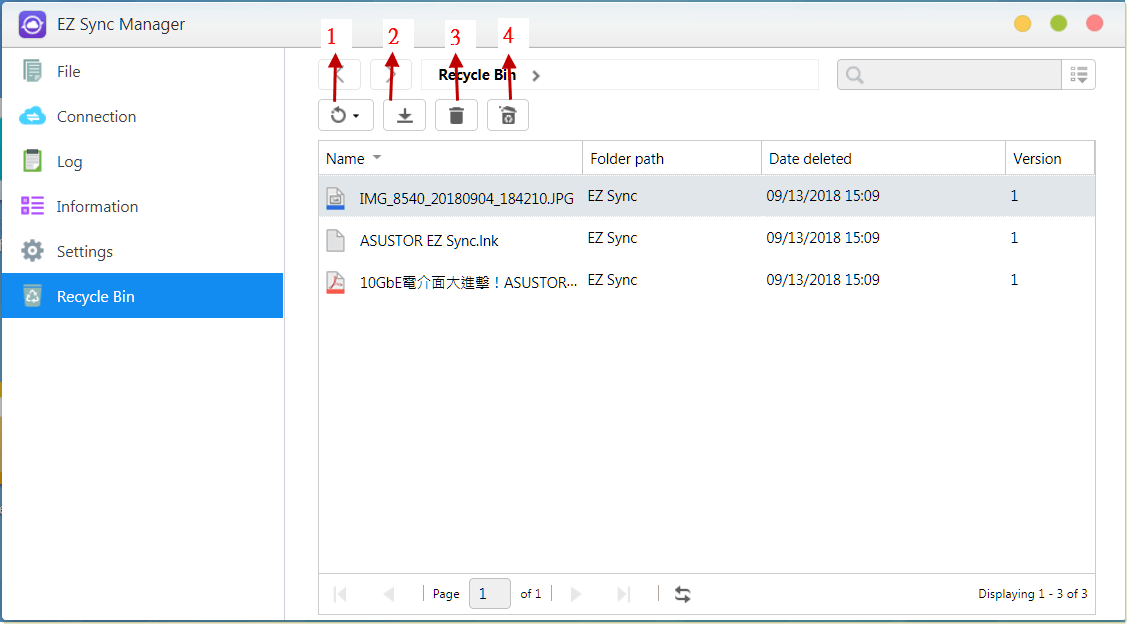
1. Restore: Restores file(s) to their original location.
2. Download: Transfer file to computer.
3. Delete: Deletes file(s) permanently.
4. Empty: Deletes all files permanently.
3.1 Installing ASUSTOR EZ Sync
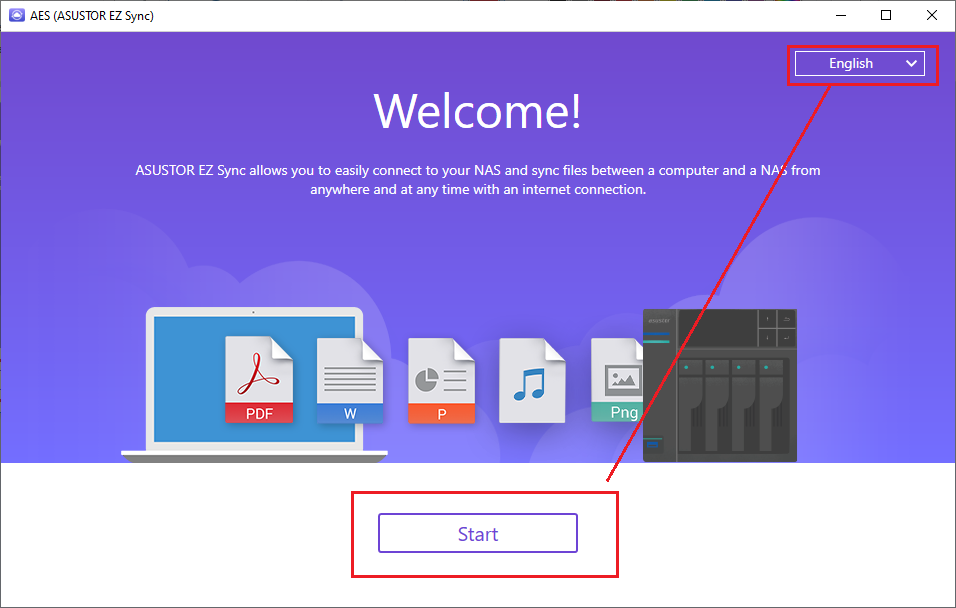
3.1.1 After selecting a language, press Start.
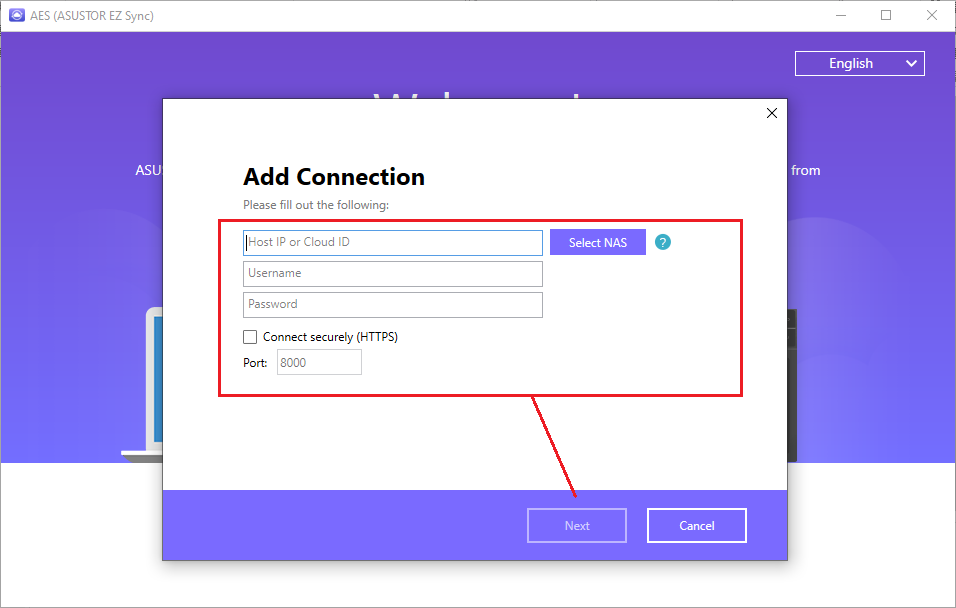
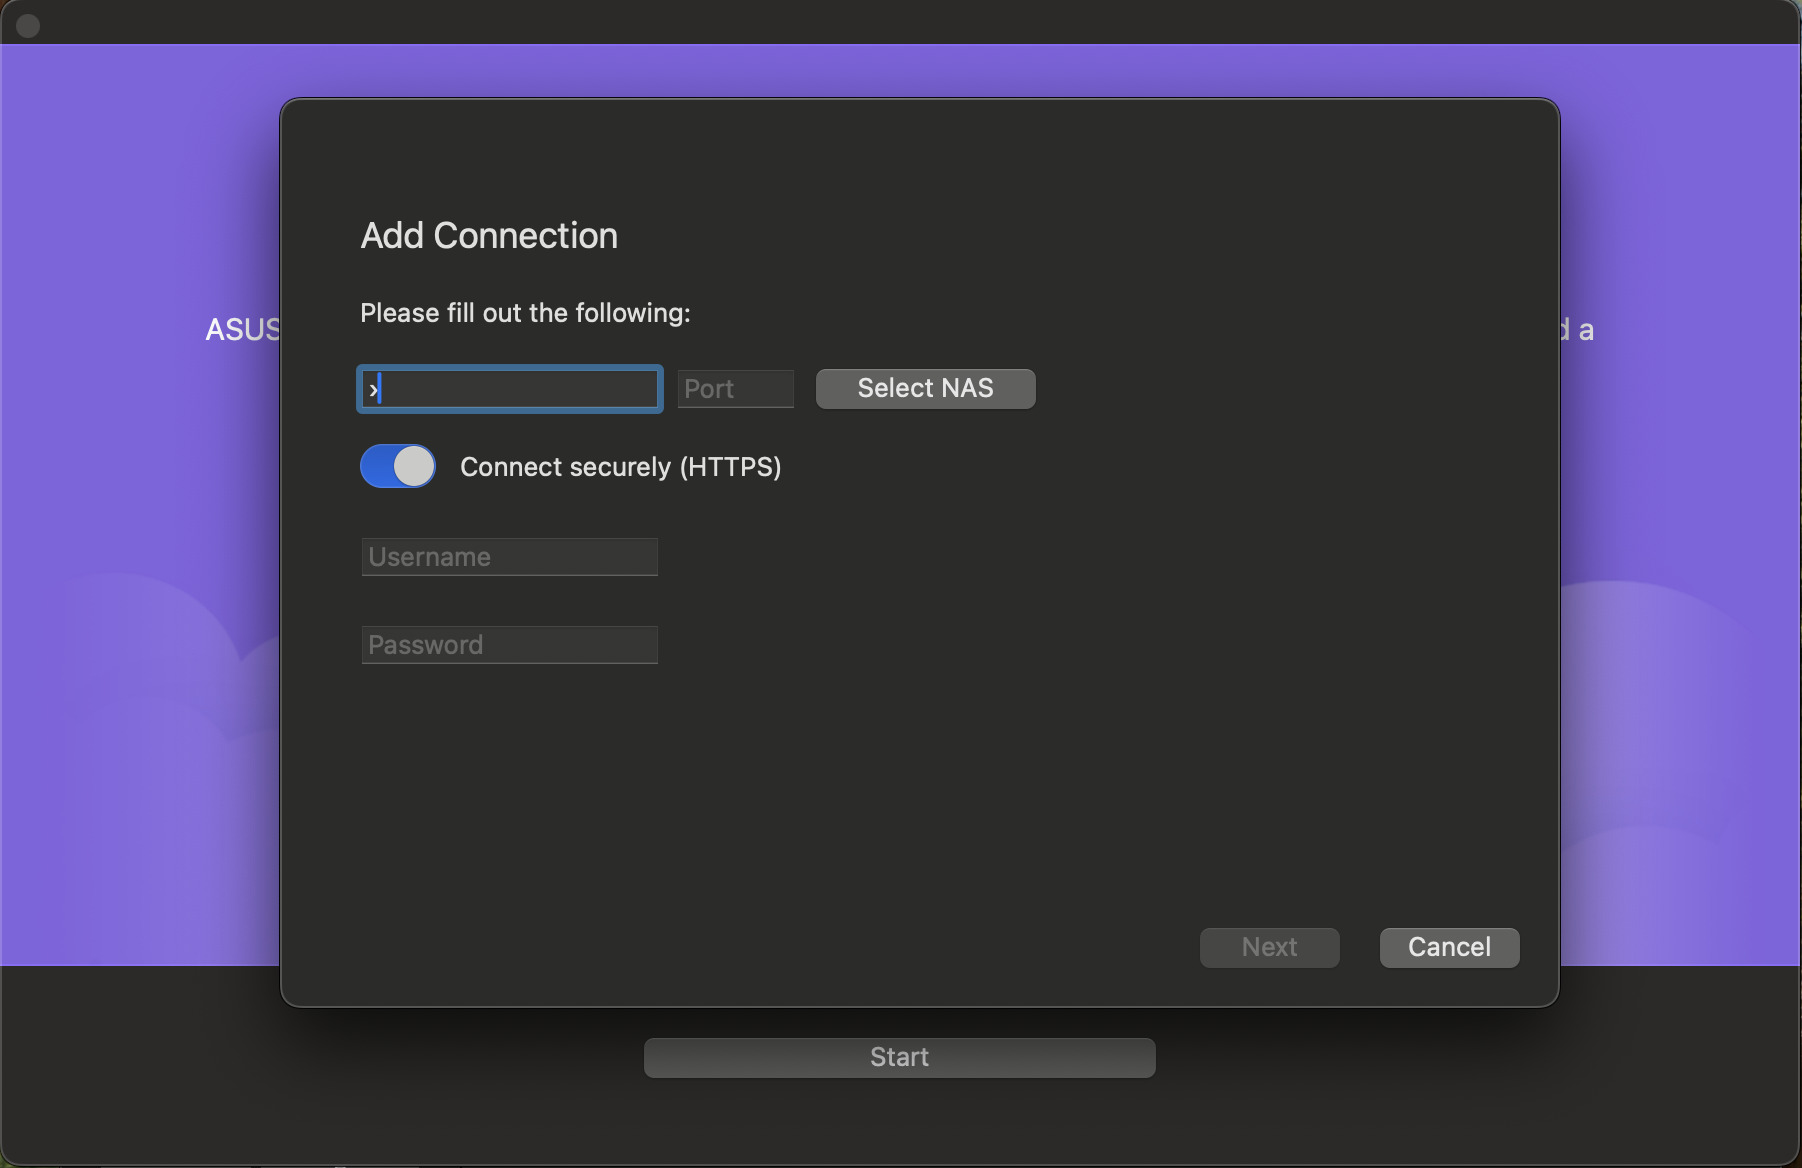
3.1.2 Add Connection.
Enter Host IP, Cloud ID or select a NAS from a list of devices on your network.
Press Next to continue.
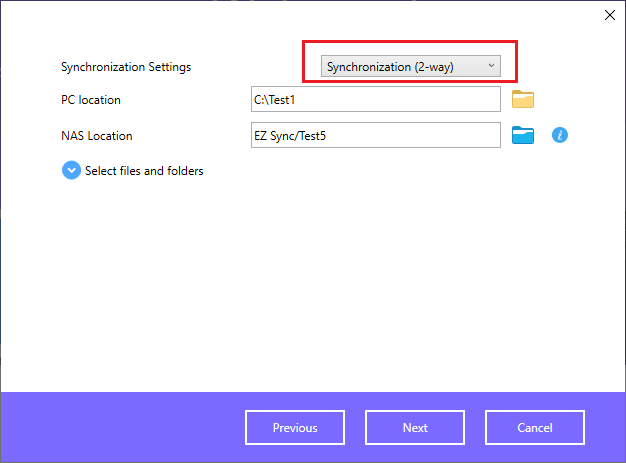
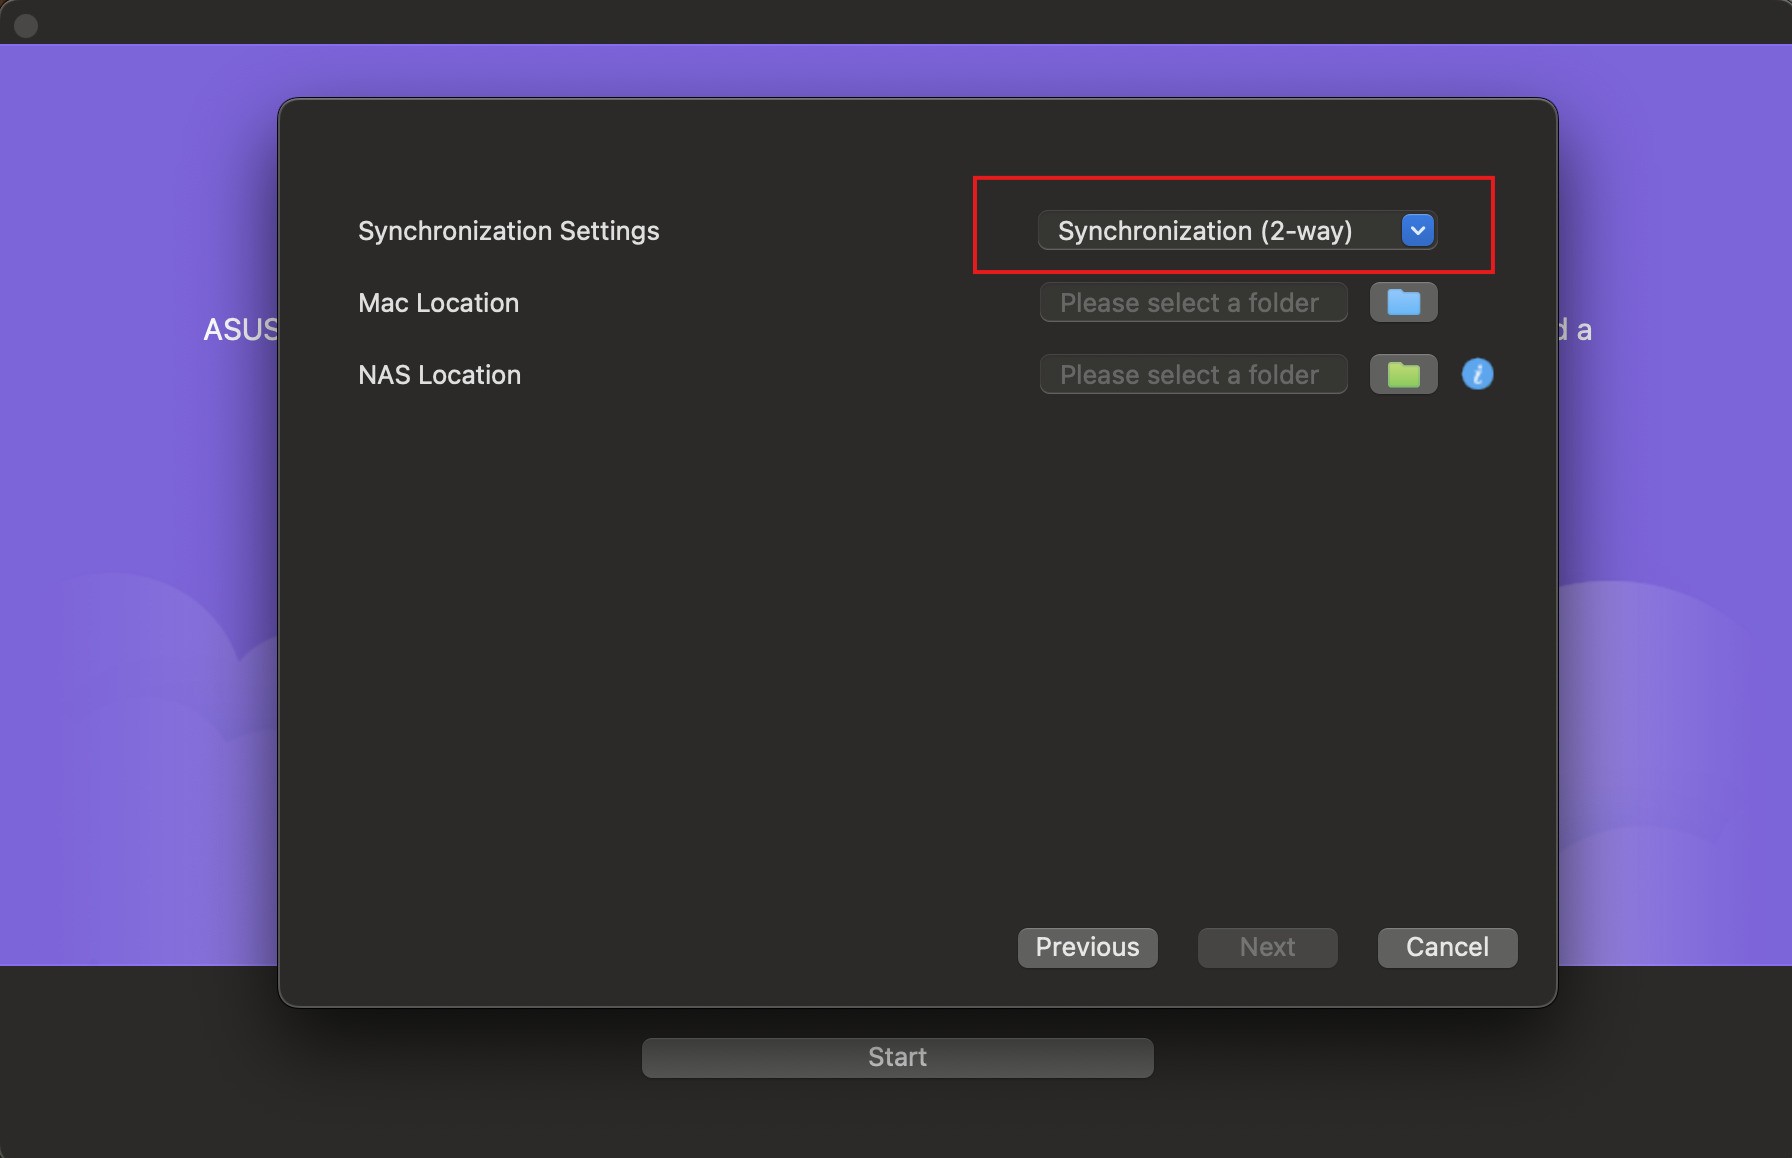
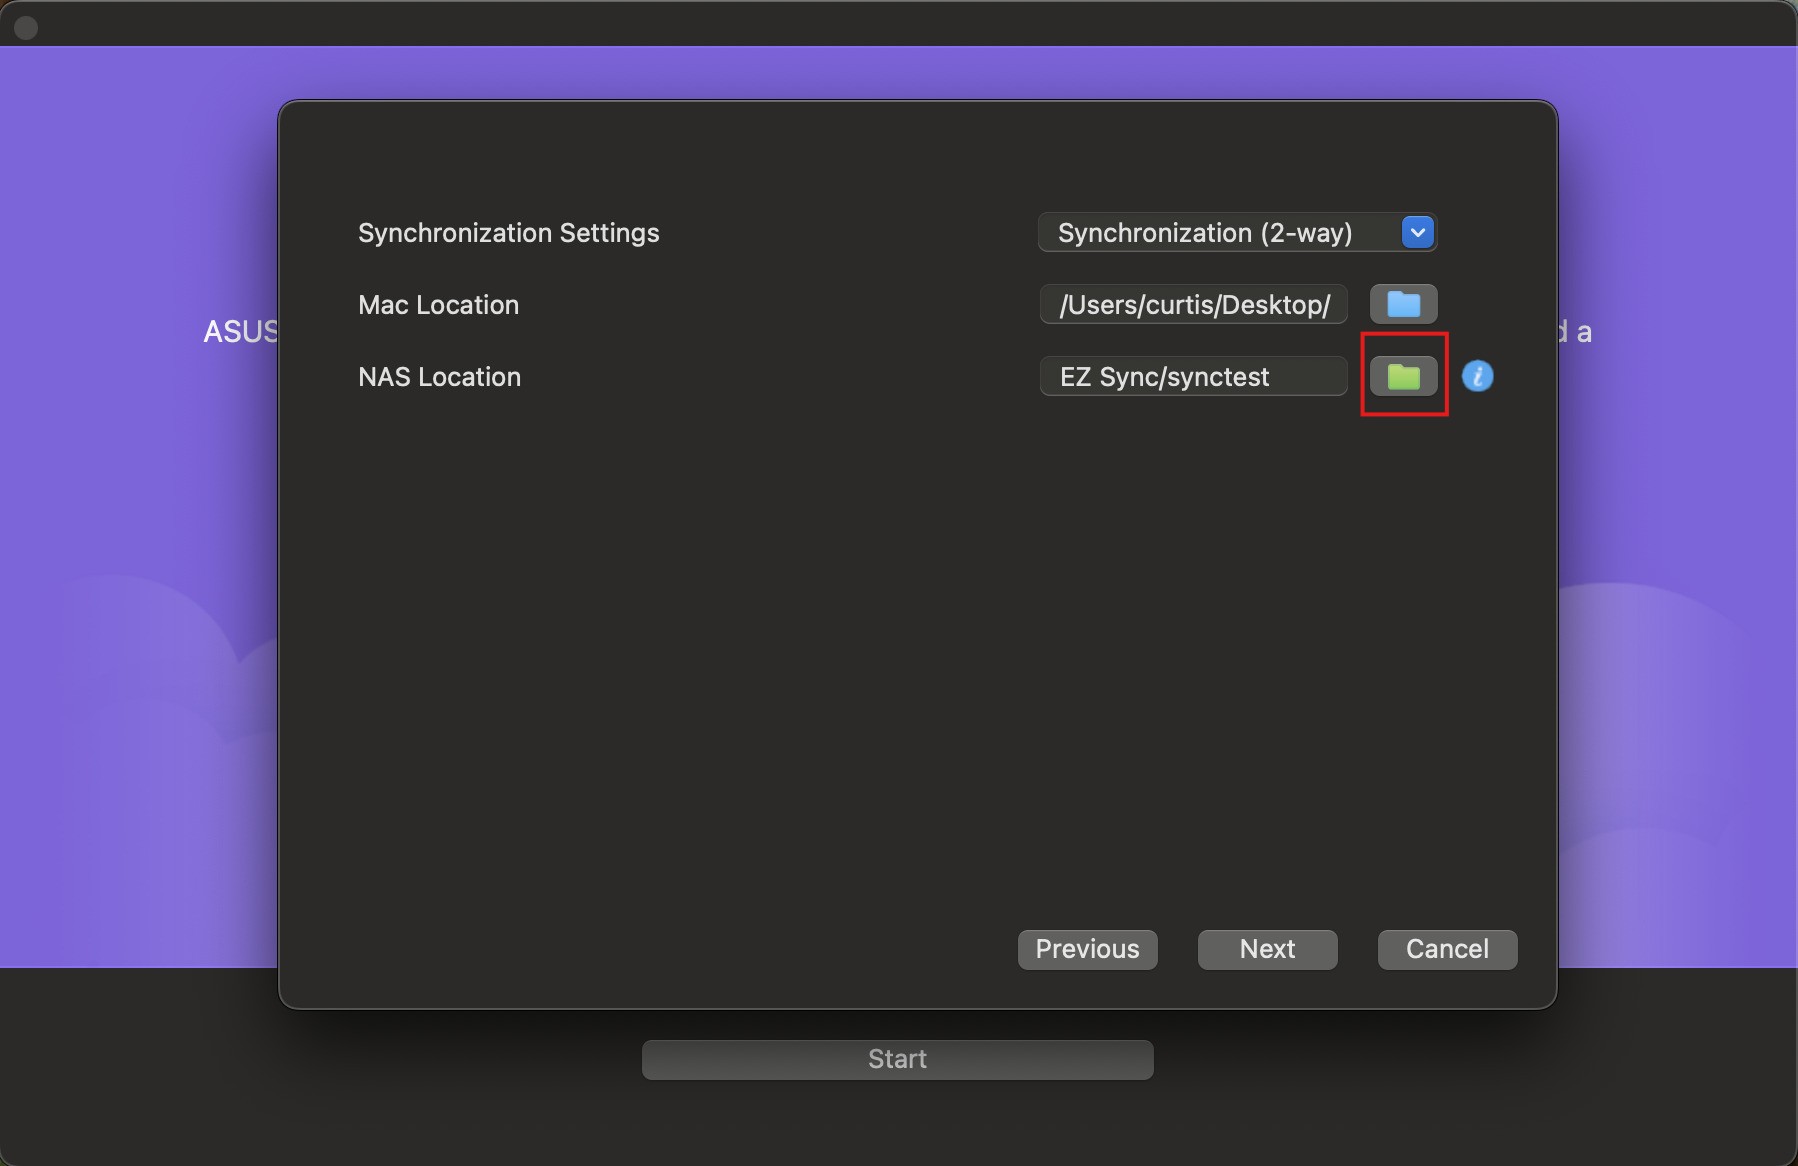
3.1.3 Synchronization settings can be set to one way or two way synchronization. One way can be set from PC to NAS or NAS to PC. ASUSTOR recommends selecting two way synchronization.
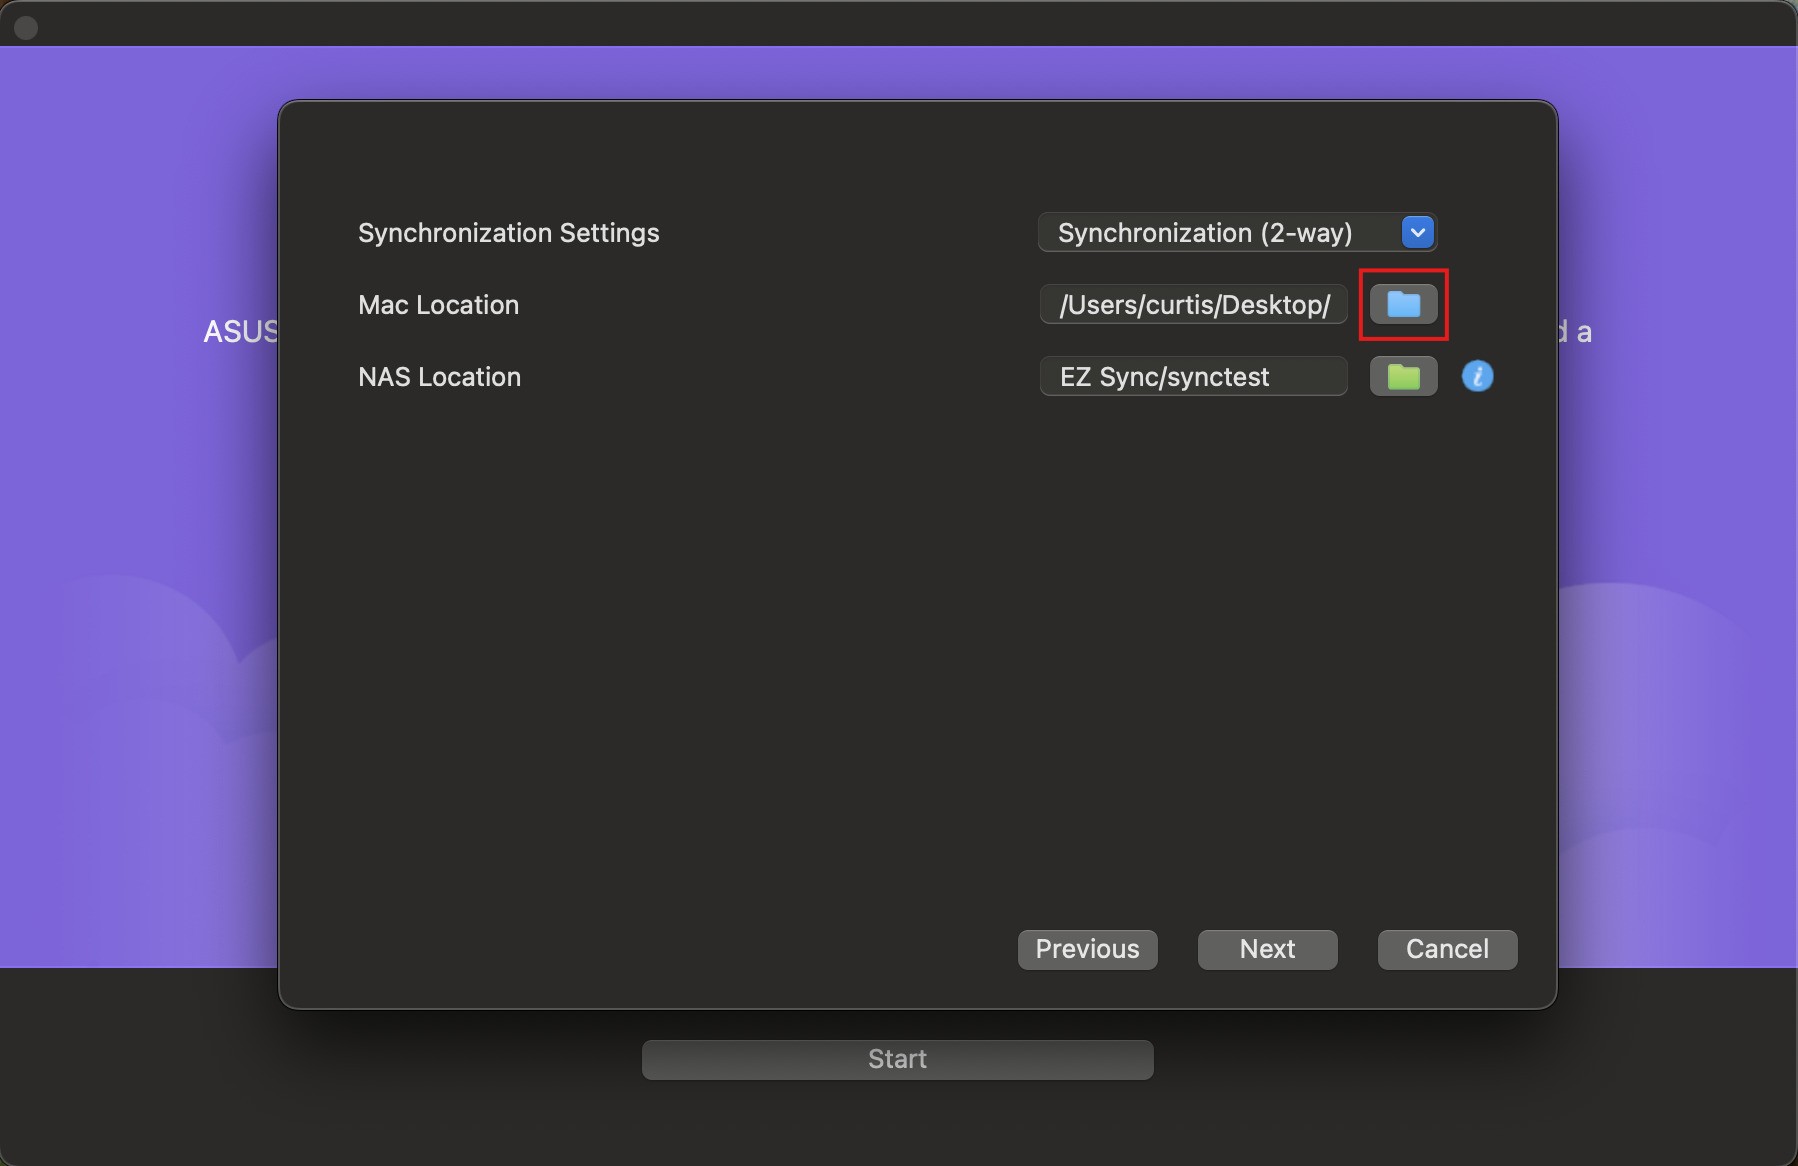
3.1.4 Press the yellow folder icon to select a folder that will synchronize data from your PC.

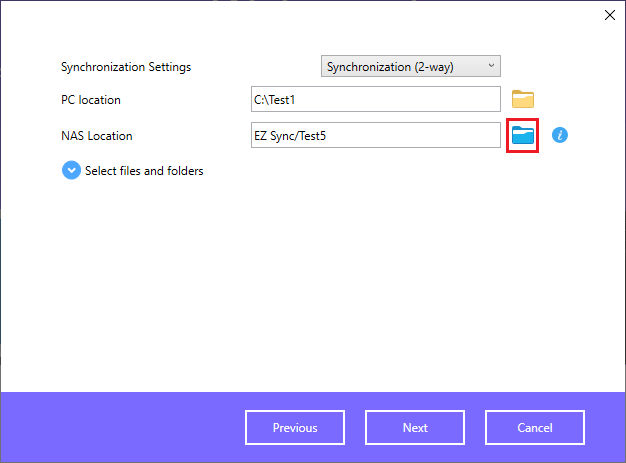
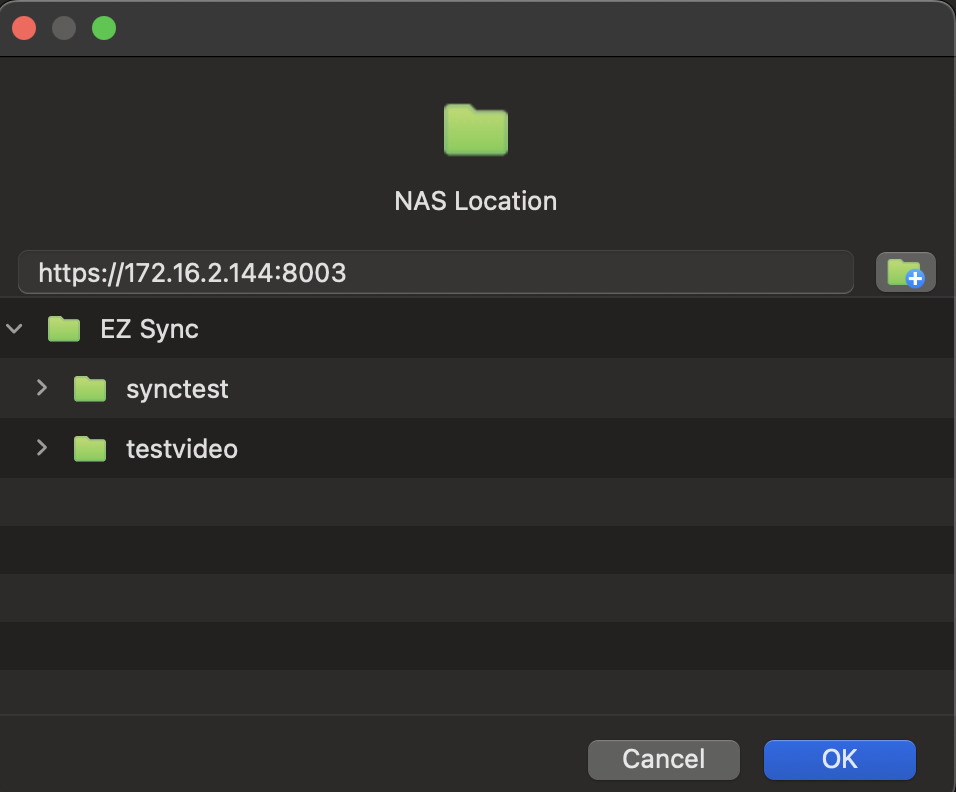
3.1.5 Press the blue folder icon to select a folder that will synchronize data from your NAS.
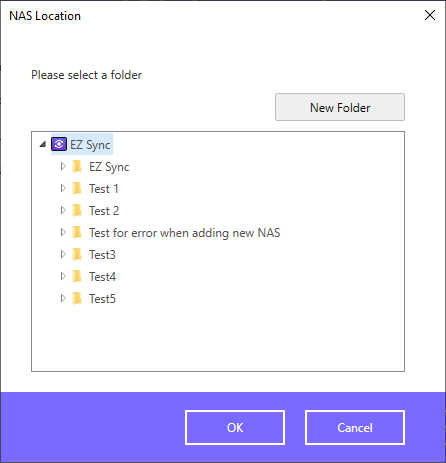
Advanced users who may want to change the default folder’s location may create a new EZ Sync folder within EZ Sync Manager. Afterwards, the new recently created folder can be selected. Folders cannot be changed after completing setup.
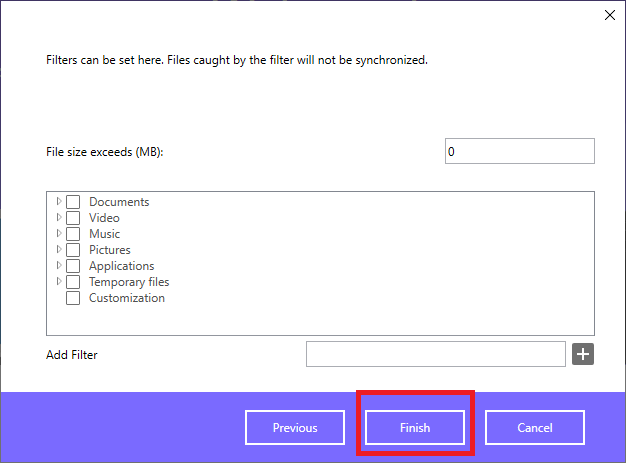
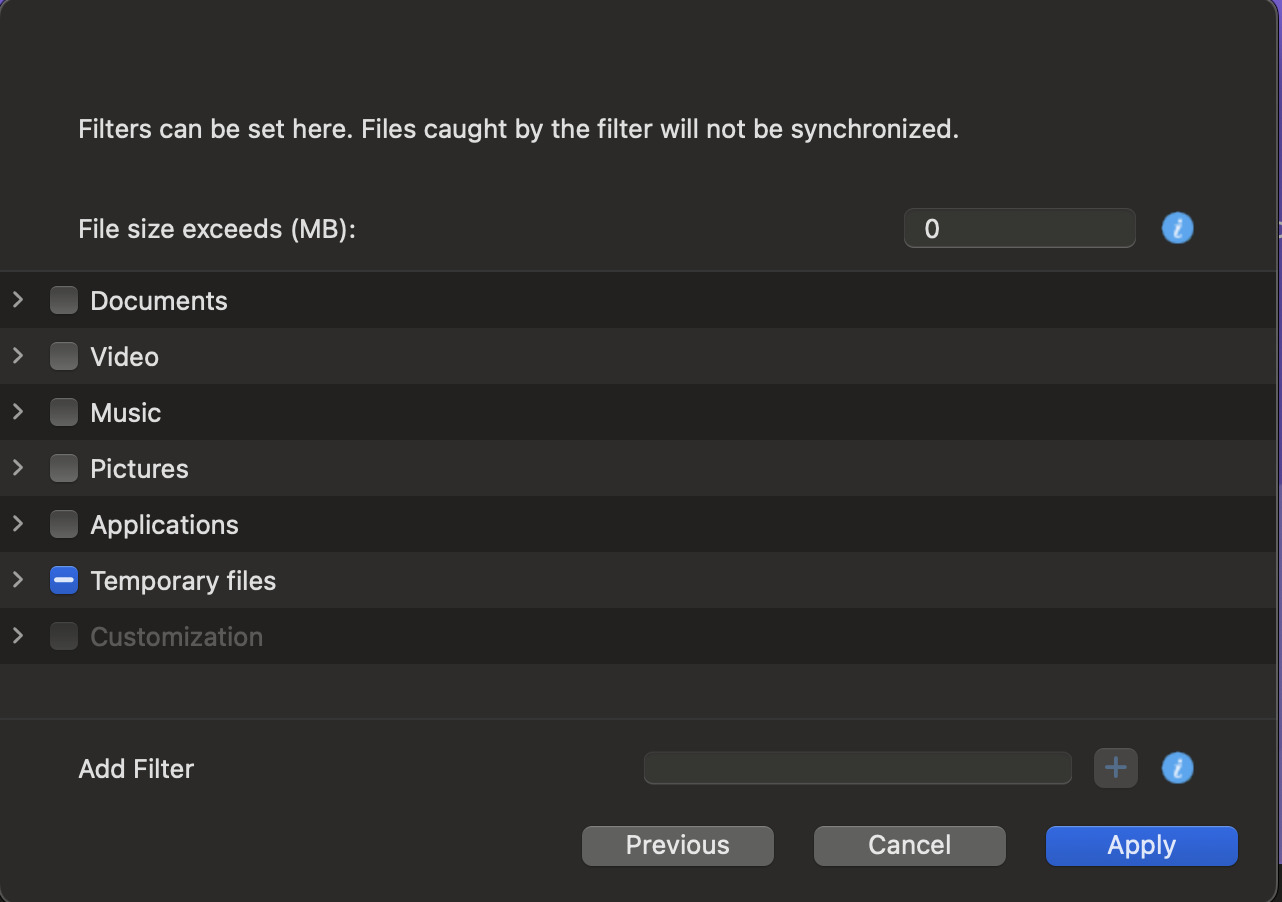
3.1.6 Select files and folders to be synchronized if necessary.
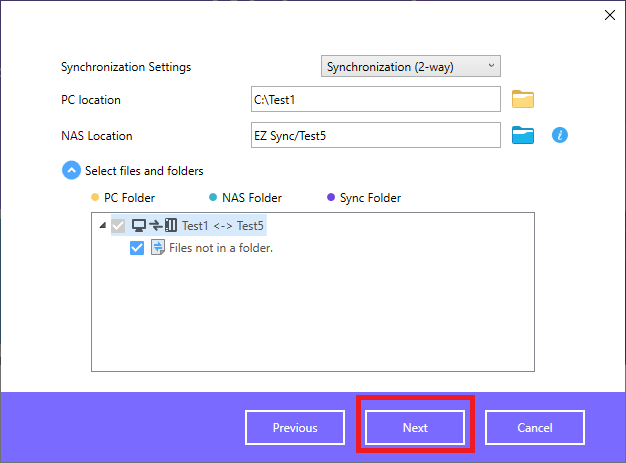
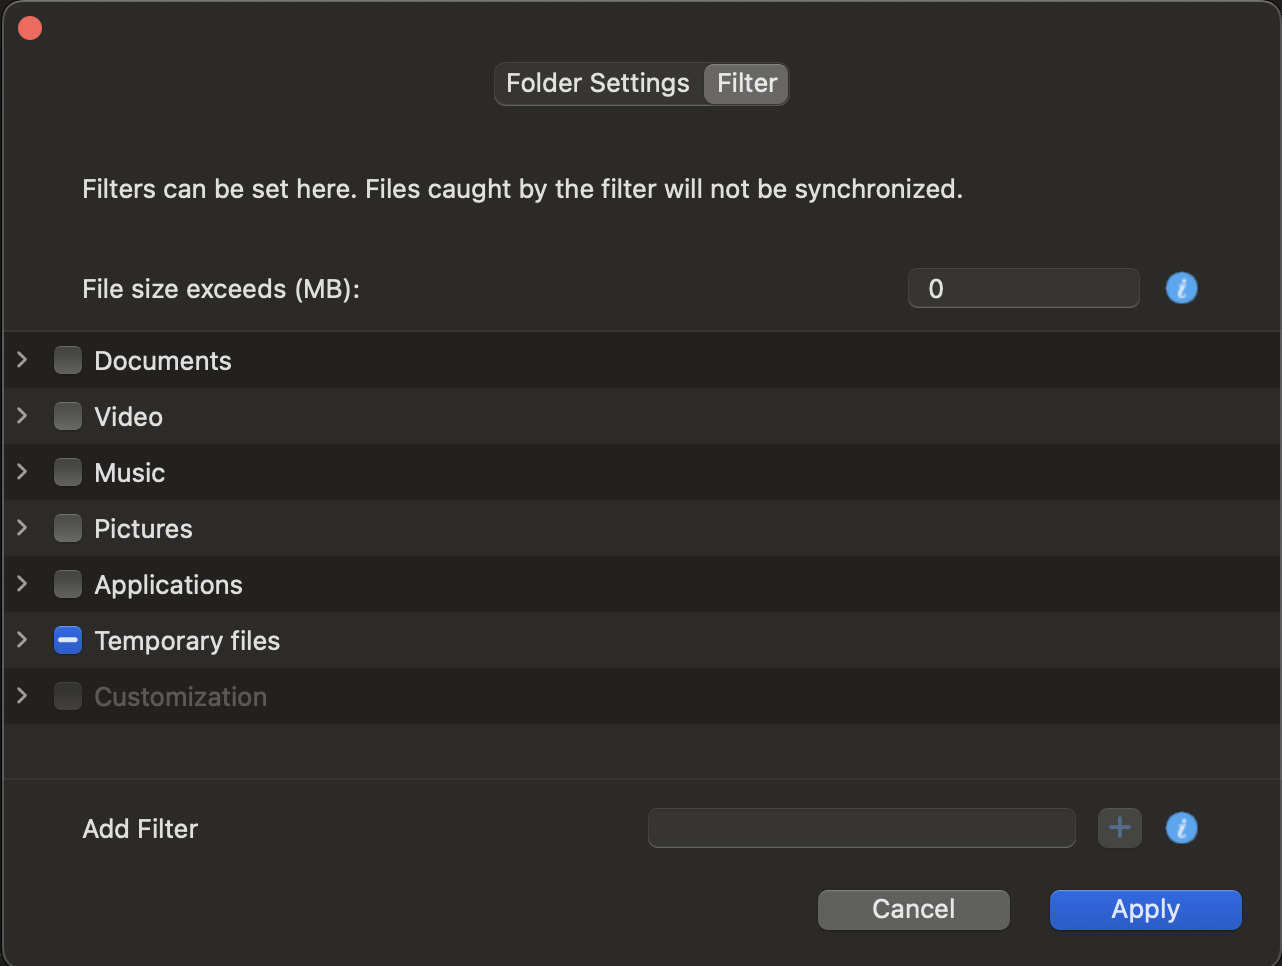
Select file types for exclusion if necessary.
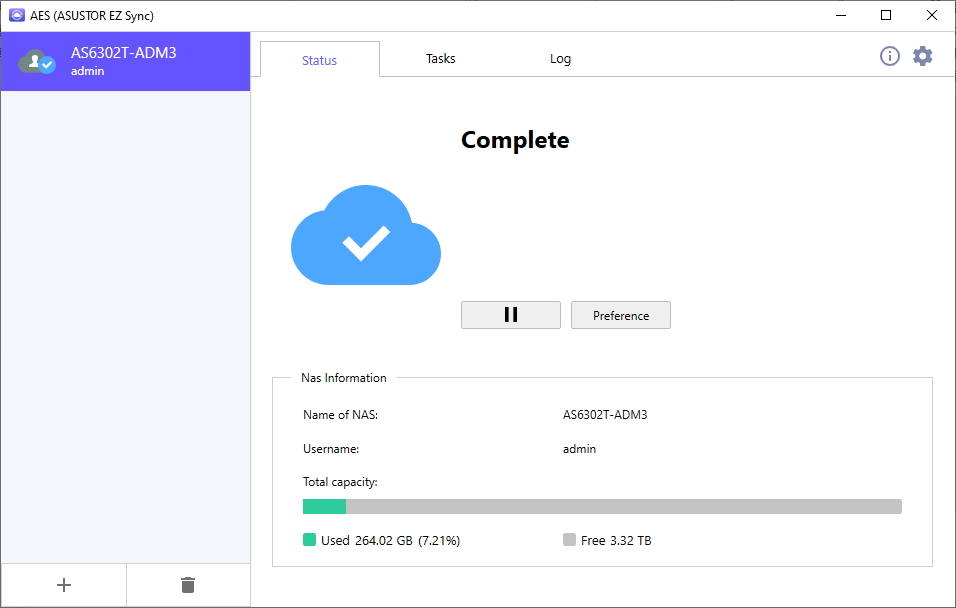
3.2.1 Open ASUSTOR EZ Sync on your computer.![]()

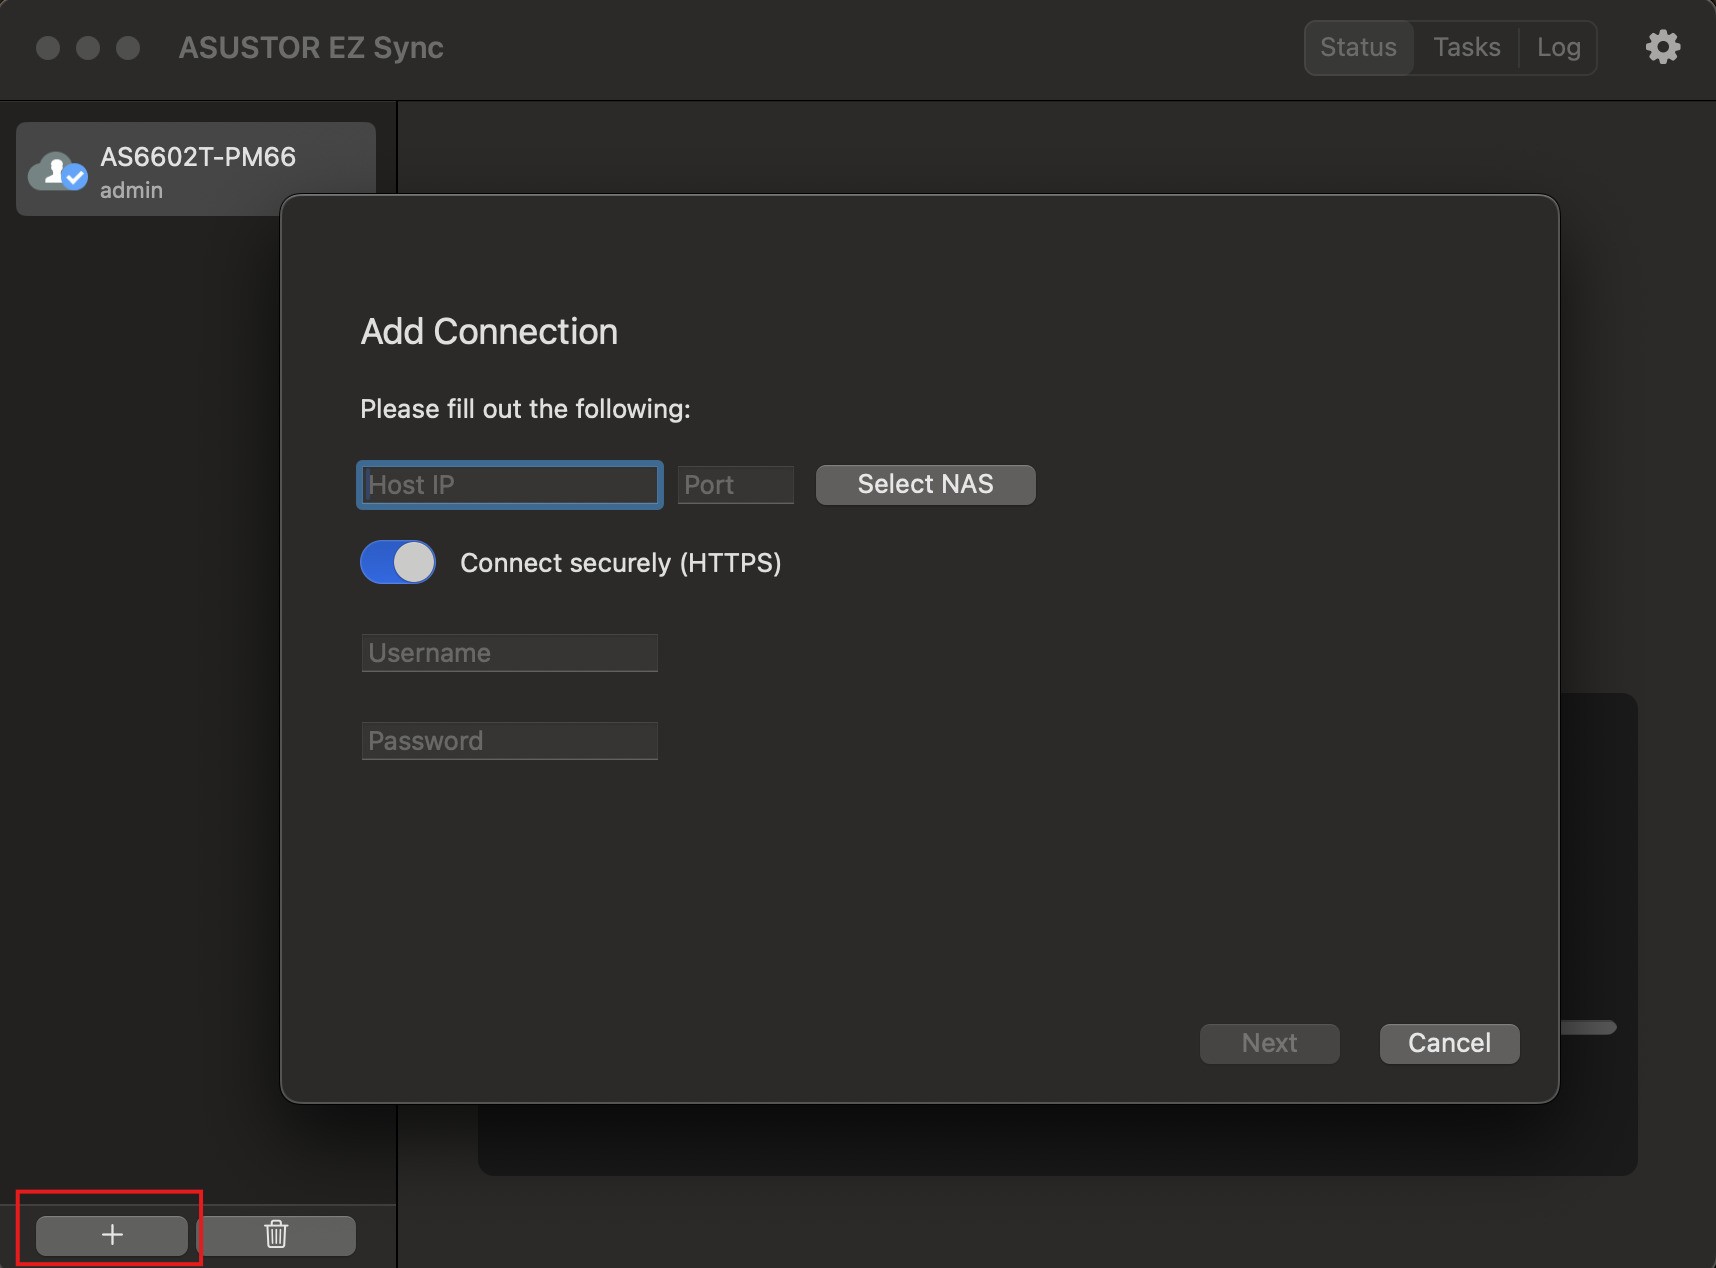
3.2.2 Add Connection NAS.
Enter Host IP, Cloud ID or Select NAS in your network.
Press + to add a second synchronization connection.

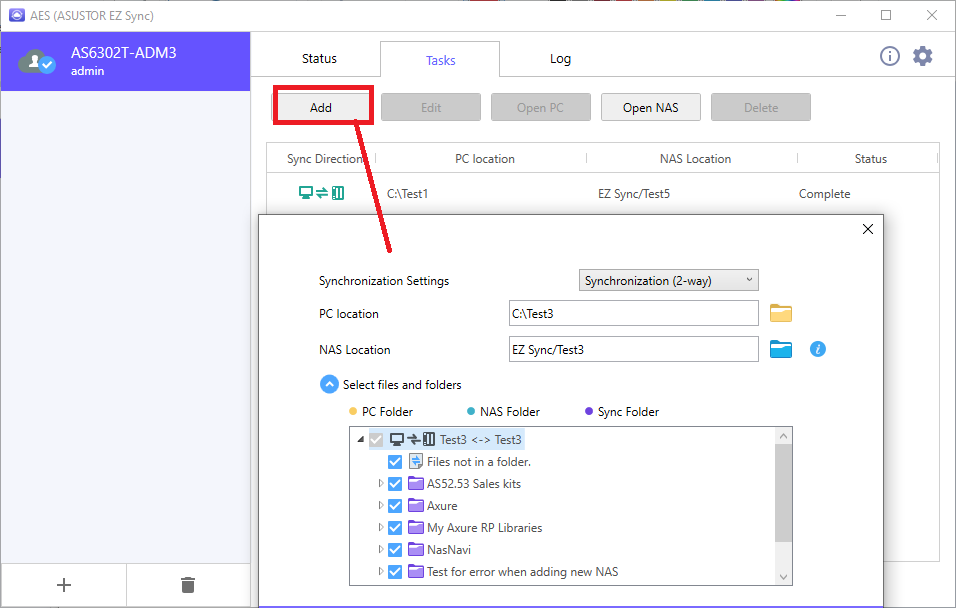
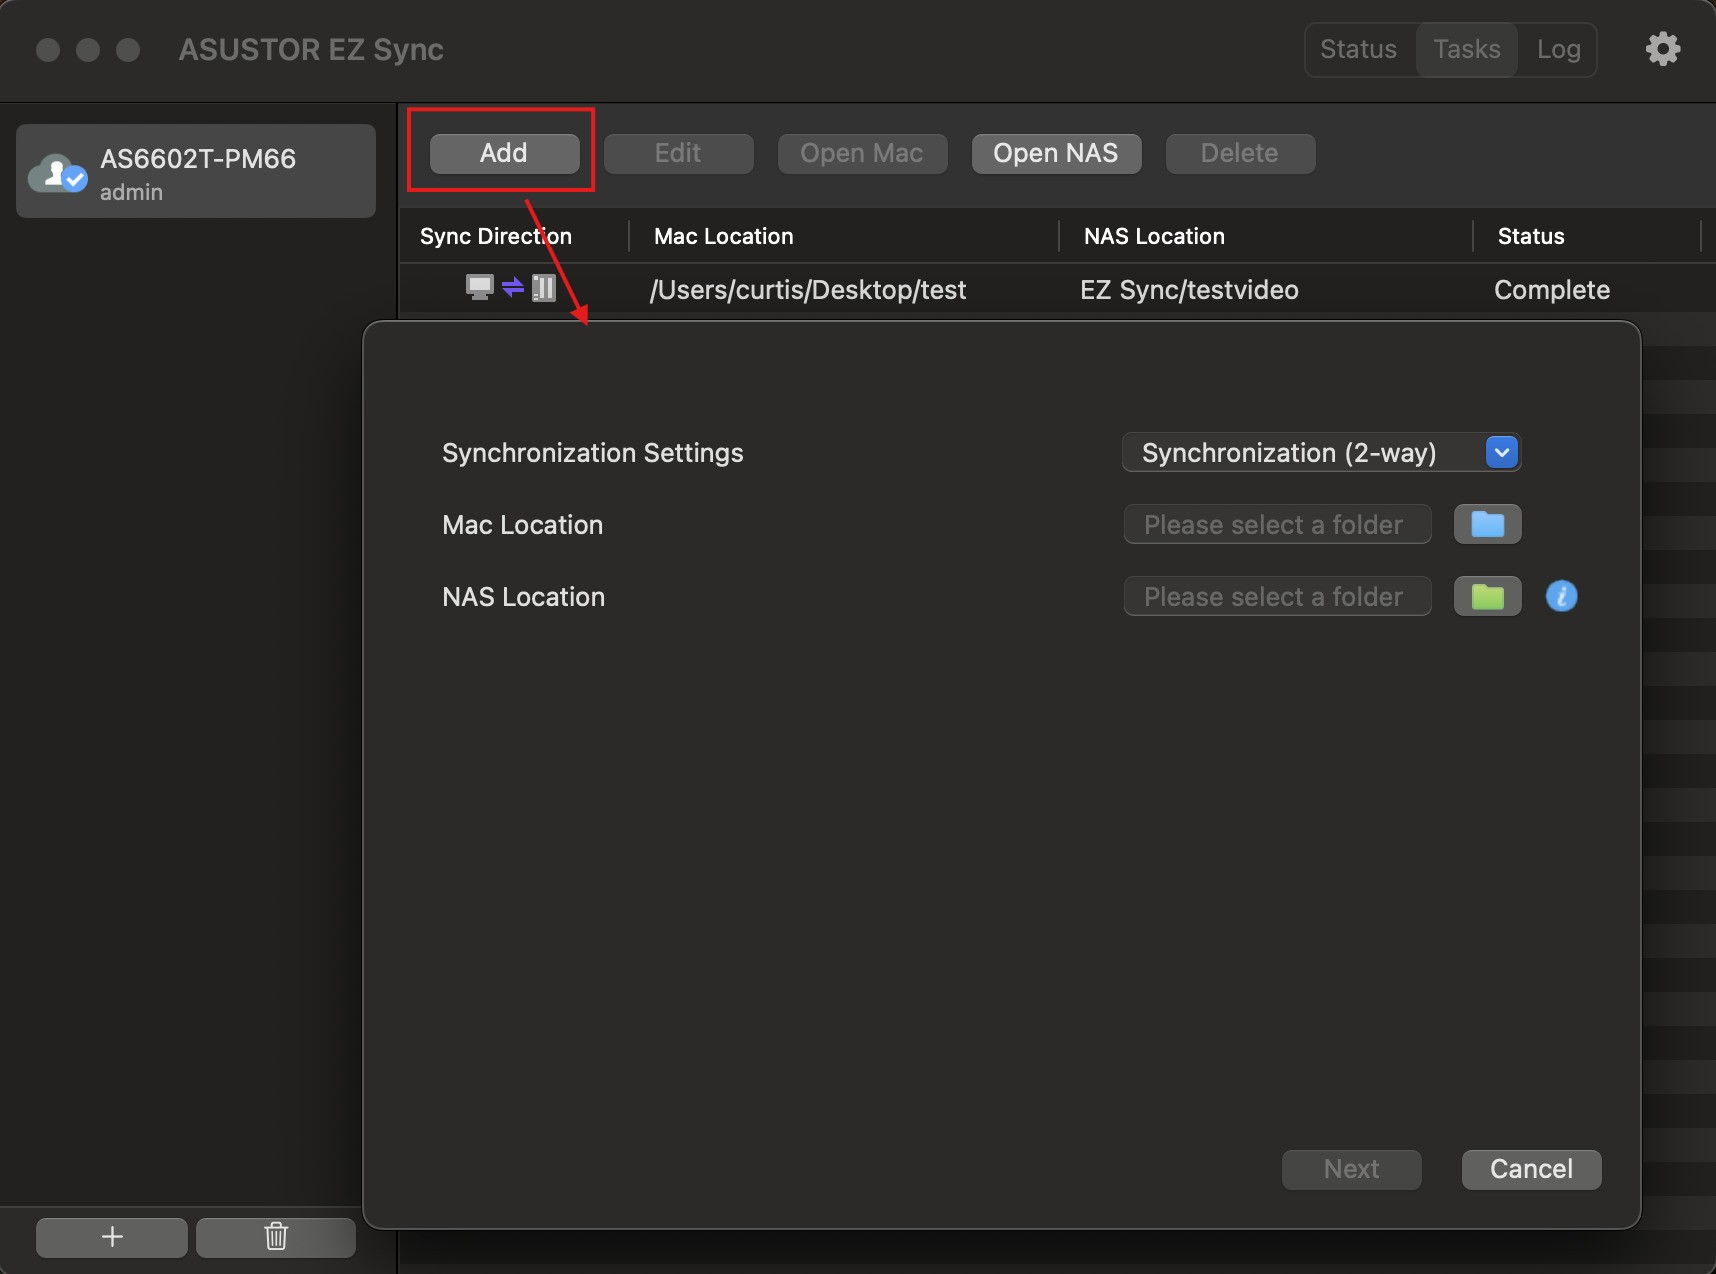
3.2.3 Add Task only allows you to add one sync folder at a time. If you want to add a new sync folder, please press Add.
Add task does not work if EZ Sync is set to the default folder.
3.2.4 Options
Preferences
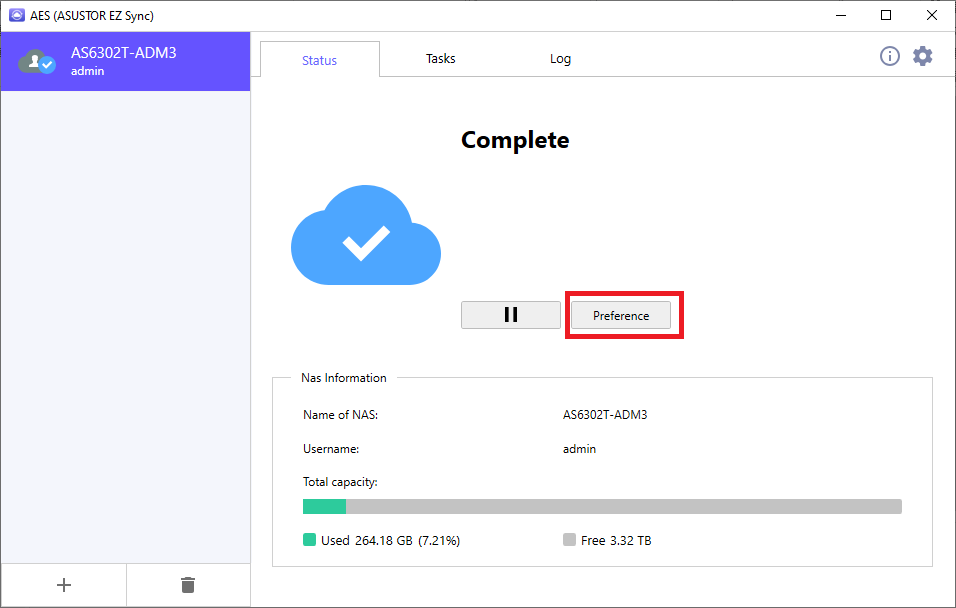
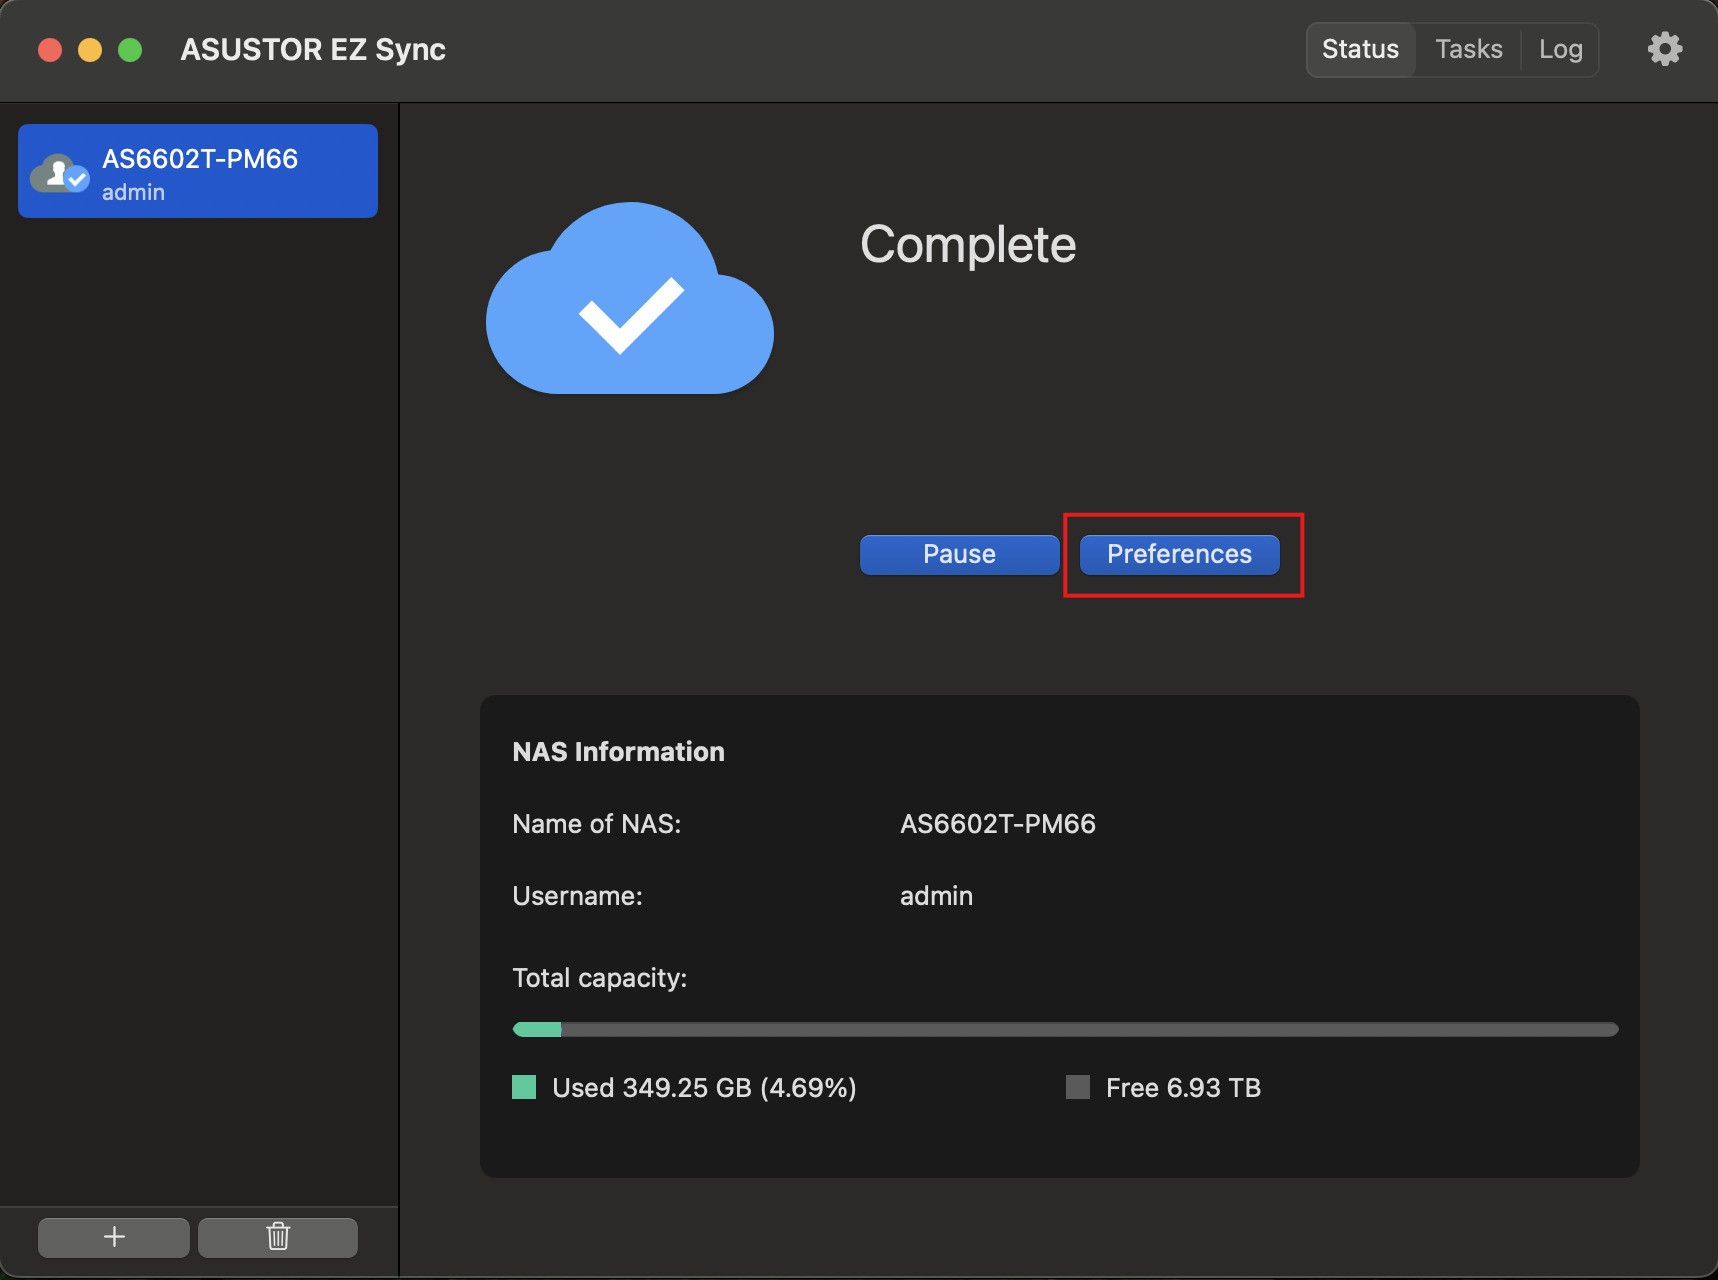
Bandwidth limits can be adjusted by pressing Preferences.


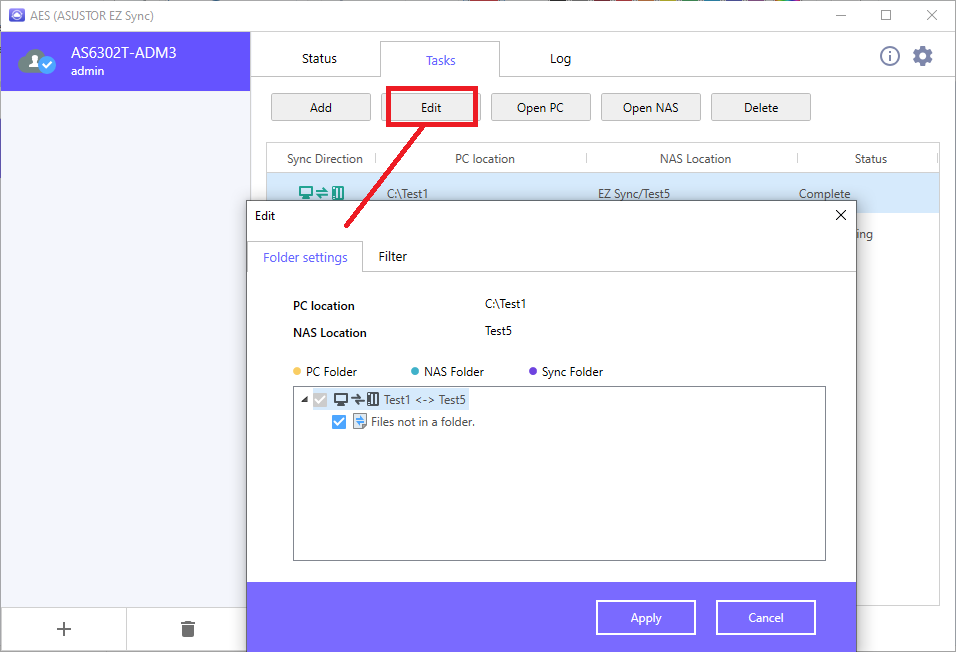
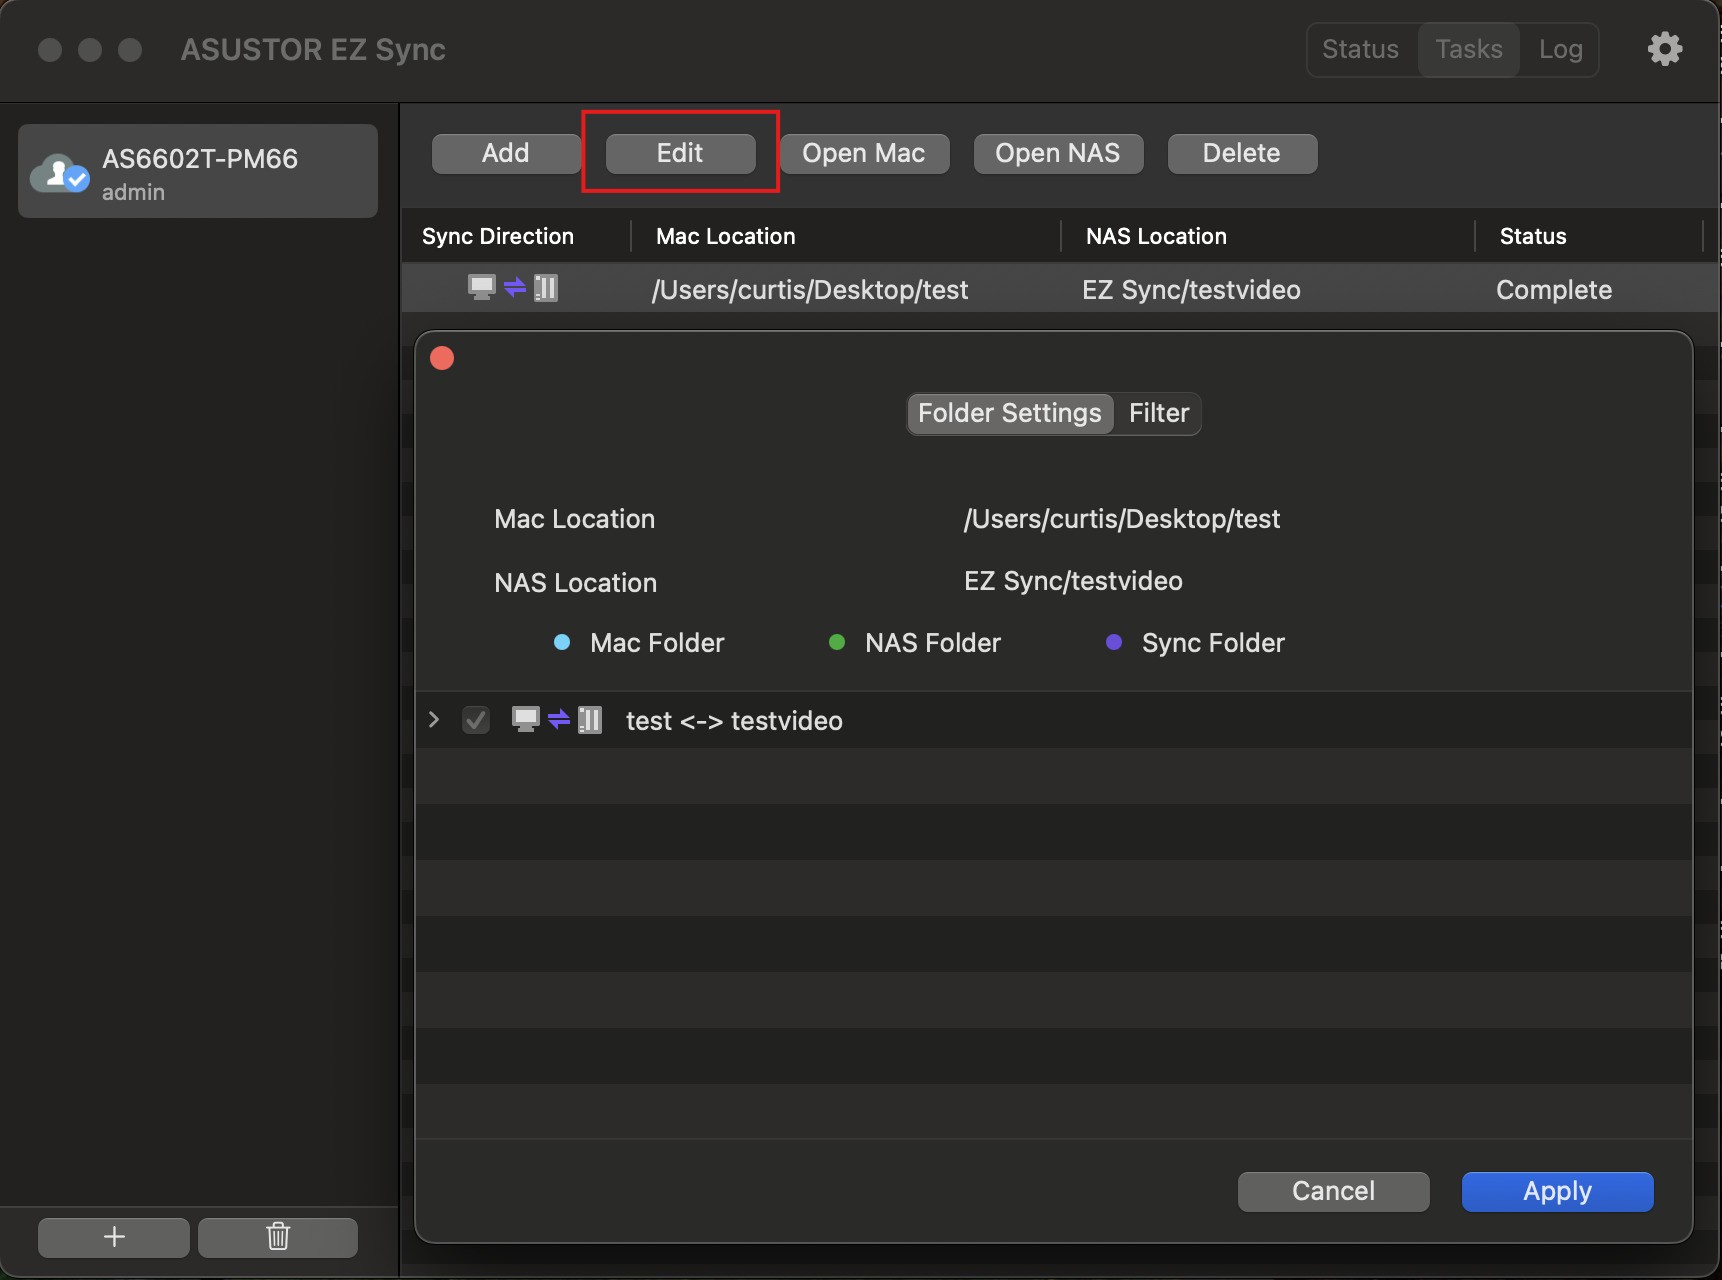
Click Edit to edit task details.
Filter

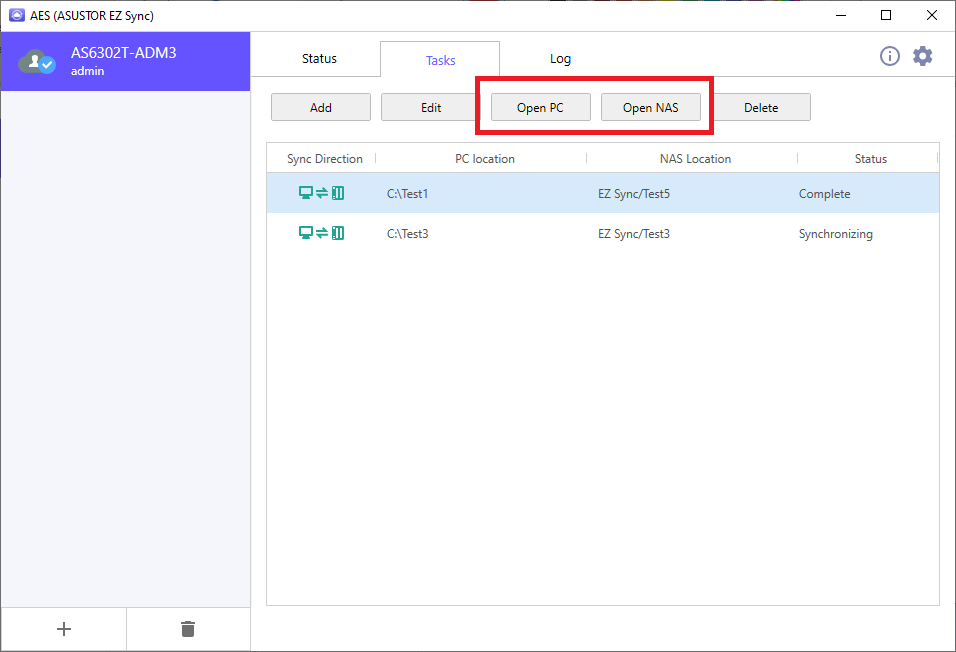
3.2.5 Press Open to access your NAS or the sync folder on your computer.
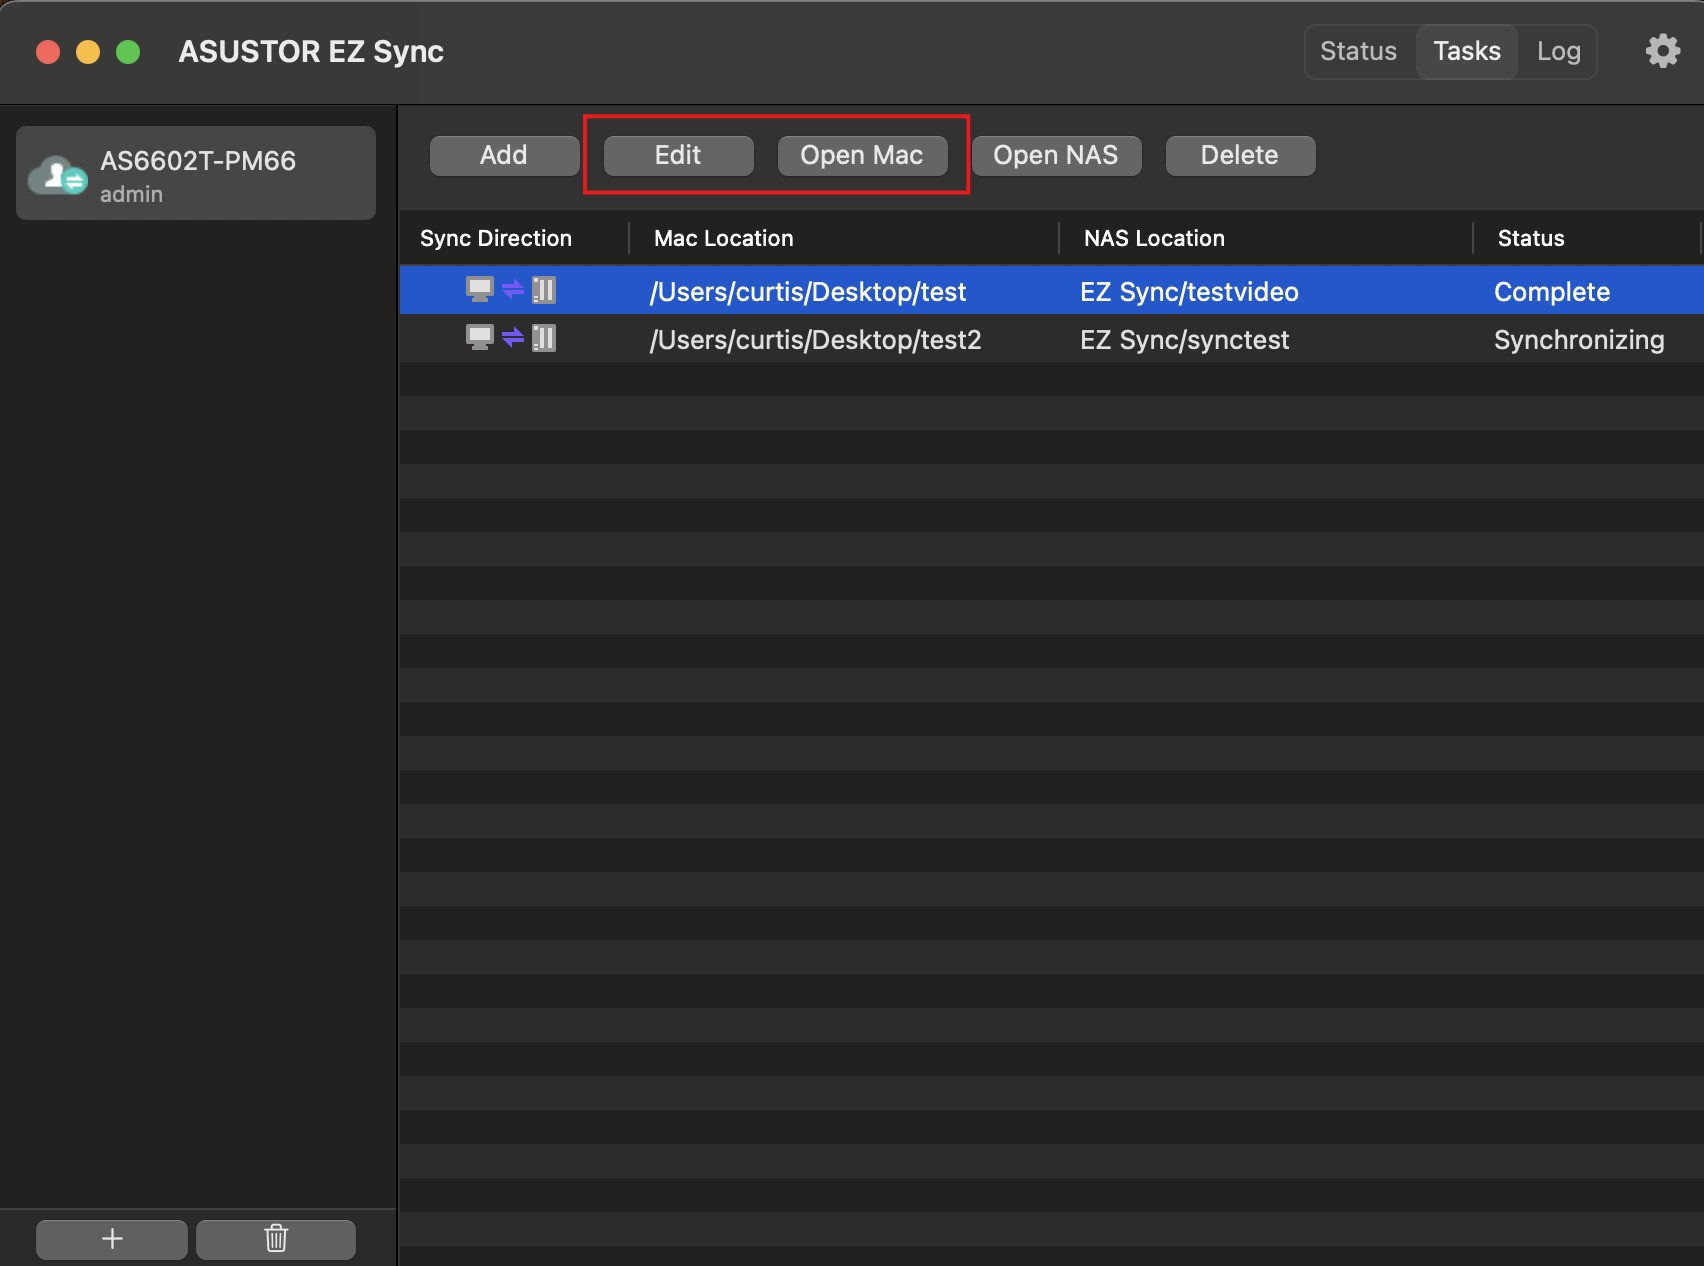
Sync folder on computer.
Successfully synchronized files are marked with a check mark in green.
Files currently being synchronized will be marked with a blue icon indicating synchronization.
Files that failed to synchronize are marked with an exclamation point in red.
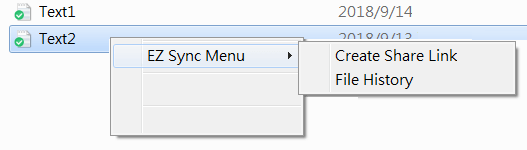
Right clicking files on Windows now create Share Links and view File History.
Create Share Link
Text can be copied like normal or emailed by pressing Mail.
Viewing File History
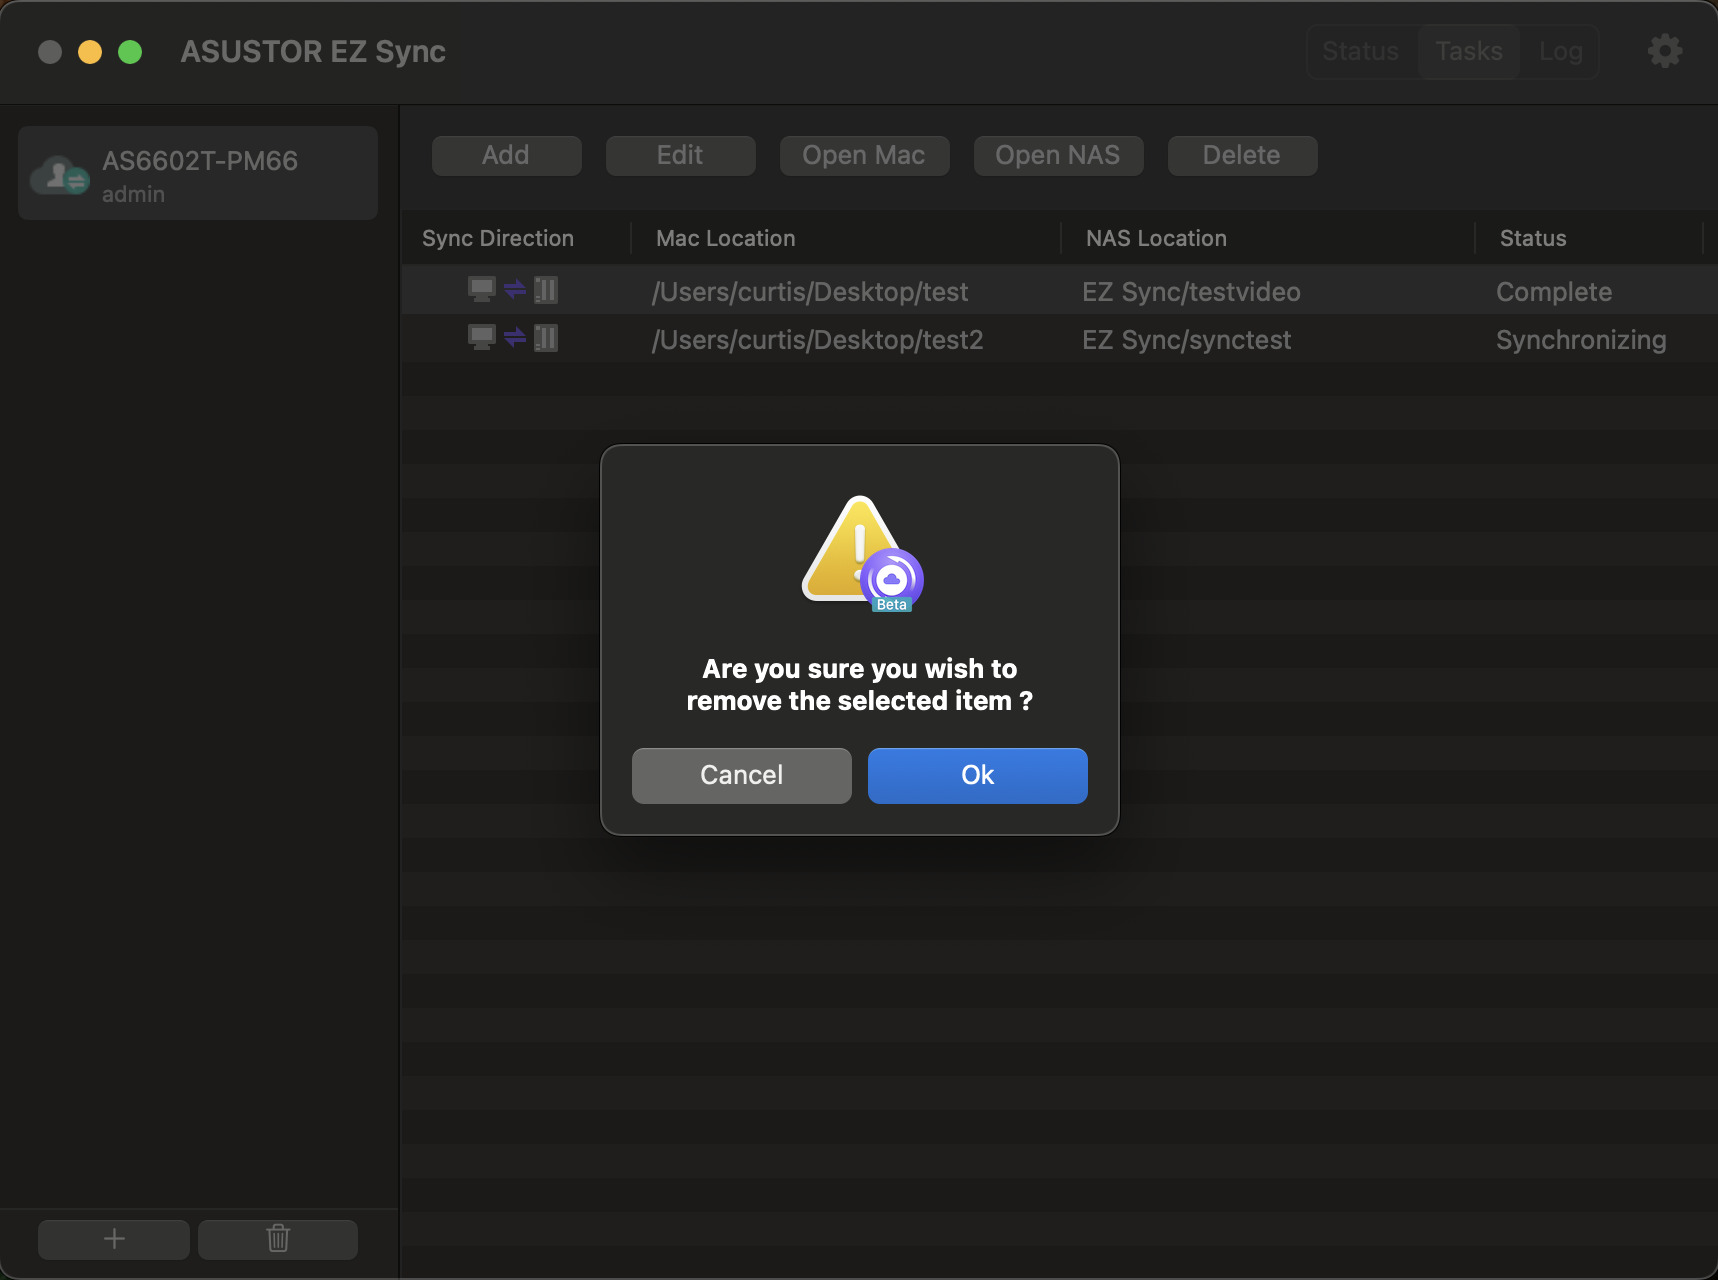
3.3 Delete synchronisation tasks
If you want to delete the sync task between PC and NAS, you only need to select the sync task you want to delete first in the main screen, and then click the recycle bin button at the bottom left.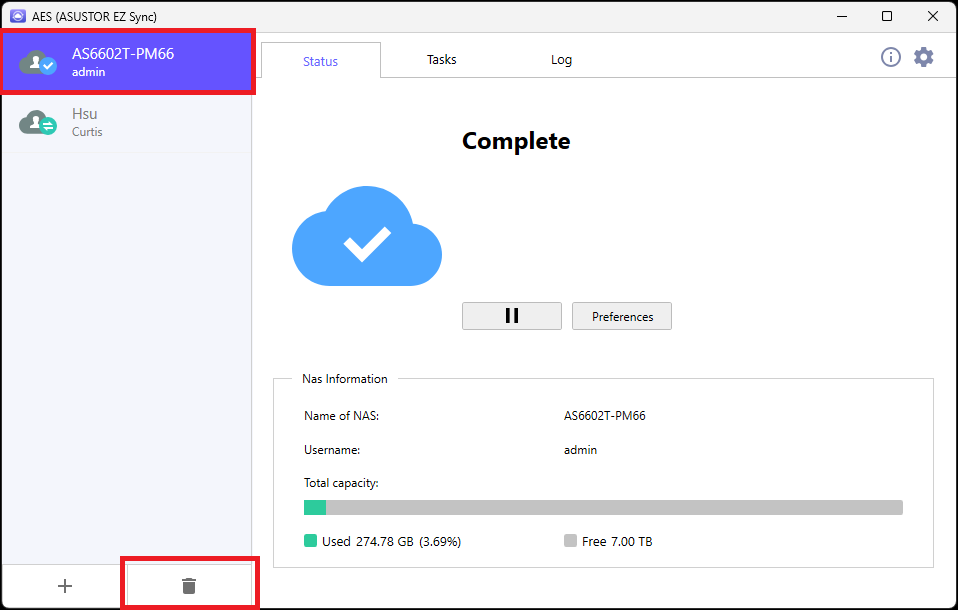

When you press it, a pop-up window will appear, click OK to delete the sync task.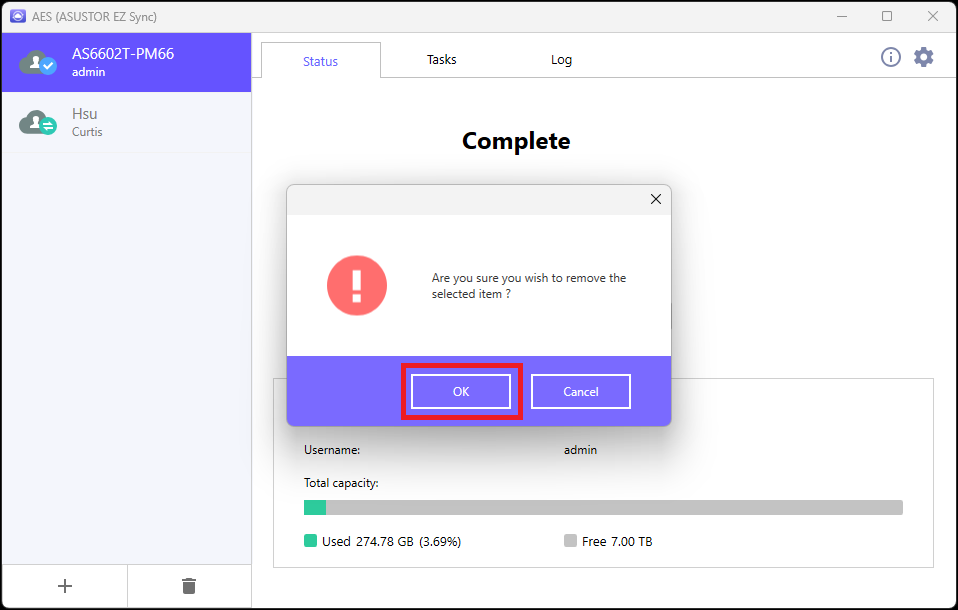
Click on EZ Sync to browse all files inside EZ Sync Manager.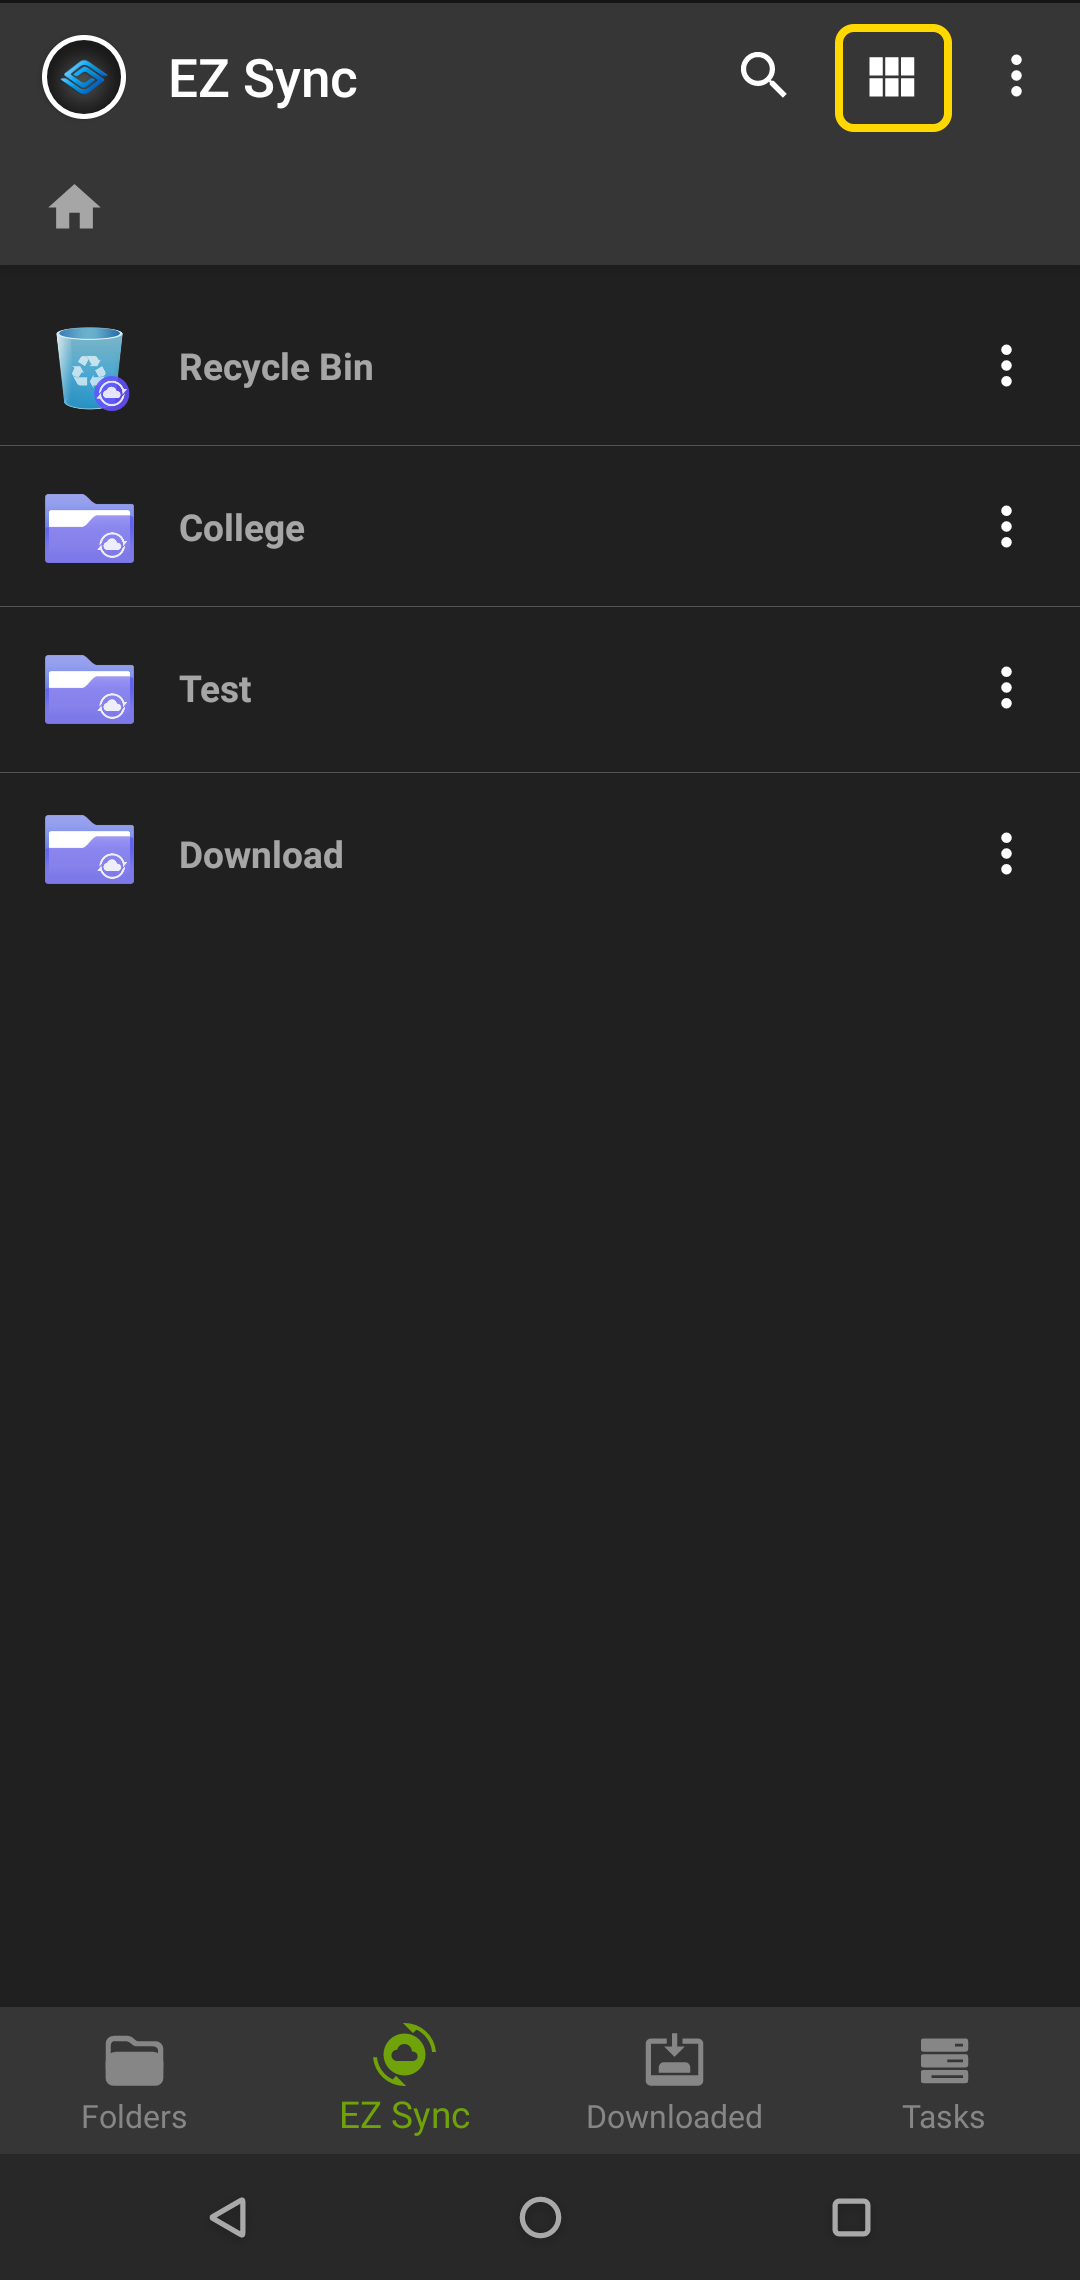
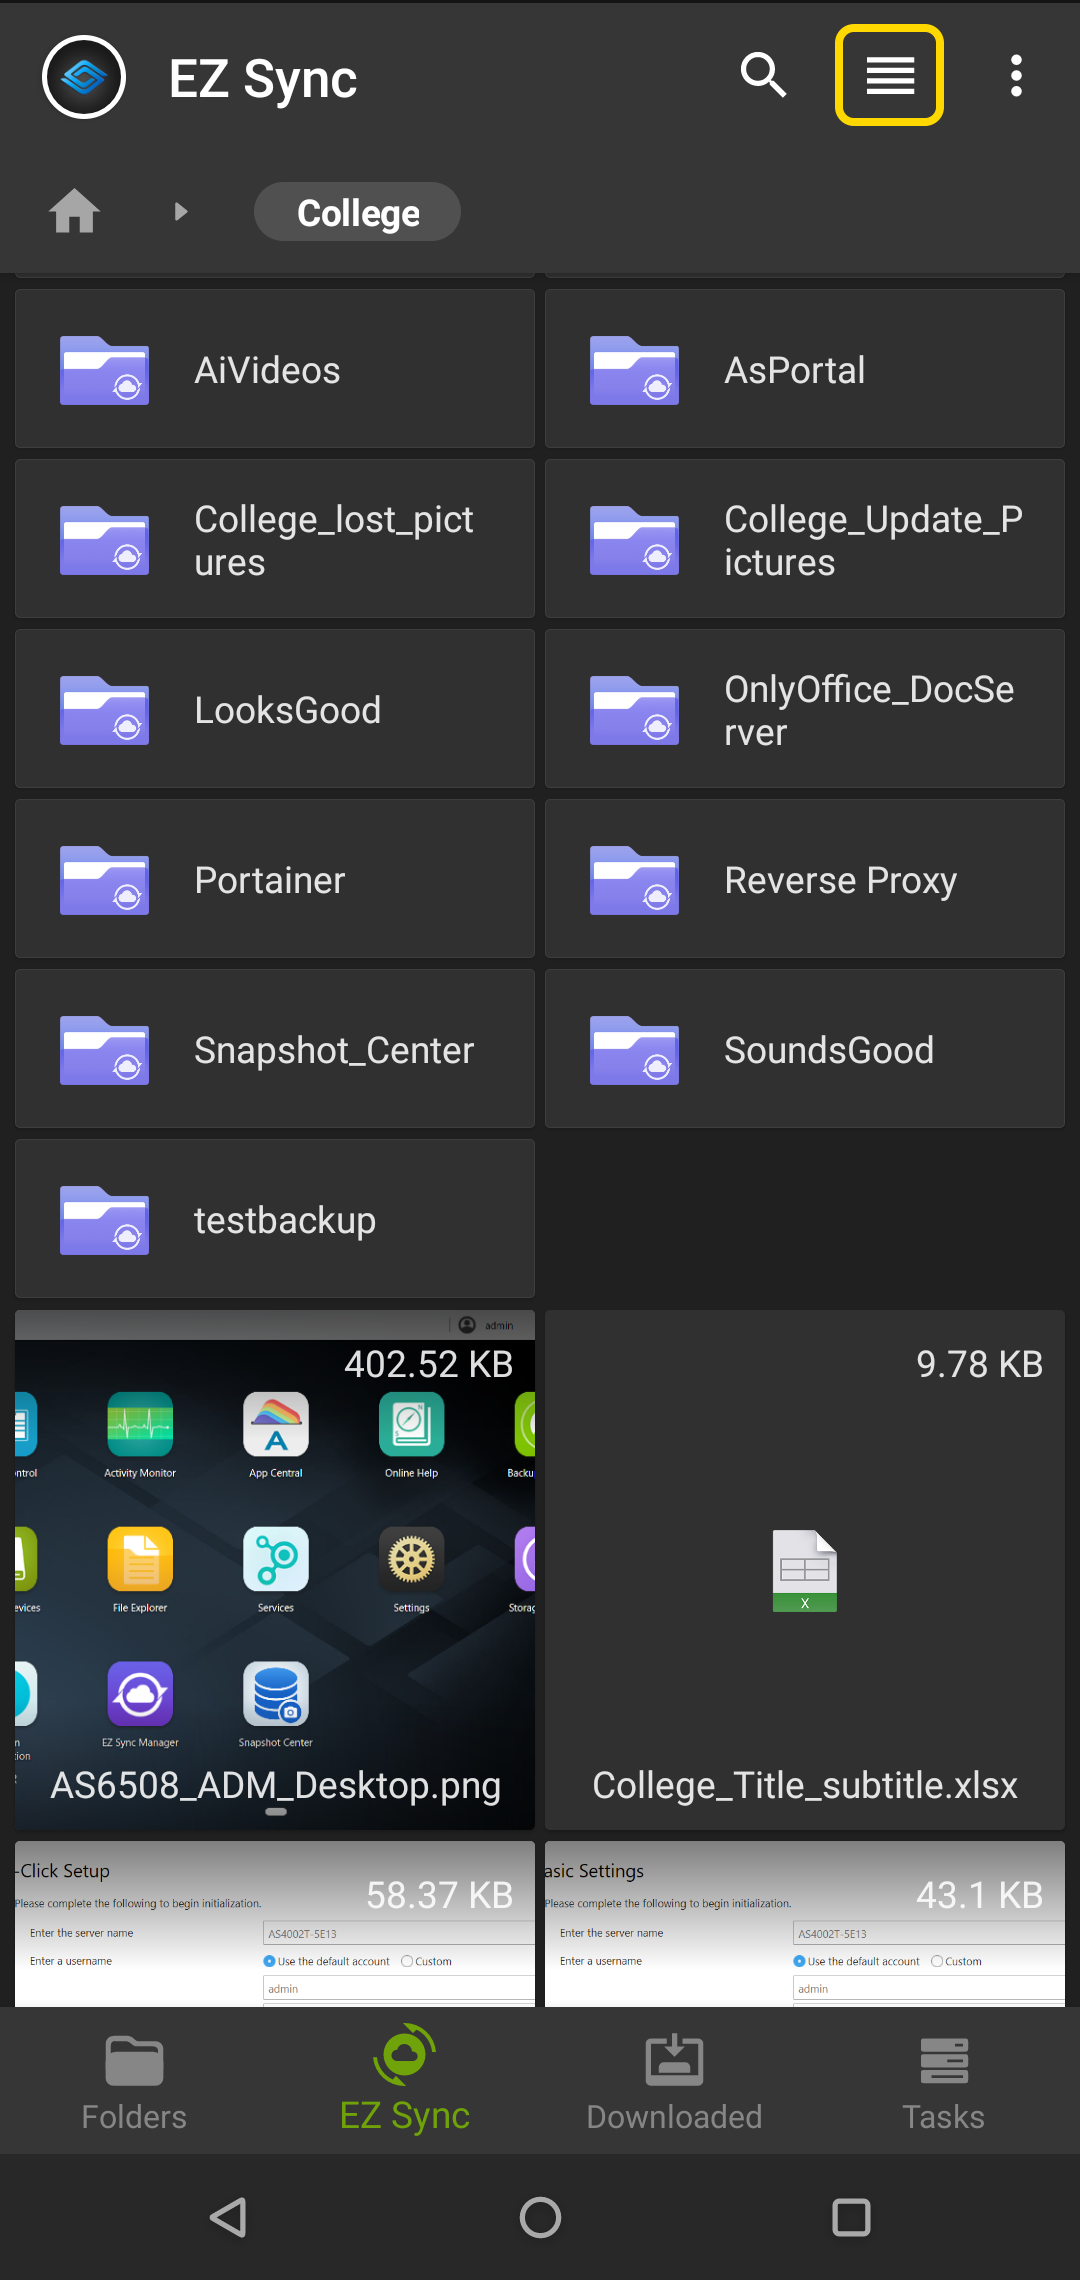
EZ Sync menu items:
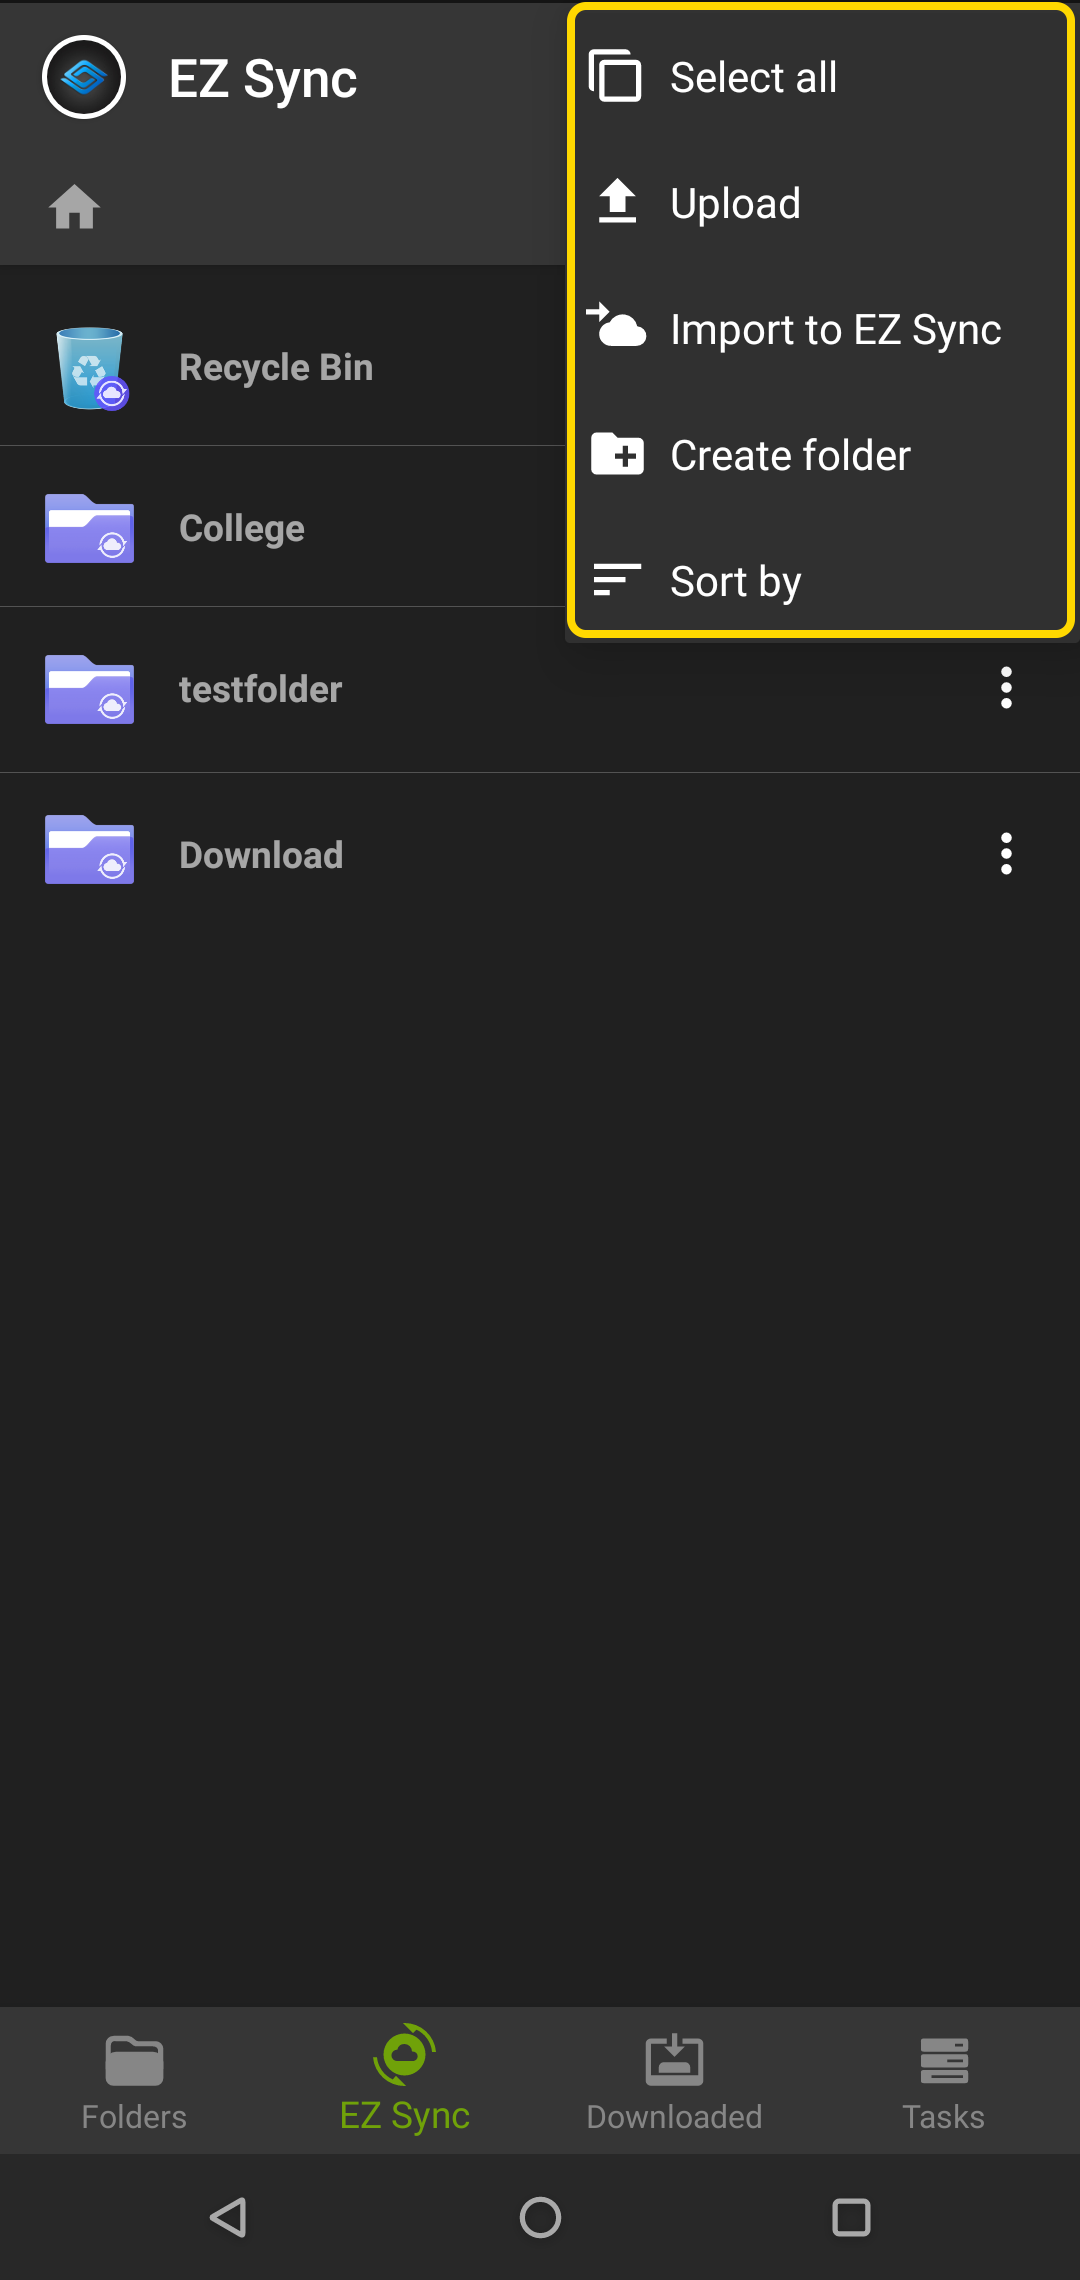
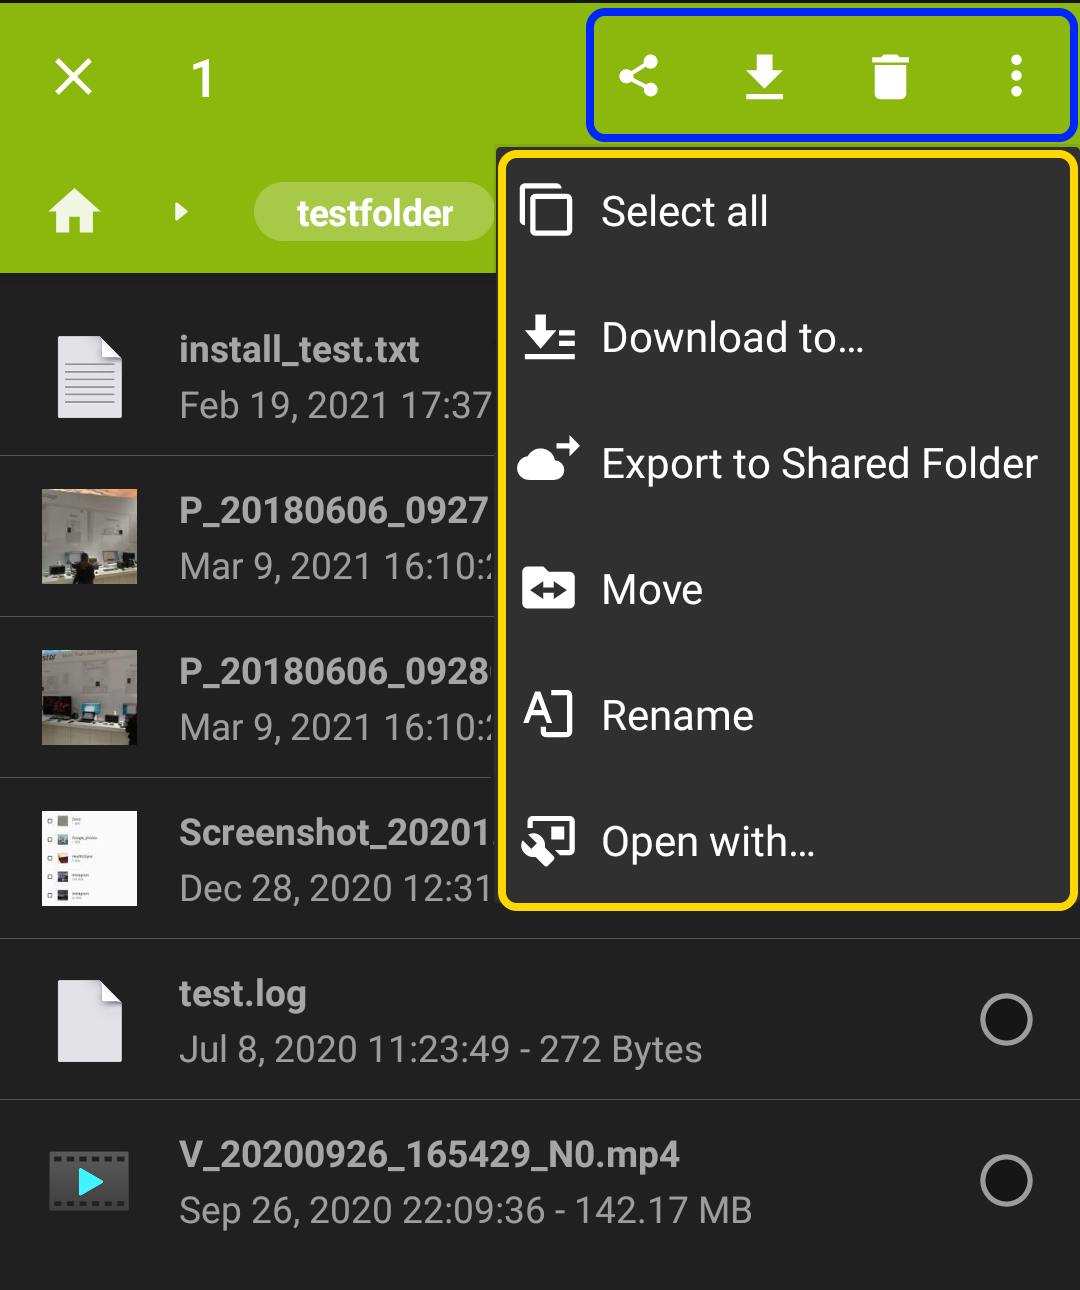
The followings actions will switch the page to selection mode:
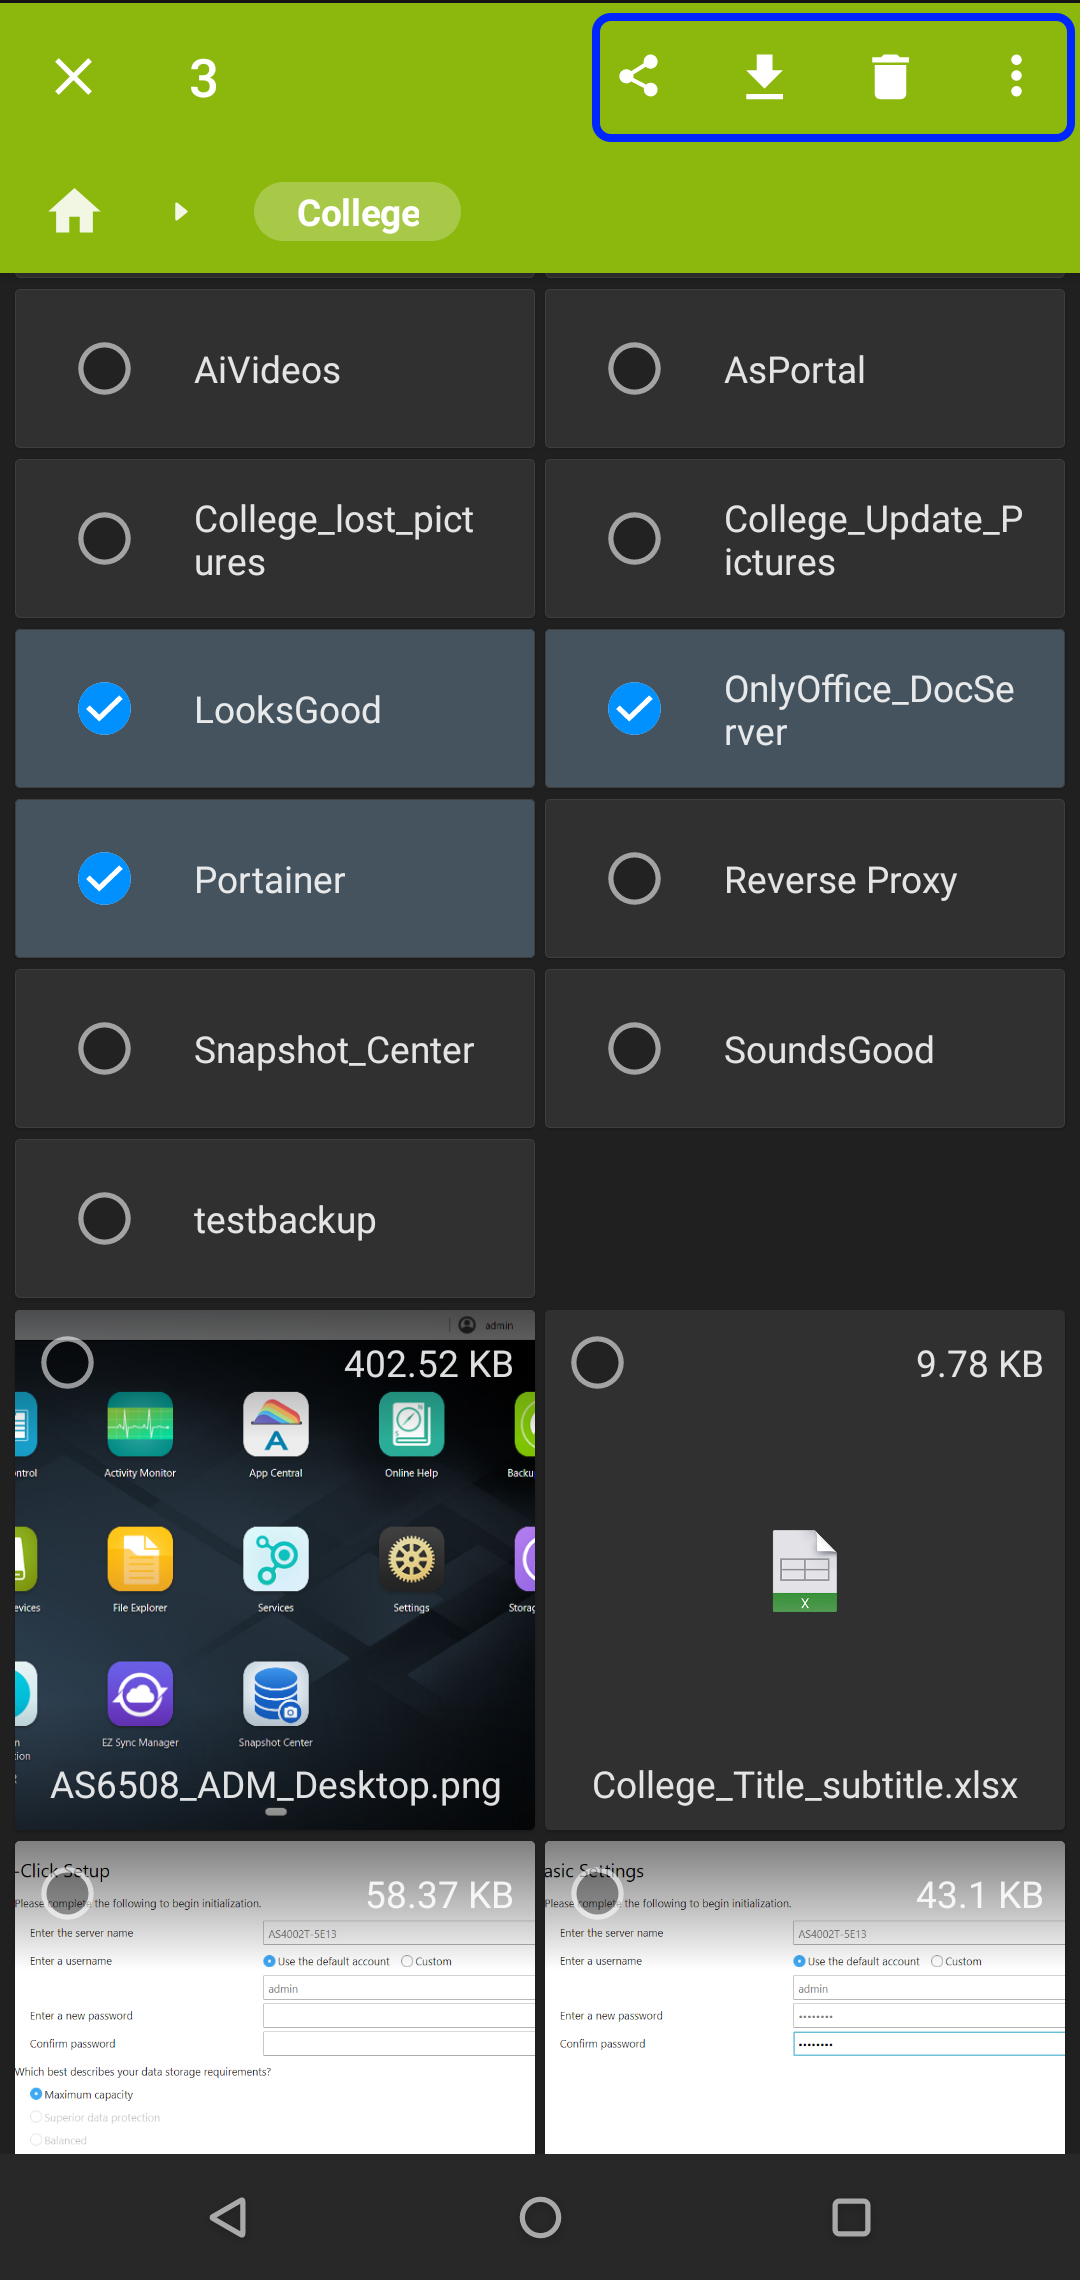
Menu options for selected items: Options vary depending on if one or more items are selected.

Recycle Bin menu options: Options vary depending on if one or more items are selected.
The EZ Sync folder in ADM's File Explorer is labeled purple.
Copyright © 2025 ASUSTOR Inc.
